Automatically Export to SharePoint
Audience
Audience: Administrators
Overview
Administrators can set a Master Chart to automatically export to SharePoint on a weekly or monthly basis.
The following article provides step-by-step instructions for configuring this feature.
Note
Automated export to SharePoint requires close coordination with your SharePoint System Administrator and IT team.
Register an App in SharePoint
Navigate to your Sharepoint home page.
In the URL bar, copy your Tenant Name from the area shown below:
https://[TENANT-NAME].sharepoint.com/Navigate to the URL shown below using your Tenant Name:
https://[TENANT-NAME].sharepoint.com/_layouts/15/appregnew.aspx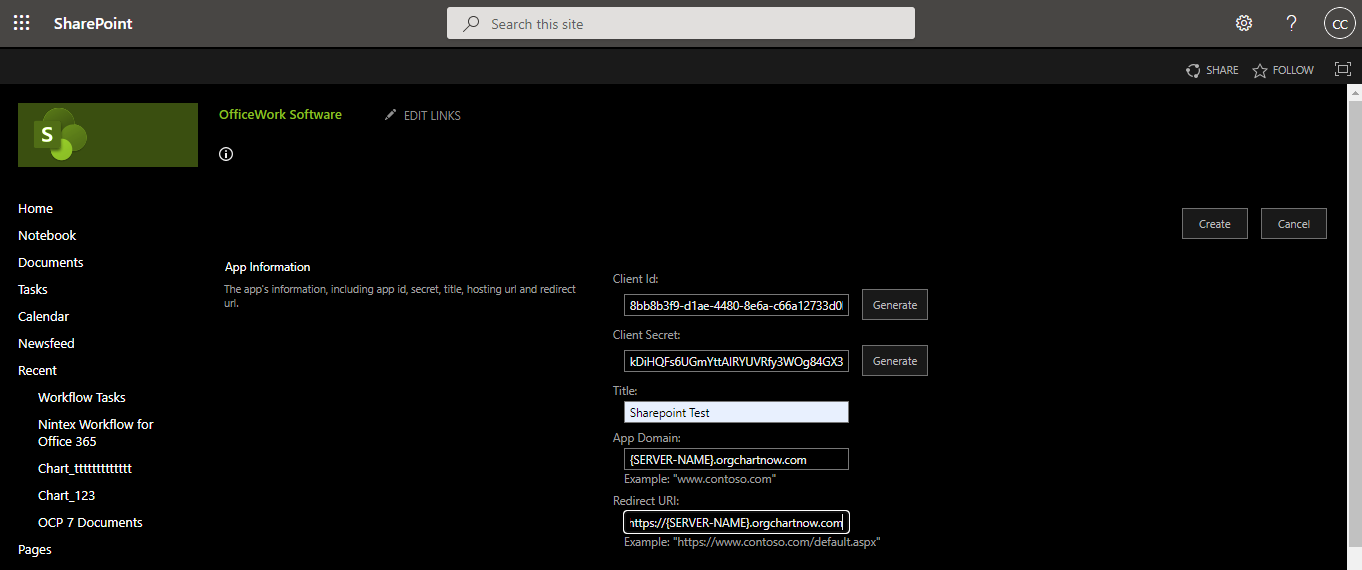
Click Generate next to the Client Id box and copy the resulting value for later use.
Click Generate next to the Client Secret box and copy the resulting value for later use.
In the Title box, type [Your Company Name]OrgChart.
In the App Domain box, type in www.localhost.com.
In the Redirect URL box, type in "https://[SERVER-NAME].orgchartnow.com" (ex. if your server name is na2, then you would type in "https://na2.orgchartnow.com").
Click Create.
Grant Permissions to the App
Navigate to the URL below using your Tenant Name:
https://[TENANT-NAME]-admin.sharepoint.com/_layouts/15/appinv.aspx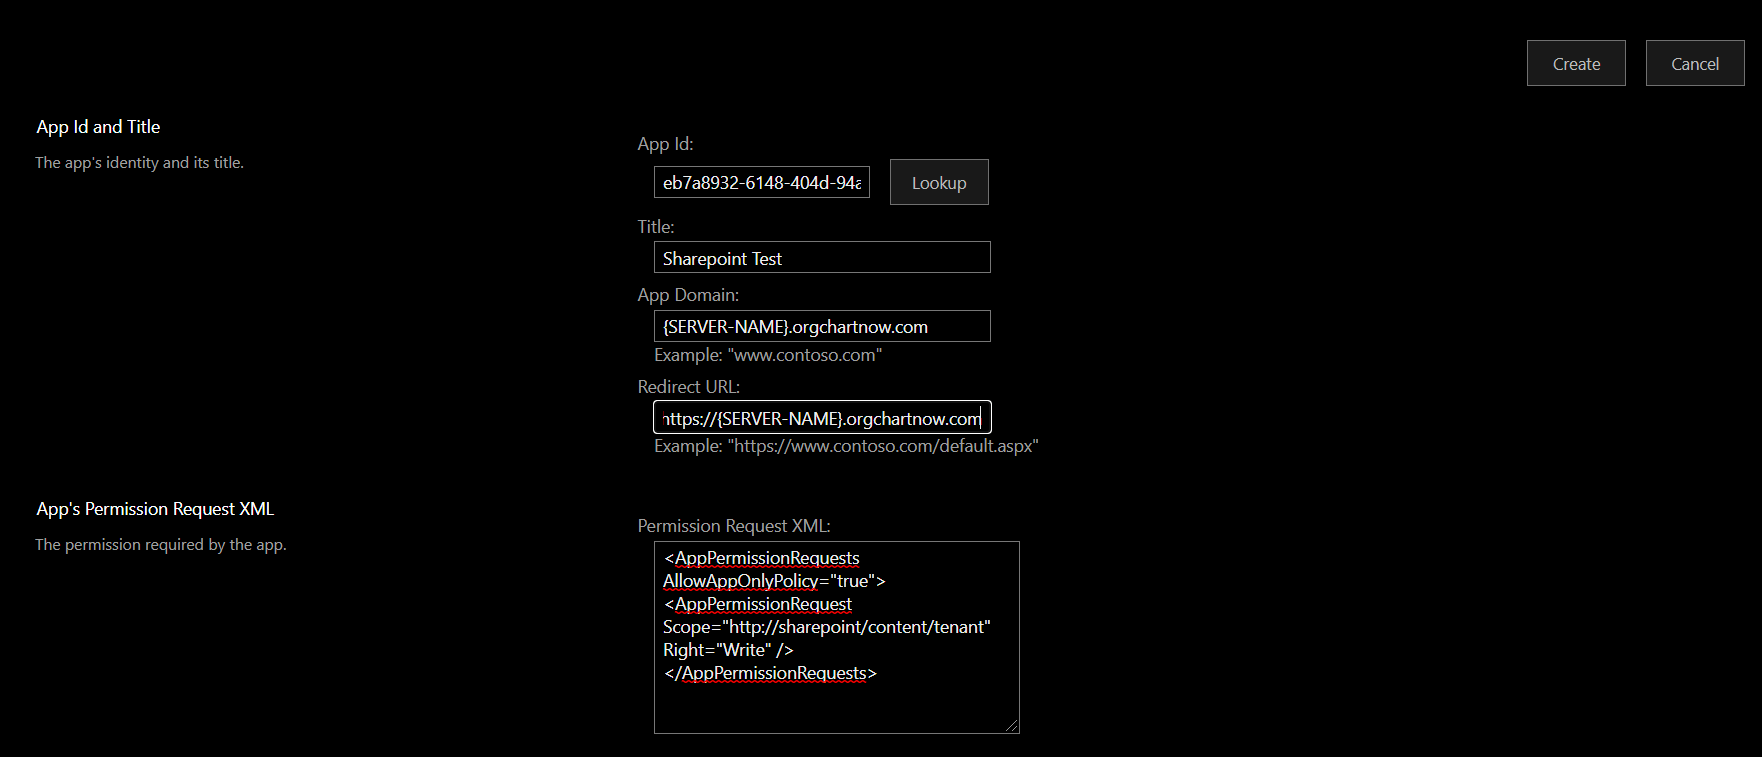
Paste your Client Id in the App Id field.
Click Look Up.
In the Permission Request XML box, add the following:
<AppPermissionRequests AllowAppOnlyPolicy="true"> <AppPermissionRequest Scope="http://sharepoint/content/tenant" Right="Write" /> </AppPermissionRequests>Click Create.
A pop up window will appear verifying that you are granting permission to this app to write files to your SharePoint site.
Click Trust It.
Get the Tenant ID
Navigate to your Sharepoint Site.
Clicke the cogwheel at the top right of the site and click Site Settings.
In the Site Settings menu, click Site App Permissions.
Copy the Tenant ID fromt he below highlighted area.
Configure Automatic Export in OrgChart
Log in to OrgChart.
Click on the Mode Switcher icon in the Top Toolbar, and then select the Setup option. The Setup panel is displayed.
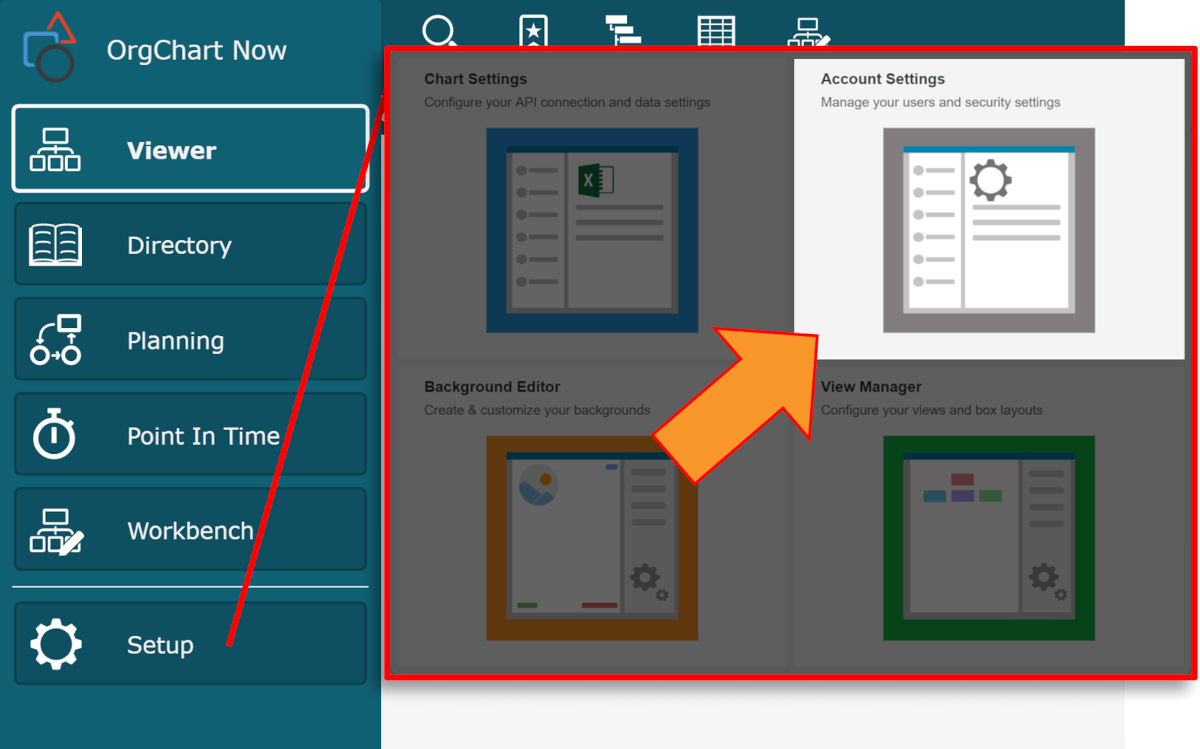
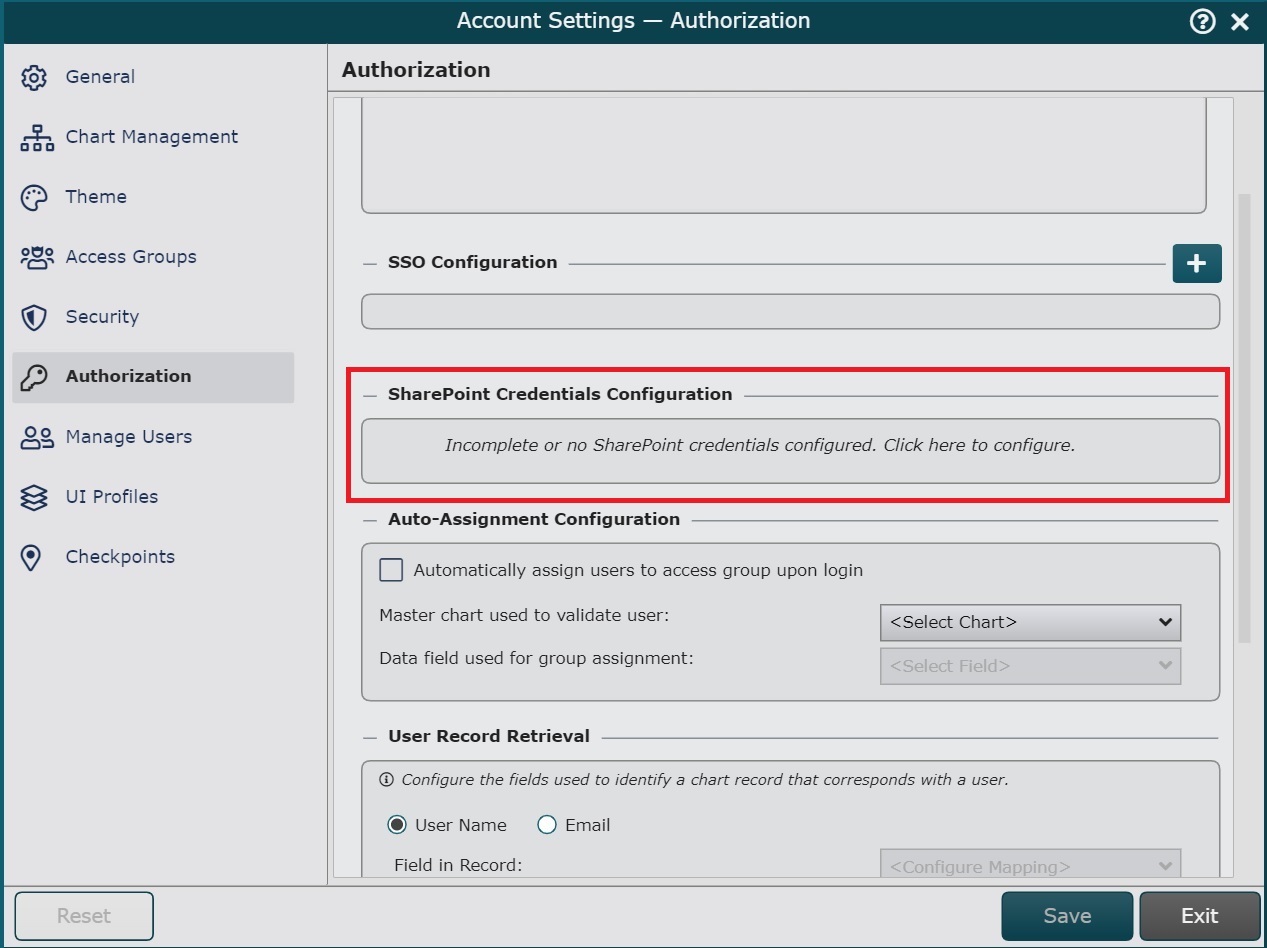
Click on the Account Settings tile, and then click on the Authorization tab in the left side menu.
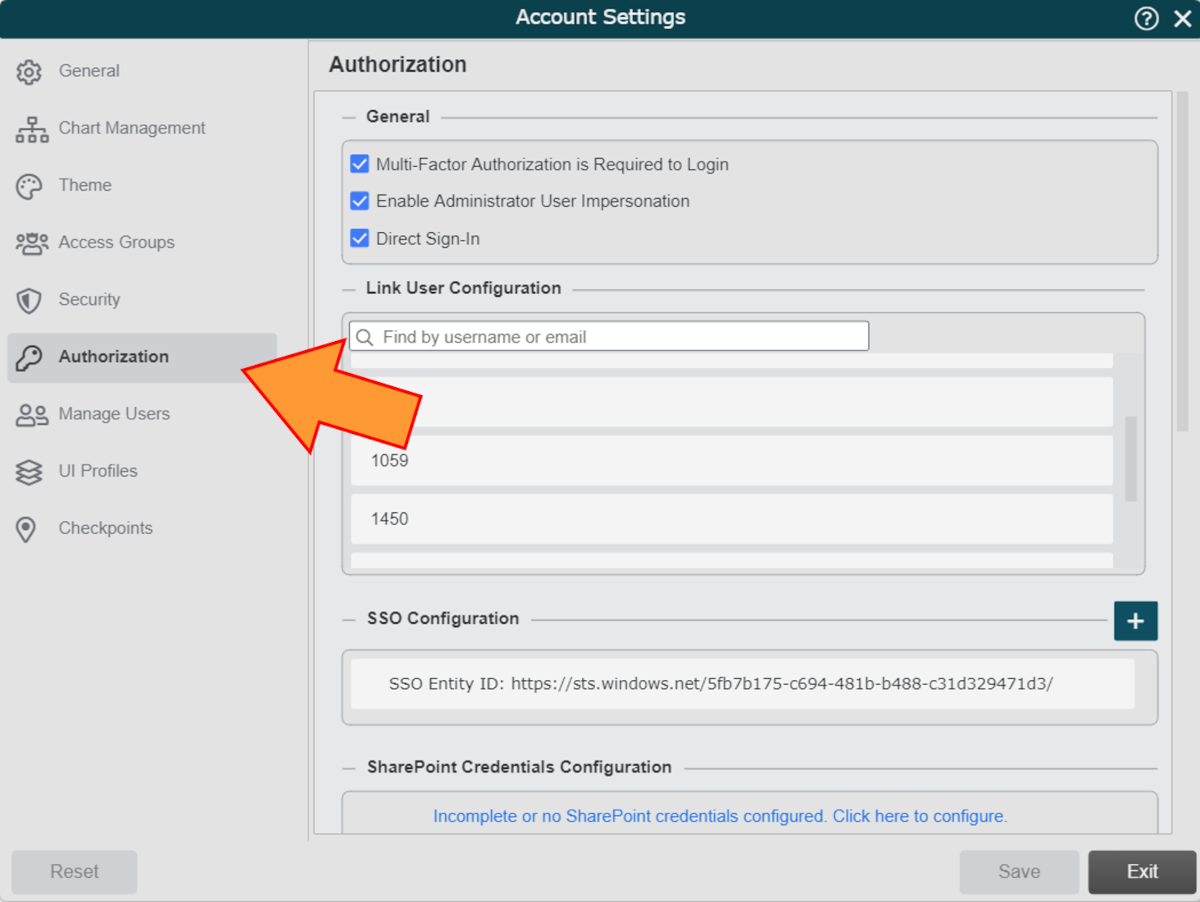
Click on the the Incomplete or no SharePoint credentials configured. Click here to configure hyperlink under the SharePoint Credentials Configuration heading.
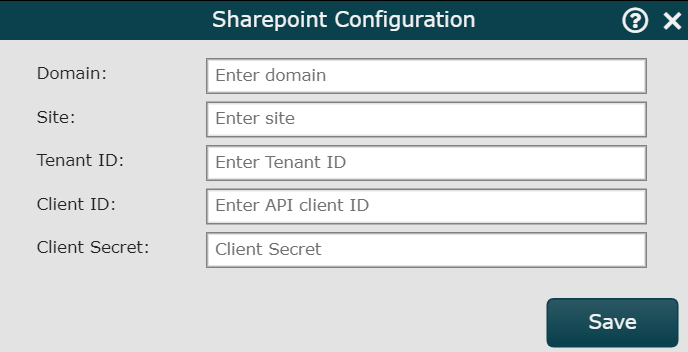
Enter the credentials from the previous steps, and then click Save.
Note
The Domain is the same as the Tenant-Name. The Site is the name of your SharePoint subsite ex. https://[TENANT-NAME].sharepoint.com/sites/[SITE]. If you wish to use your main site and not a subsite, leave the Site field empty.
Next, close the Account Settings panel, and then click on the Mode Switcher icon in the Top Toolbar, and then select the Setup option.
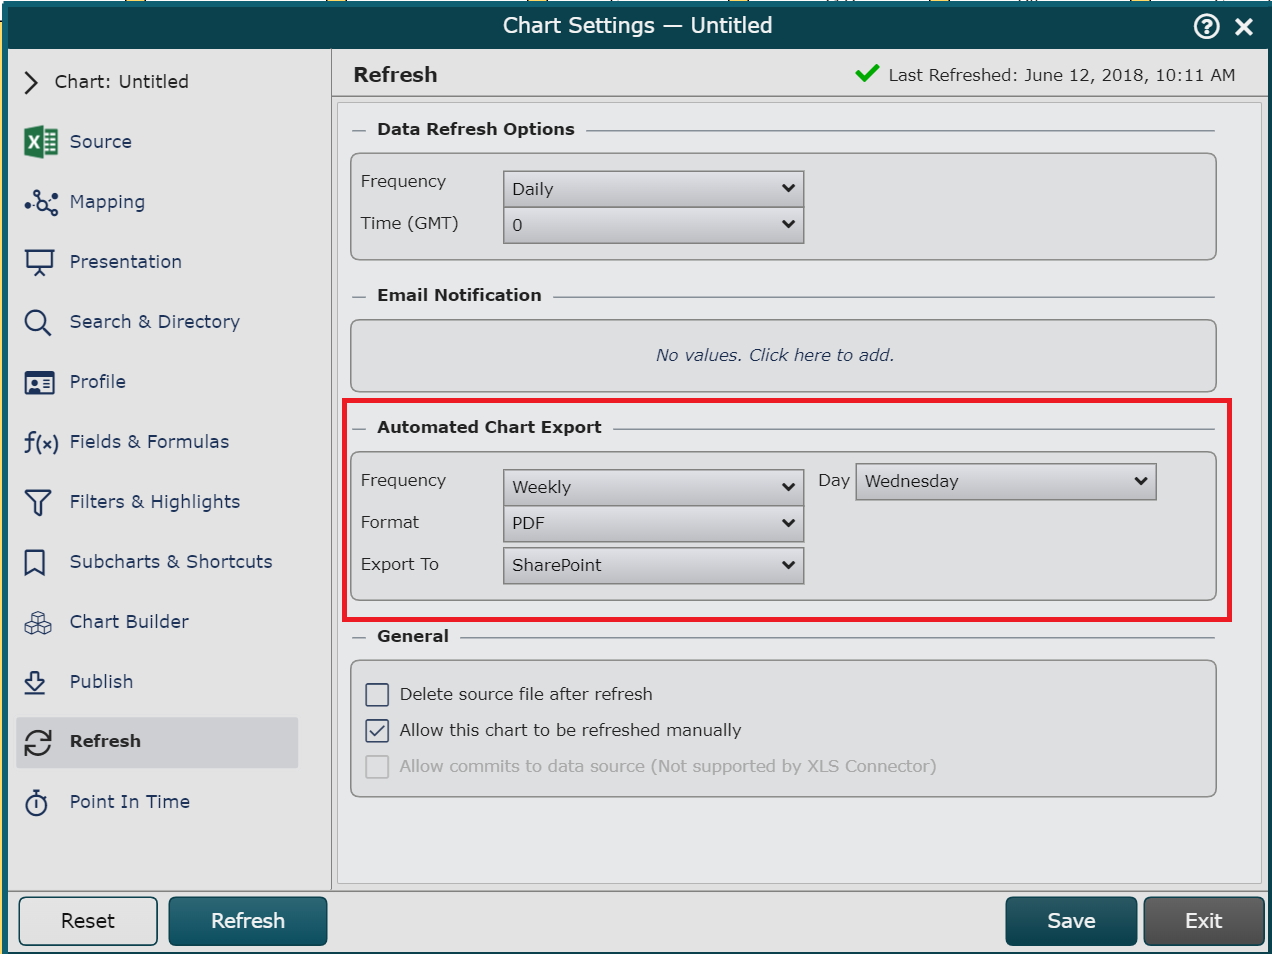
Click on the Chart Settings tile, and then click on the Refresh tab in the left side menu.
In the Automated Chart Export section, choose the desired Frequency, Format, and Day of your export. Then set the Export To option to SharePoint.
Click on Save.