Creating Backgrounds
Audience
Audience: Administrators & Read/Write Users
Overview
Backgrounds contain elements, such as company logos, legends and page numbers, and can be applied to Master Charts or Chart Documents. Users can create, modify, and manage their backgrounds in the Background Editor.
The following article provides step-by-step instructions for creating a new background, and then applying it to a Master Chart or Chart Document.
Creating a New Background
The following section provides step-by-step instructions for creating a new background using a Standard Background template.
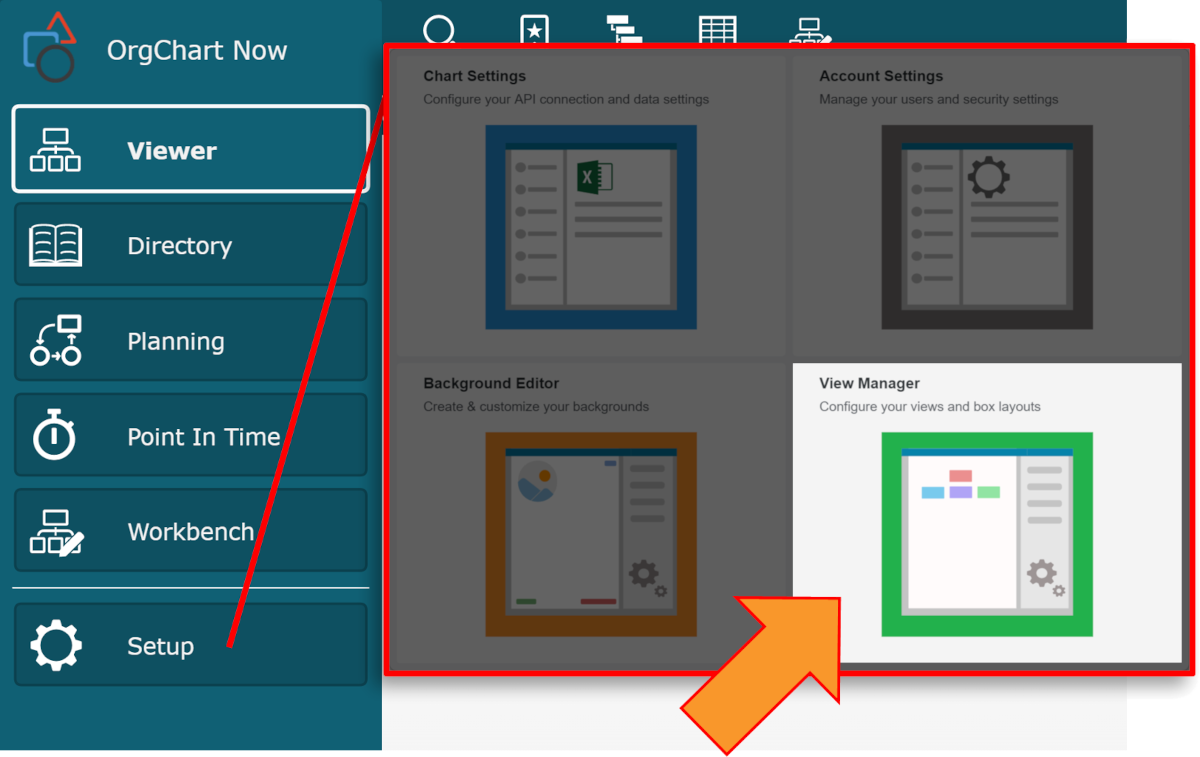
Click on the Mode Switcher icon in the Top Toolbar, and then select the Setup option. The Setup panel is displayed.
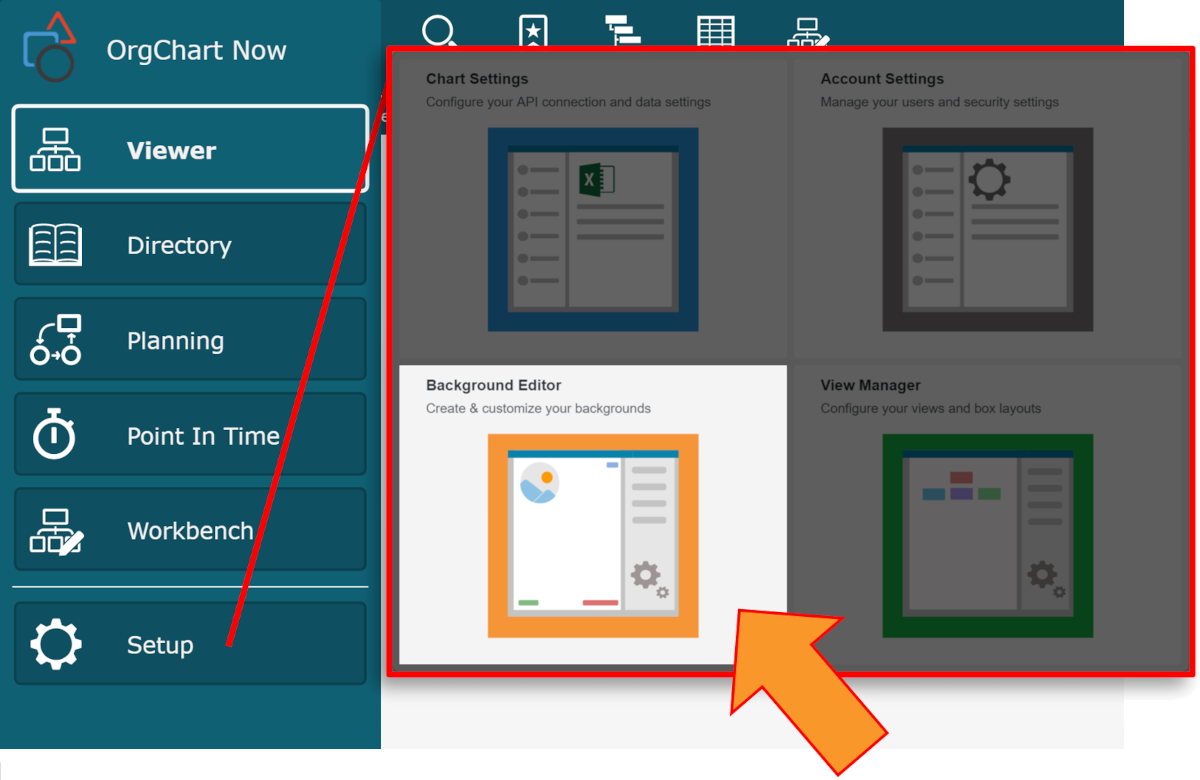
Click on the Background Editor tile, and then click on the Standard Background option.
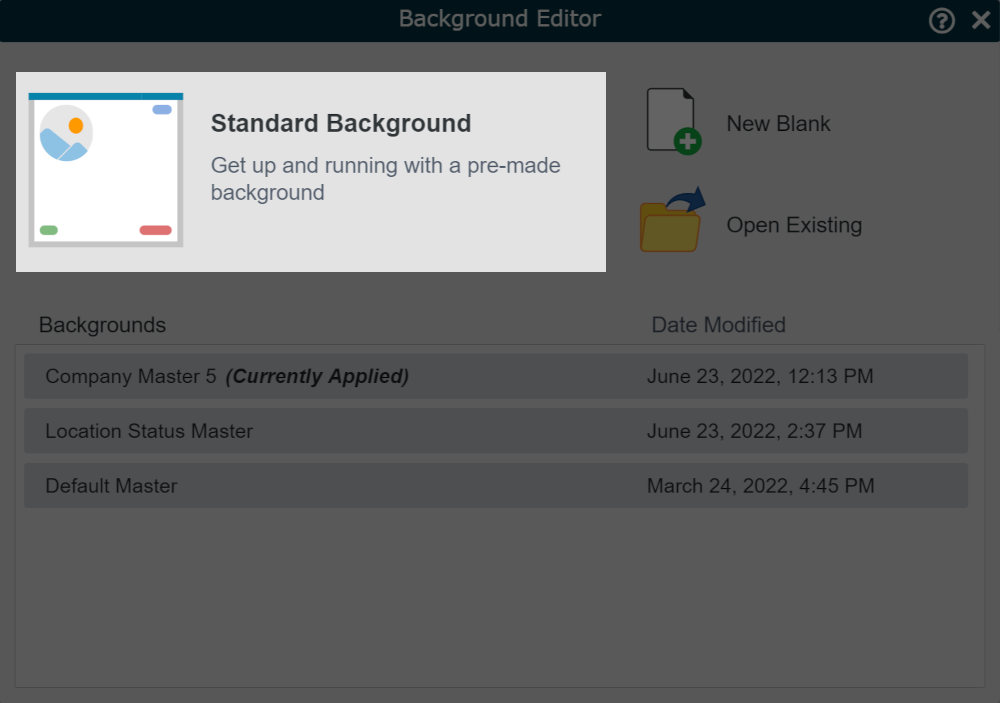
The Standard Background template is displayed in the Background Editor.
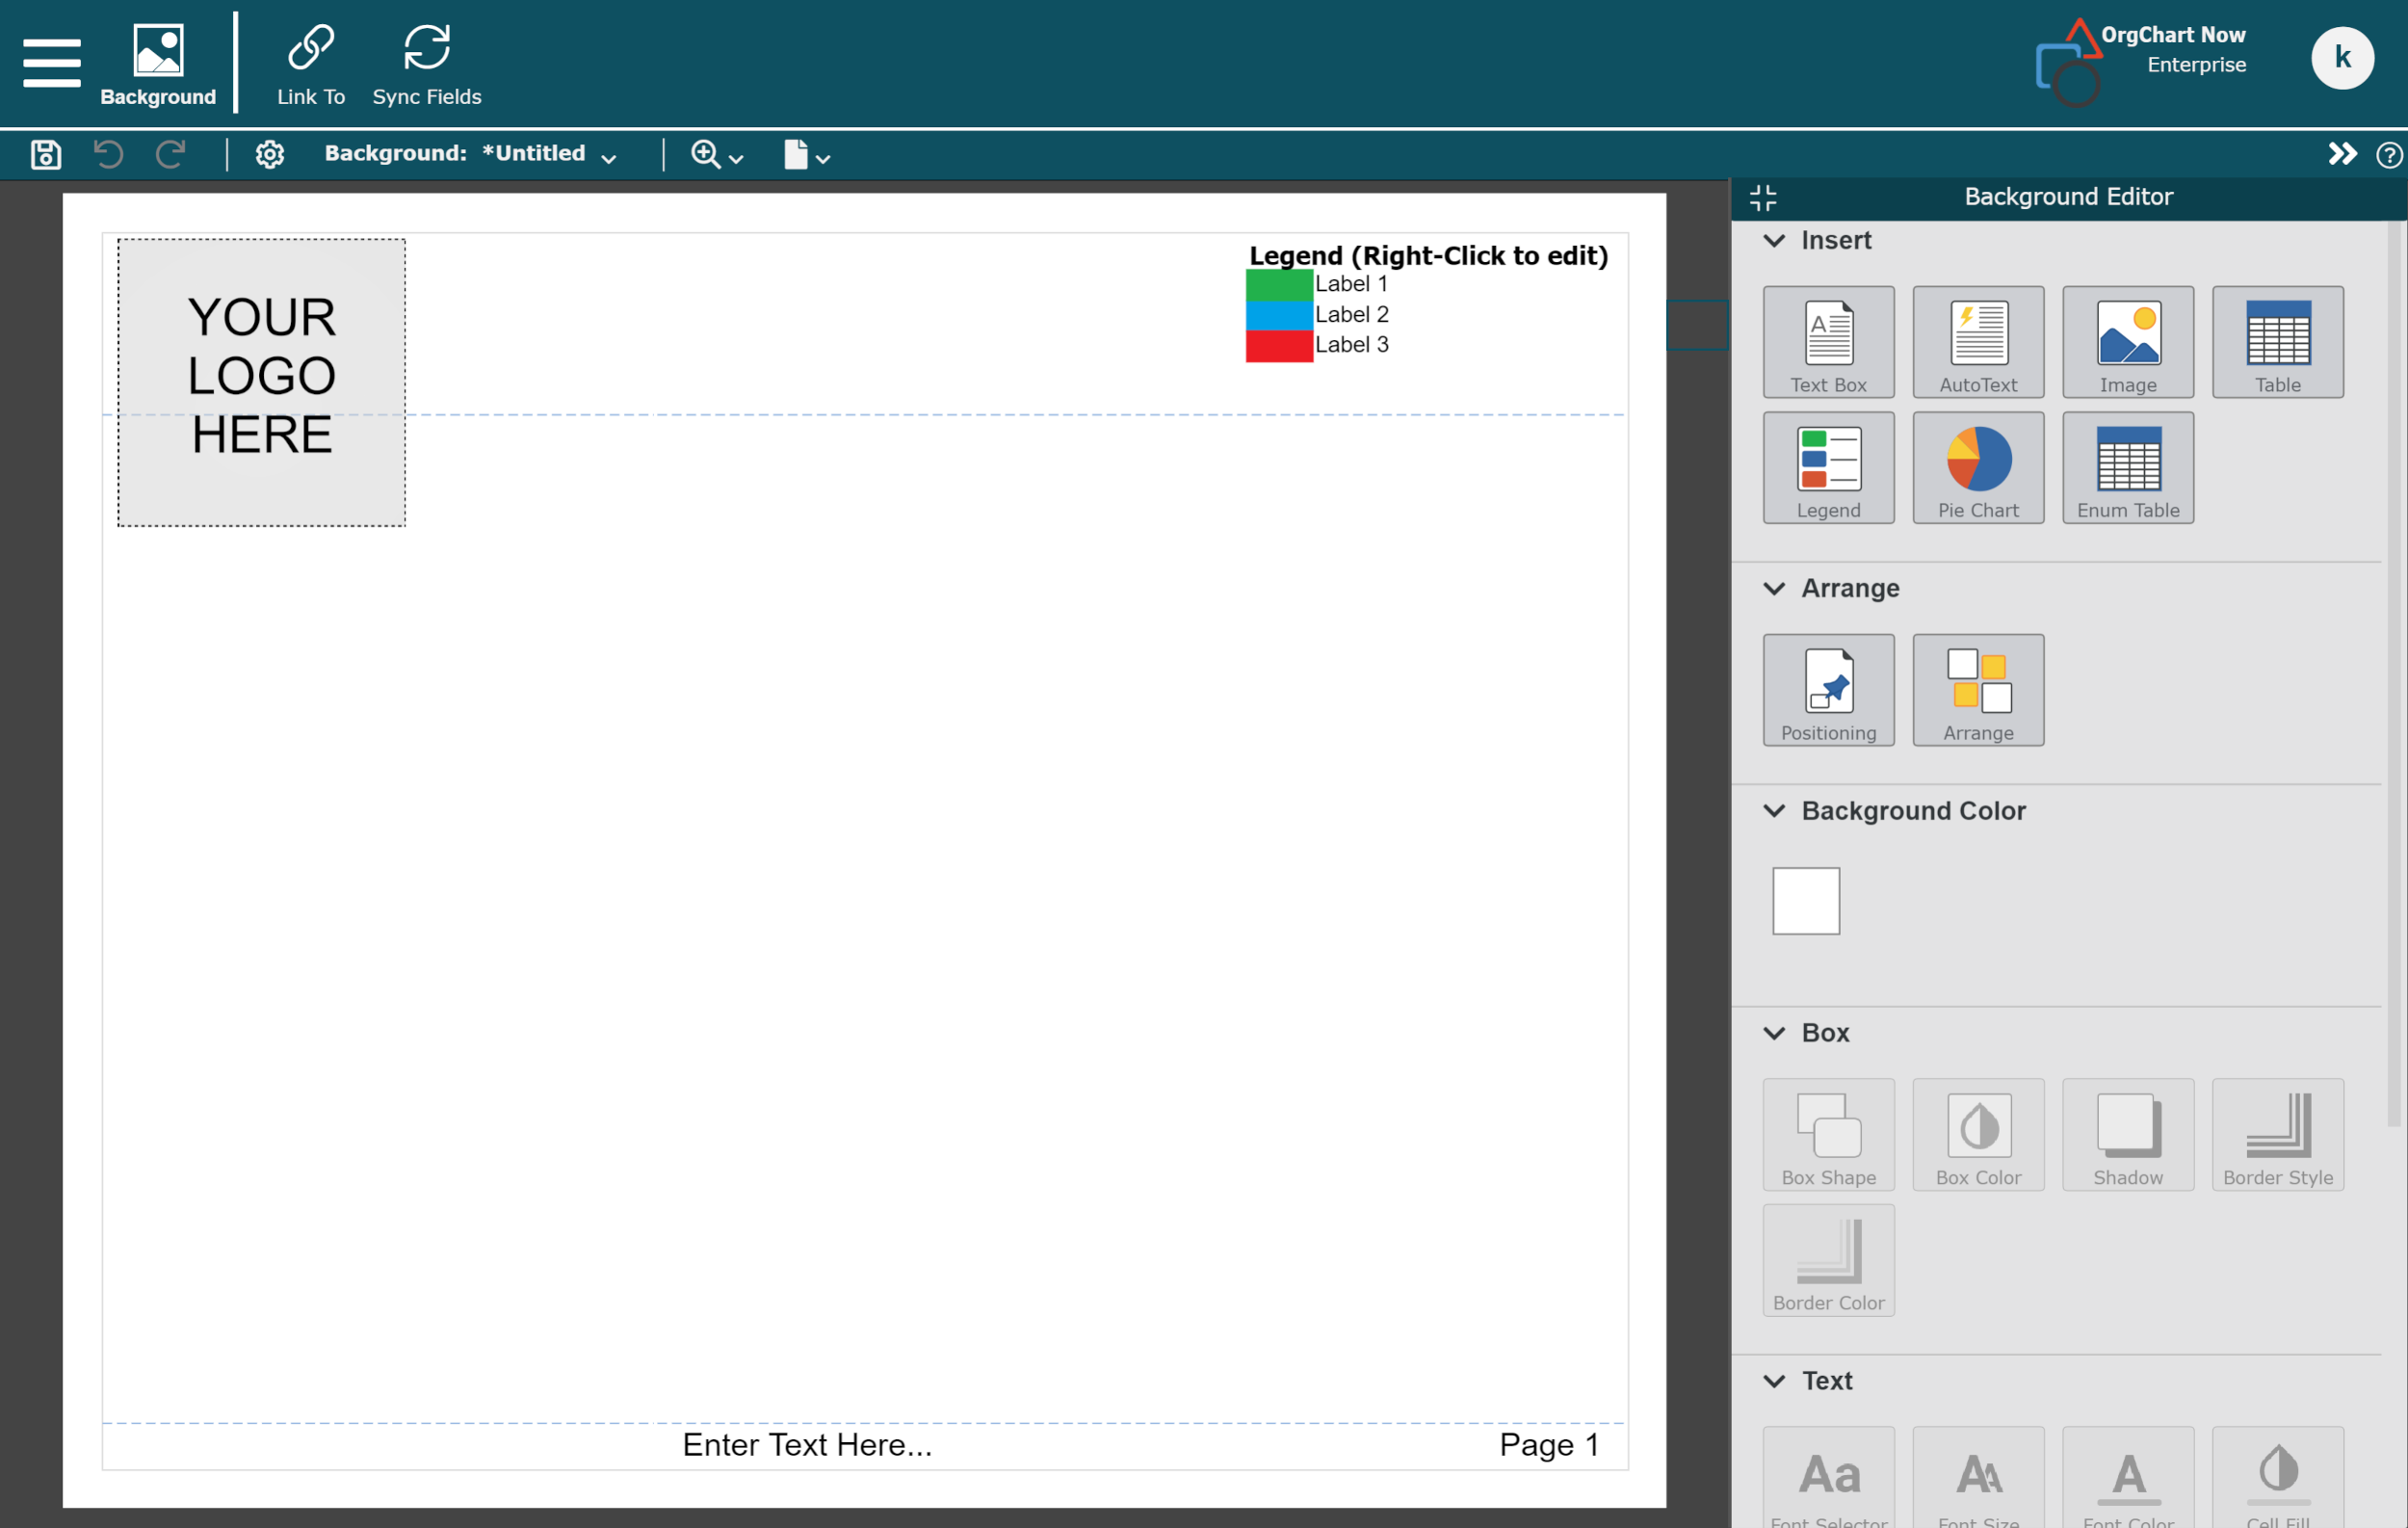
Drag and drop your logo onto the background. The photo is uploaded Backgrounds folder of the File Manager and replaces the Your Logo Here photo element.
Note
You can also right-click on the Your Logo Here photo element, and click on Upload Image option. Once you've uploaded the image, right- click on the Your Logo Here photo element, click on Open Image, and then select your desired logo from the File Manager.
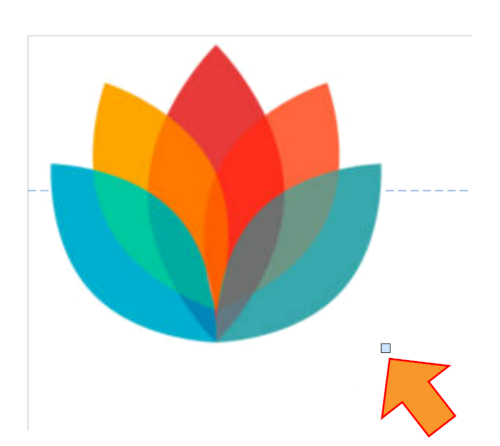
Right-click on the logo to resize it, or use the small blue square to manually adjust the sizing.
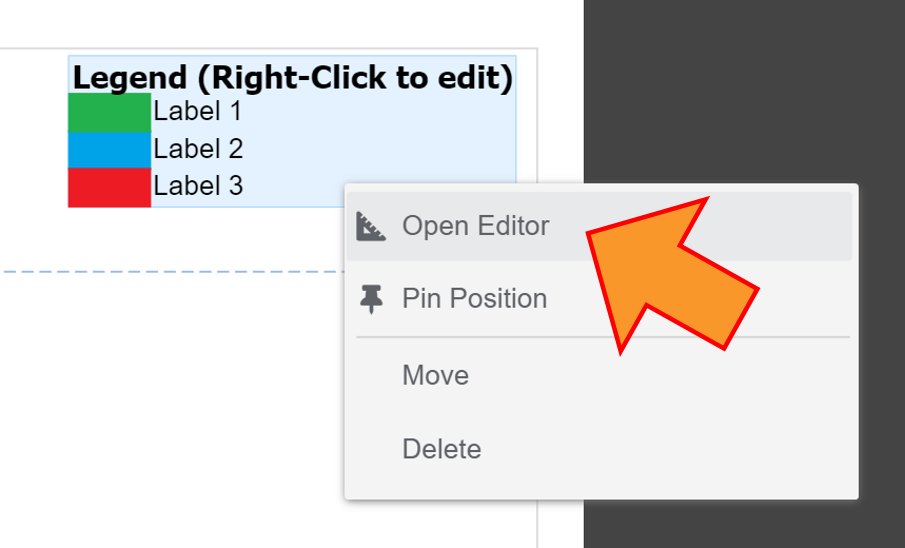
Right-click on any element to delete it, or edit it.
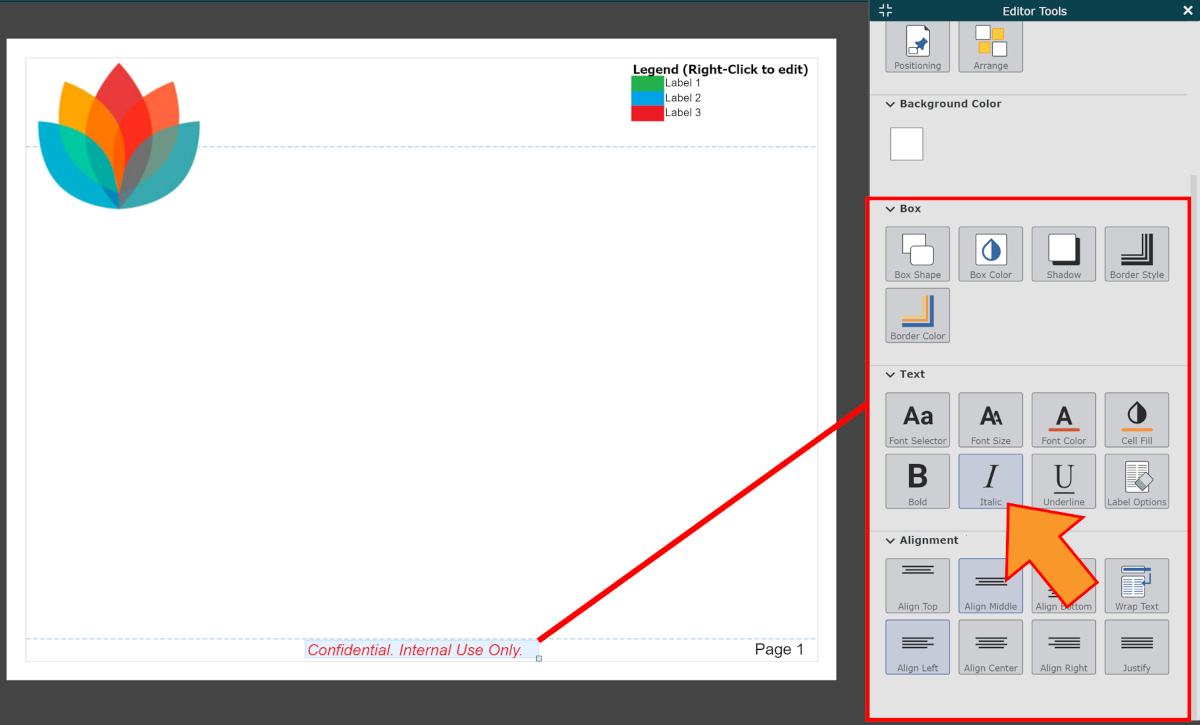
Double-click on a text element to type alternate text.
Click on a text element to highlight it, and then use the Text and Alignment tools in the Editor Tools panel to adjust the text formatting.
Optionally, right-click on the background canvas, and then click on one of the following options to add it to the background:
Text box
AutoText (i.e. Page numbers or last refresh date)
Image
Table
Legend
Note
If you'd like to use formulas and fields specific to a Master Chart, ensure that you Sync Master Chart Fields before modifying any of the elements above.
Once you've finished making your edits, save your Background to the Backgrounds folder, or link it to a Master Chart.
Syncing Master Chart Fields
If your Master Chart data has changed since creating your background, or if you'd like to create a background for a Master Chart with specific fields and formulas, you will need to synchronize your background with that Master Chart. To do so:
Open the background you'd like to edit.
Click on the Sync Fields option, and then select the Master Chart that contains the fields and formulas you would like to see on your background.

Linking a Background to a Master Chart
Once you have finished creating a background, you can link it to a Master Chart, so that it's displayed in Viewer.
Click on the Document menu, and then select the Save As... option.
Enter a name for the Background in the filename text box, and then click on Save Background.
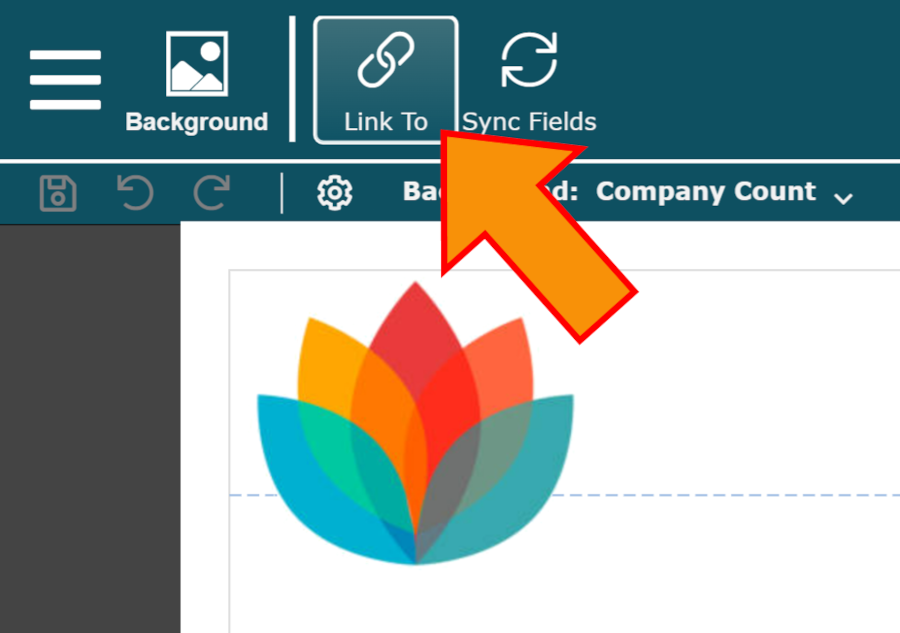
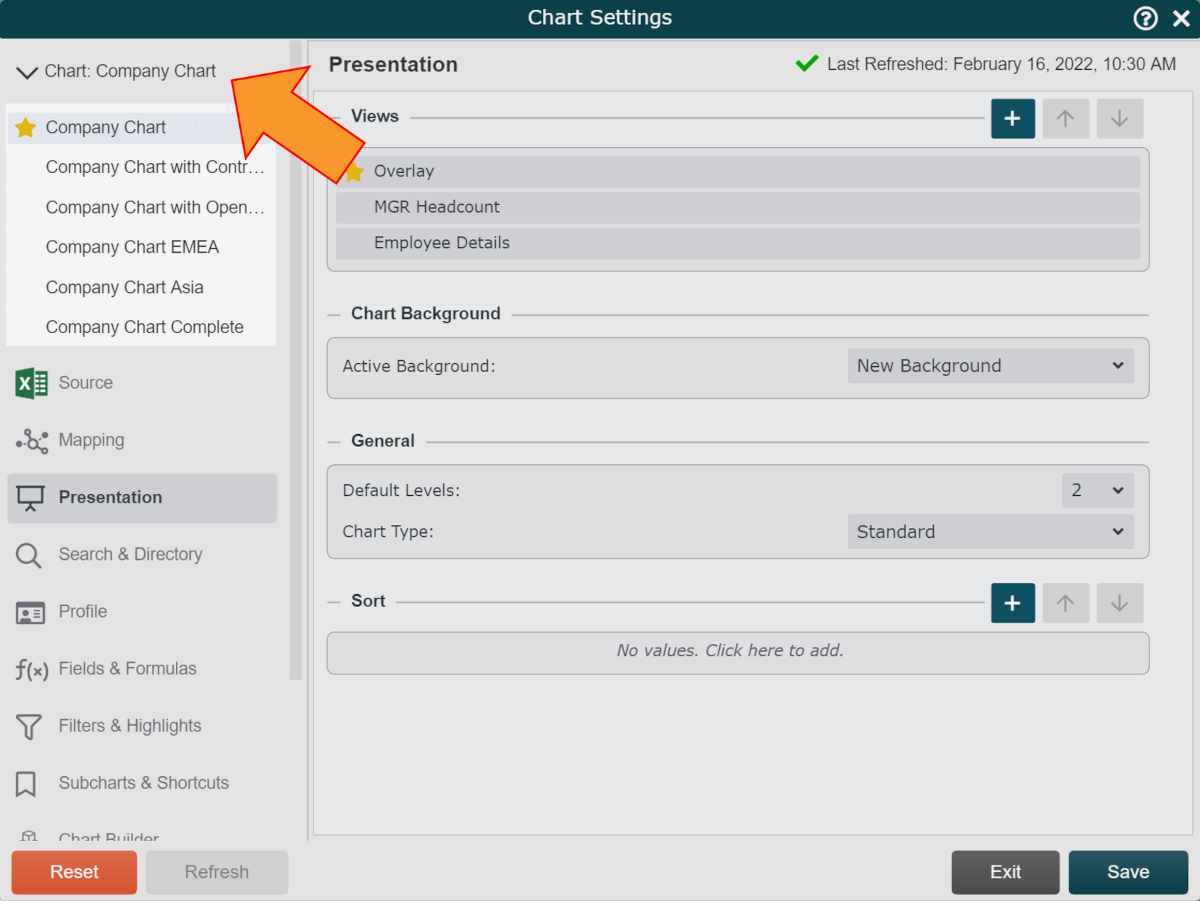
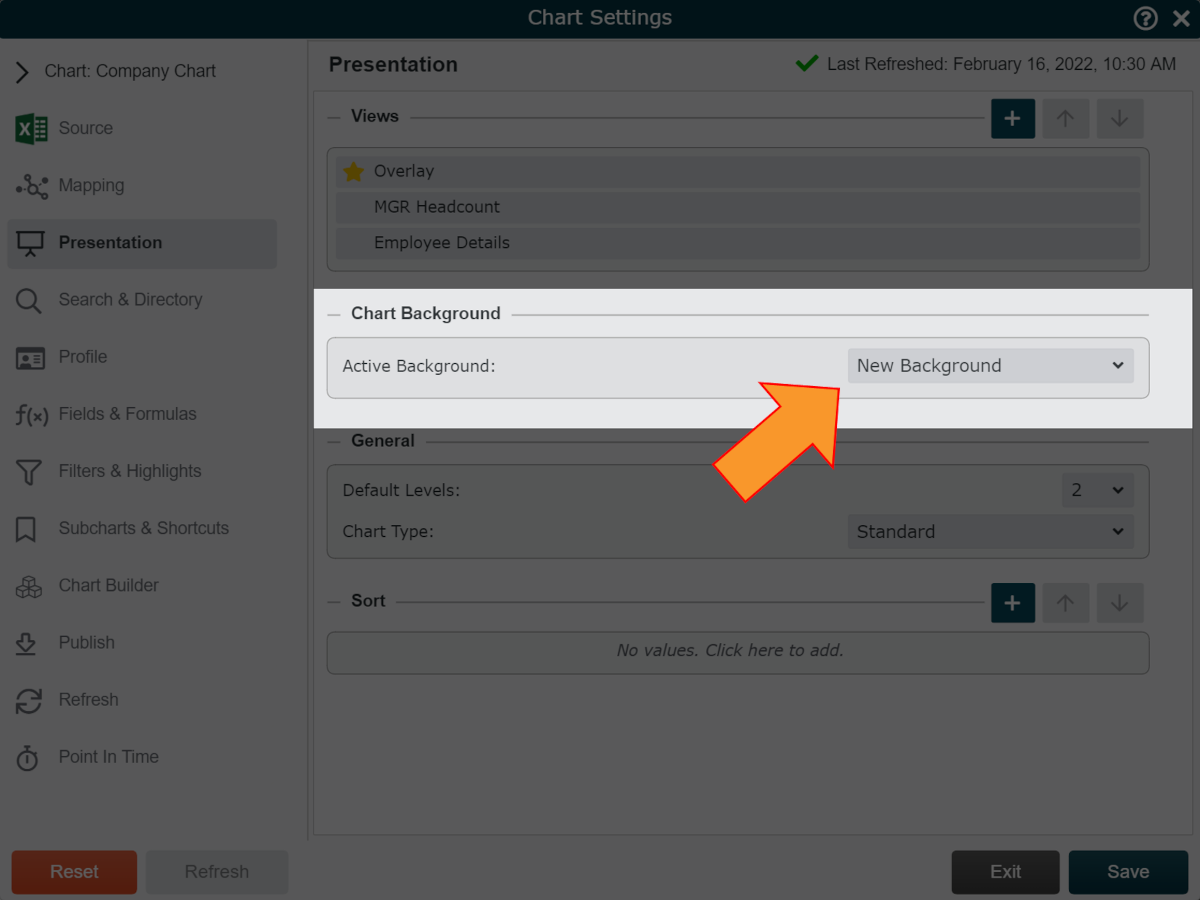
Click on the Link to Chart icon in the Top Toolbar. The Chart Settings: Presentation panel is displayed.
Ensure that the Master Chart you intend to link the background to is selected. If the Master Chart is not selected, click on the Chart dropdown menu, and then select the correct chart.
Note
By default, the Master Chart that was open before entering the Background Editor will be selected.
If your background contains fields or formulas unique to that Master Chart, linking the background to a different Master Chart will not display those fields and formulas.
The background is already selected in the Active Background dropdown menu. Click on the Save button.
Applying a Background to a Chart Document
Open an existing Chart Document in Workbench, or create a new one using Builder.
Click on the Chart Editor option in the Workbench Top Toolbar.
Scroll to the Background Section, and then click on the
 icon.
icon.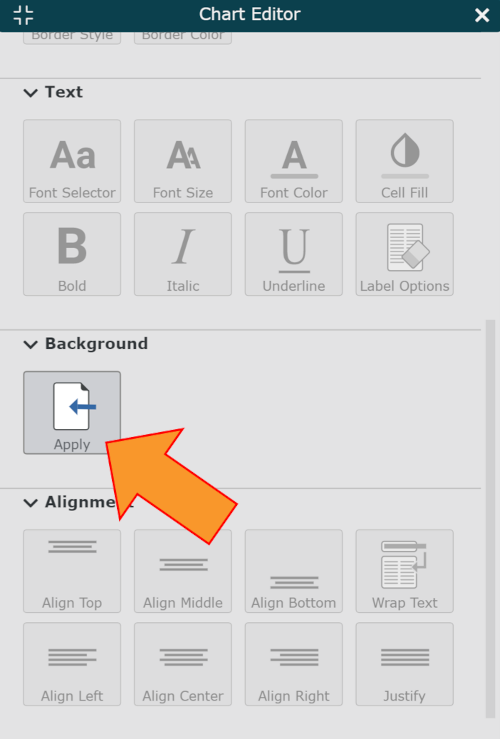
Click on the Custom option, and then click on the Select... button.
Select the background that you would like to apply to the open Chart Document, and then click on the Select Background button. The background is applied.
Applying a Background to a View
Click on the Mode Switcher icon, and then select the Setup option.
Click on the View Manager tile.
If the template Rules are not displayed, click on the Rules button. Then, select the View from the View dropdown menu to which you would like to apply a background.
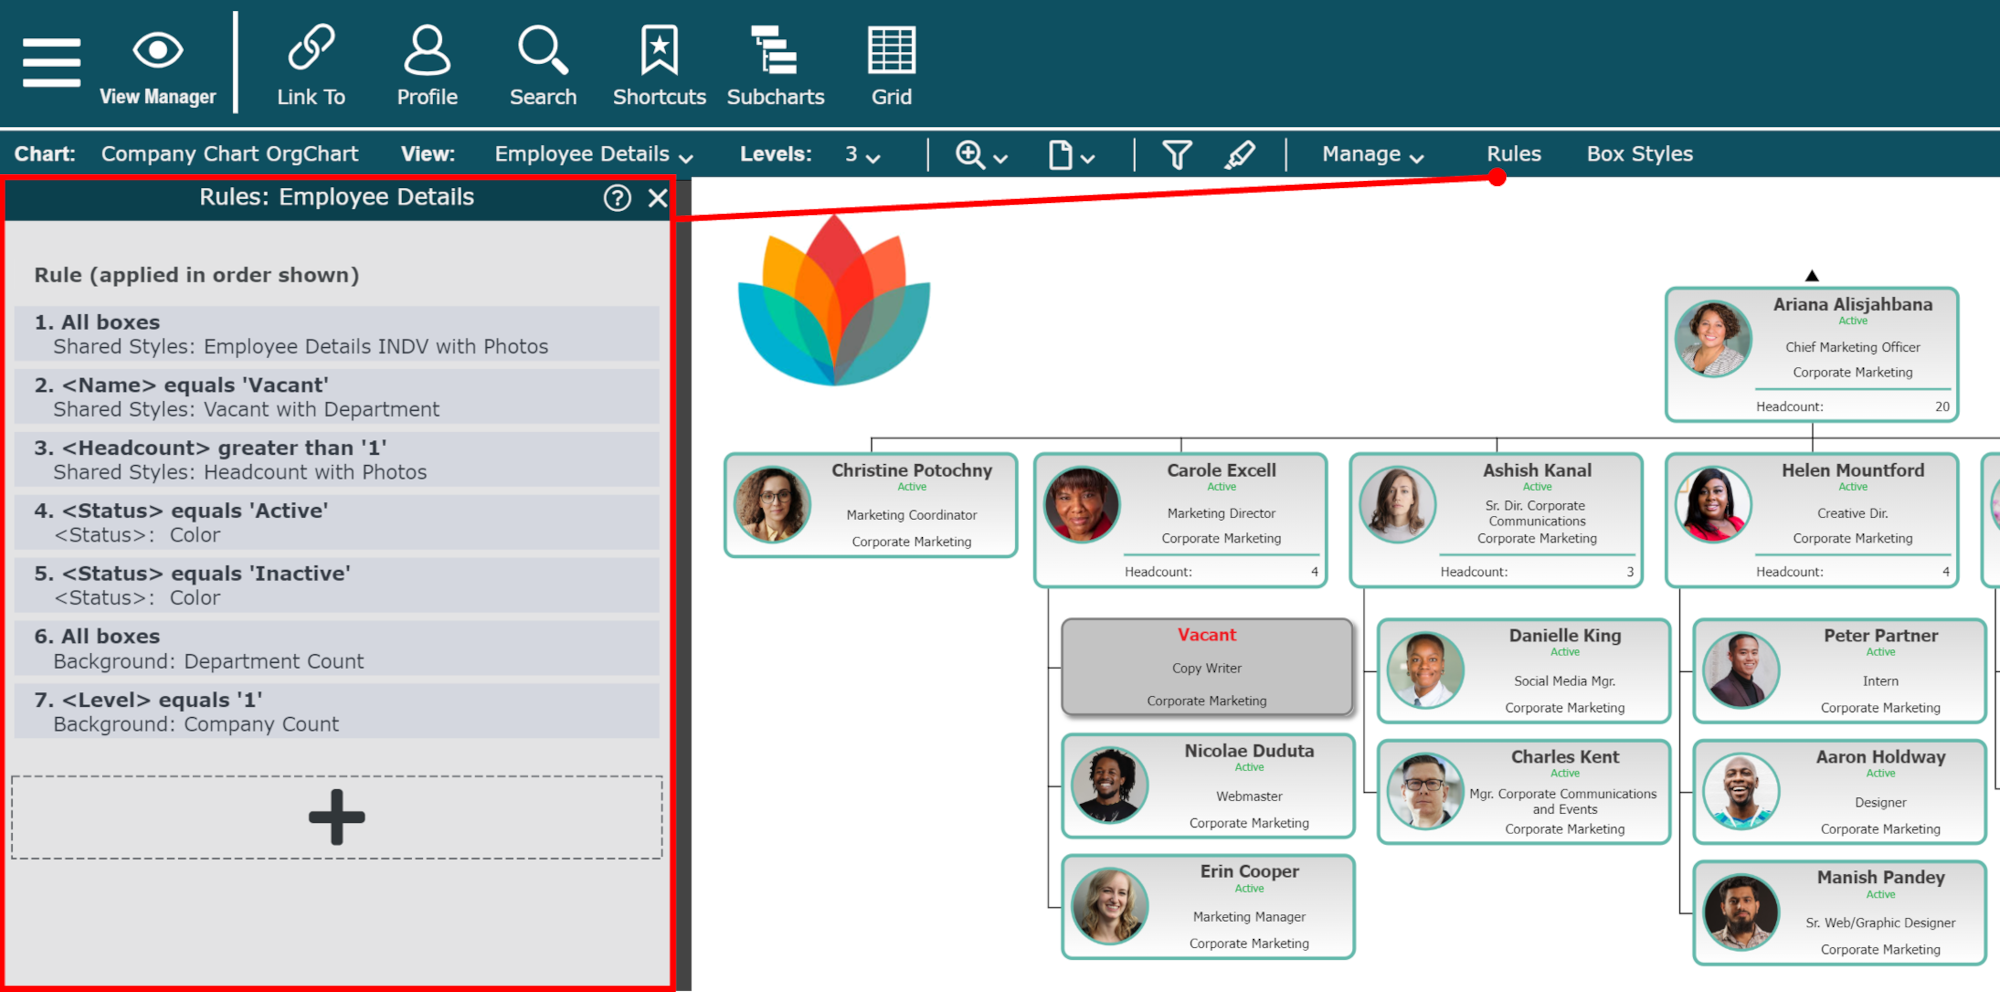
Click on the
 icon at the bottom of the Rules panel. The Rule Editor is displayed.
Click on the Rule Criteria dropdown menu, and then select the Rule Type you would like to use to apply the Background.
If applicable, define the Rule Criteria for applying the Background. If you always want the background to be applied when the selected View is applied, ensure that you've created an All Boxes rule.
Click on the Background tab, and then select a Background from the Apply background dropdown menu.
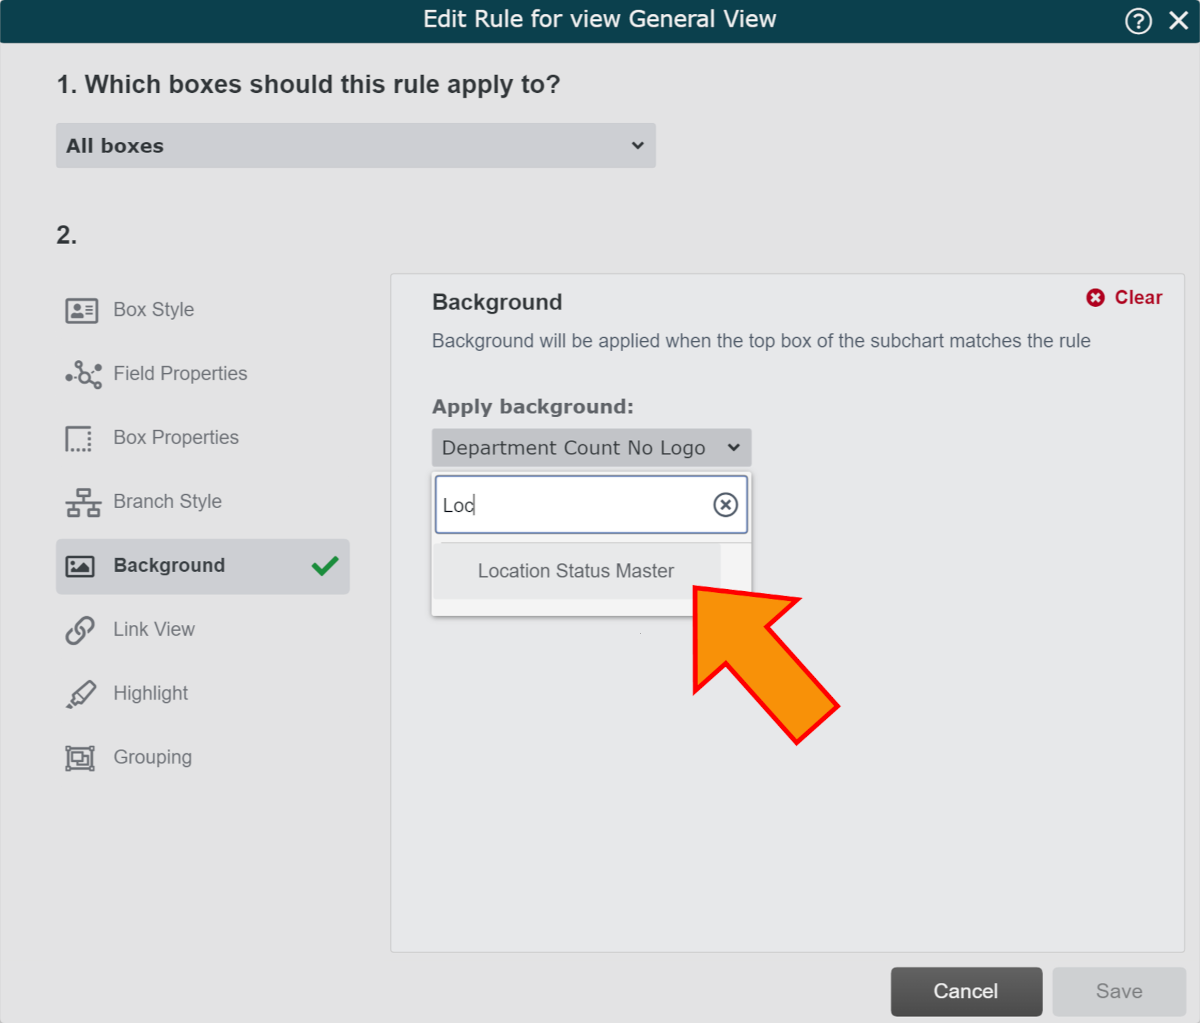
Click on Save. The Rule is added to the list.
Click on the Manage menu, and then click on Save to preserve the changes.