Photo Integrations
Audience
Audience: Administrators
Overview
You can import photos into OrgChart directly from your HRIS system for display in chart records, employee profiles, and search results. The following article provides details surrounding which data connectors support live photo integration.
Unfortunately, not all HRIS integrations support photos. However, there are other ways in which you can import photos to OrgChart. For additional photo import options, as well as general guidance for image sizing and quality control, reference the Working with Photos article.
If you would like to pull photos from an HRIS system that currently does not support live photo integration in their API, please reach out to your HRIS System Administrator to request an enhancement.
Supported Connectors
OrgChart can pull photos directly from the following data connectors.
Connectors that require photo formula configuration are in bold, and link to articles providing step-by-step instructions for completing the photo import.
ADP
BambooHR
Breathe HR
Google Directory
Namely
OrangeHRM
Paycom
PeopleHR
Signify
Subscribe HR
TriNet
Unicorn HRO
Additional Photo Configuration
Some API photo connectors, such as AzureAD and Igloo, require additional configuration in order to import photos into OrgChart.
The following section provides step-by-step instructions for finalizing your photo integration in OrgChart.
Log in to OrgChart.
Click on the Mode Switcher icon in the Top Toolbar, and then select the Setup option. The Setup panel is displayed.
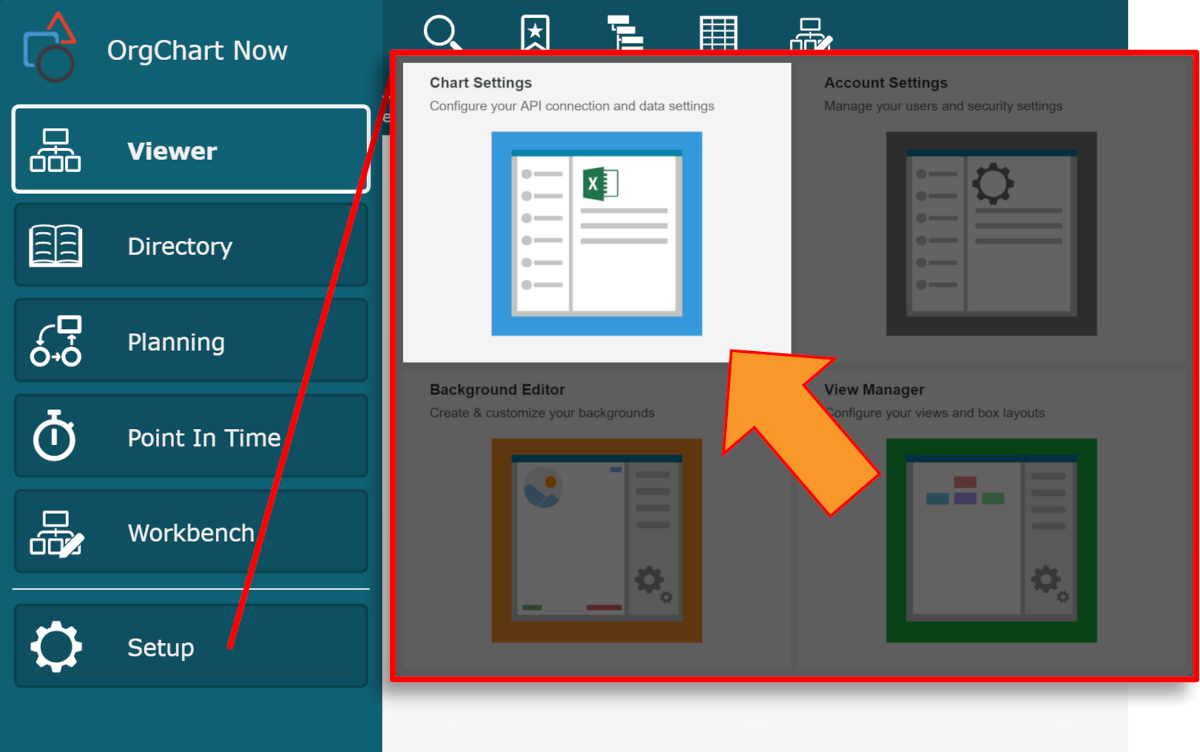
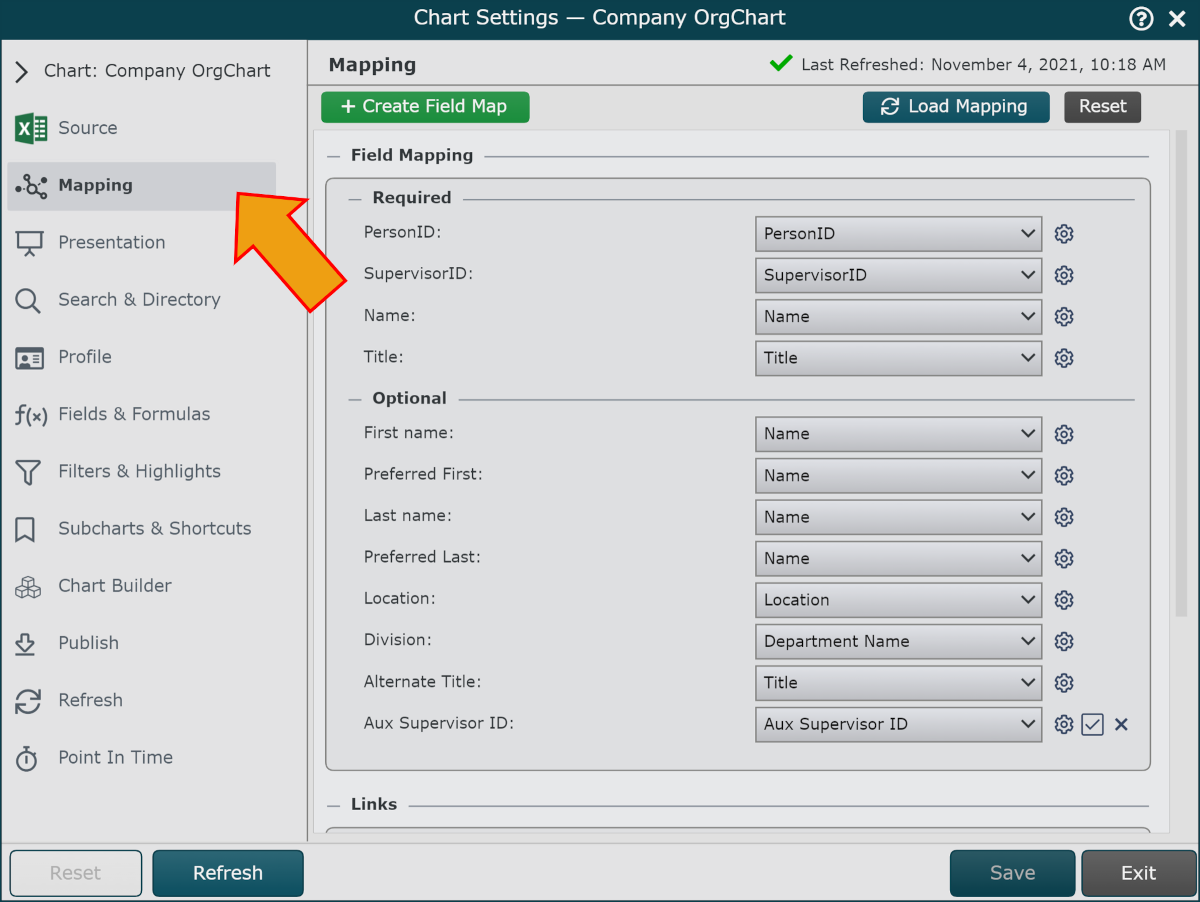
Click on the Chart Settings tile, and then select the Mapping option from the left side menu.
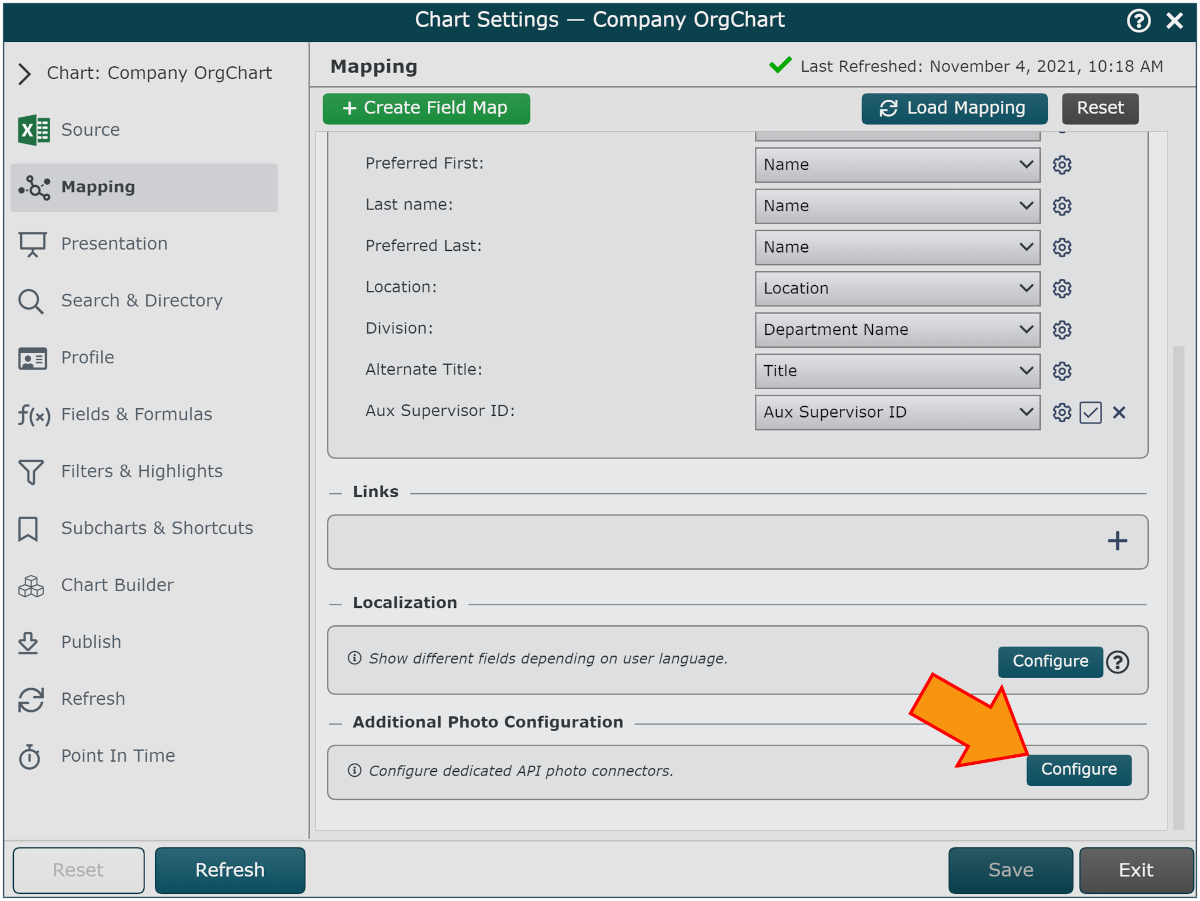
Scroll down to the Additional Photo Configuration section, and then click on the configure button. The Additional Photo Configuration panel is displayed.
Click on the
 button to the right of Source. Double click on the source from which you'd like to pull photos from the Photo Data Source menu.
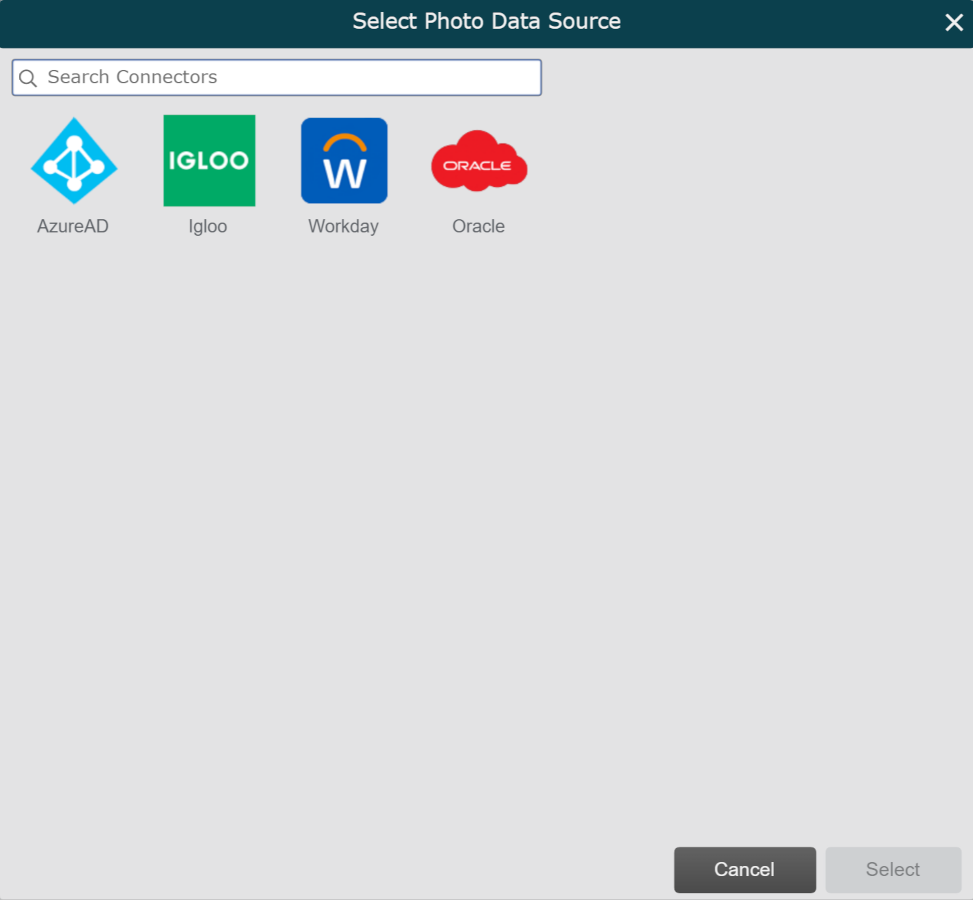
Enter your credentials. For more details regarding the requested information for each API photo connector, reference the corresponding article listed below:
Click on Validate to ensure that your credentials are correct.
Click on Save, and then Refresh.
Follow the steps in the Creating a Photo Formula section of the photo configuration articles listed above to finalize your photo import.