Dayforce Configuration
Audience
Audience: Administrators
Overview
OrgChart connects to Ceridian Dayforce using an API. For this integration, OrgChart needs a service user and an associated role in order to pull your company data.
The following article provides step-by-step instructions on how to configure the Dayforce data connector, prior to importing data from Dayforce into OrgChart.
Note
Note: If your Dayforce instance does not have the same user interface that is documented in this article, please work with your Dayforce Representative, or contact Dayforce Support.
Important
Changes made to the employees in your Dayforce account will be reflected in OrgChart after you refresh the data.
Configuring a Dayforce Connector
Log into your Dayforce portal using your Company Name, Username, and Password.
Create an Integration Policy
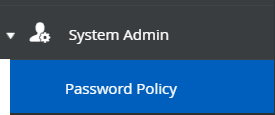
Click on the System Admin button (located in the left-side panel), and then click on Password Policy. Here, you will create an Integration Policy, which allows OrgChart to periodically pull your HR data.
Select the '+' button at the top of the screen to create a new Integration Policy.

Name the policy "OfficeWork Integration Policy," and then create a Password Policy. To set a password policy:
Under the Password Lockout Rules heading:
Enter 0 in the box under Lock Account for (Minutes)
Enter 999 in the box under Failed Login Attempts before Lockout
Click on the Save button at the top of the screen.
Note
Note: DO NOT enter a value under "Default Password Life (Hours)." Passwords should not have an expiry.
Add a Service Role
The Service Role allows admin to select the fields OrgChart can pull from Dayforce.
Click on the System Admin button in the left side panel, and then click on Roles SL.
To add a Service Role:
Click on the Add button at the top of the screen
Enter the following Name: OfficeWork API Service Role
Enter the following Description:OfficeWork API Service Role
Select the Integration Policy (created in steps 2-4) from the dropdown menu
Enter the following Reference Code: 512
Click on the Features tab, and then check the following checkboxes:

Click on the Authorizations tab, and then check the following checkboxes in the Can Read column:
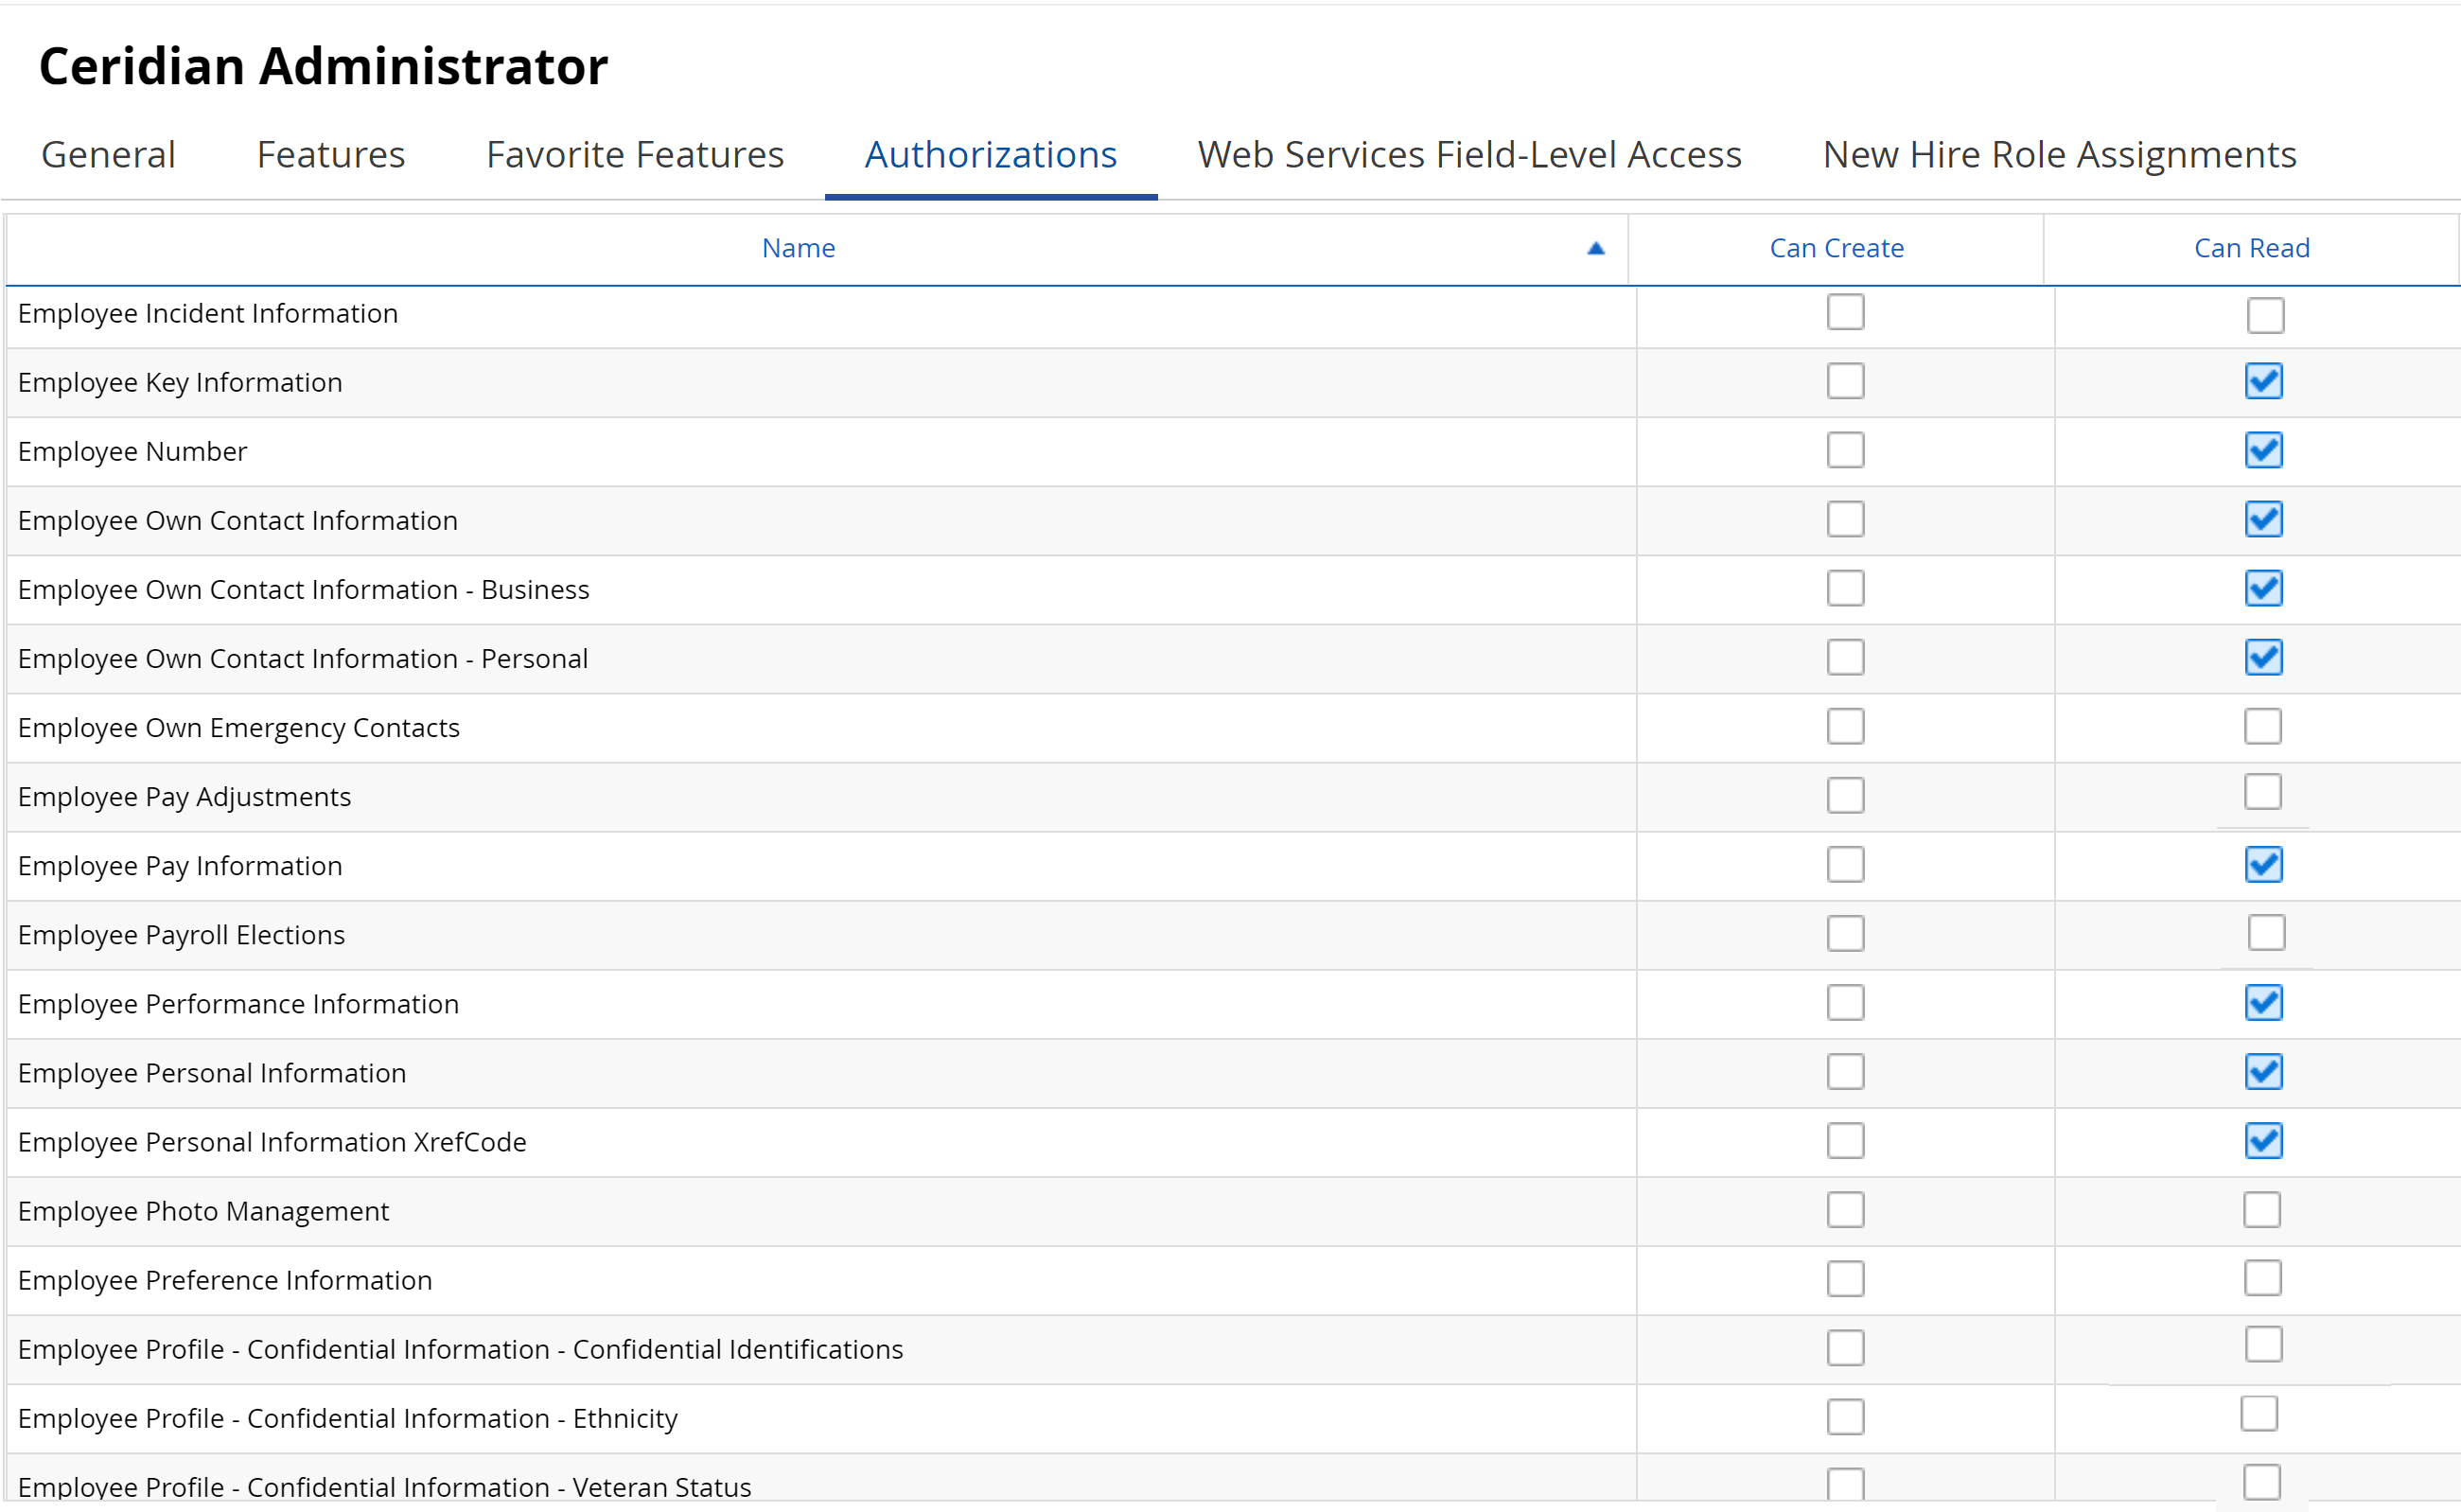
Note
Note: If you wish, you can omit some checkboxes if they do not comply with your company security policy. Typically, only non-PII fields are required by OrgChart.
Then, scroll down, and check the following checkboxes in the Can Read column:
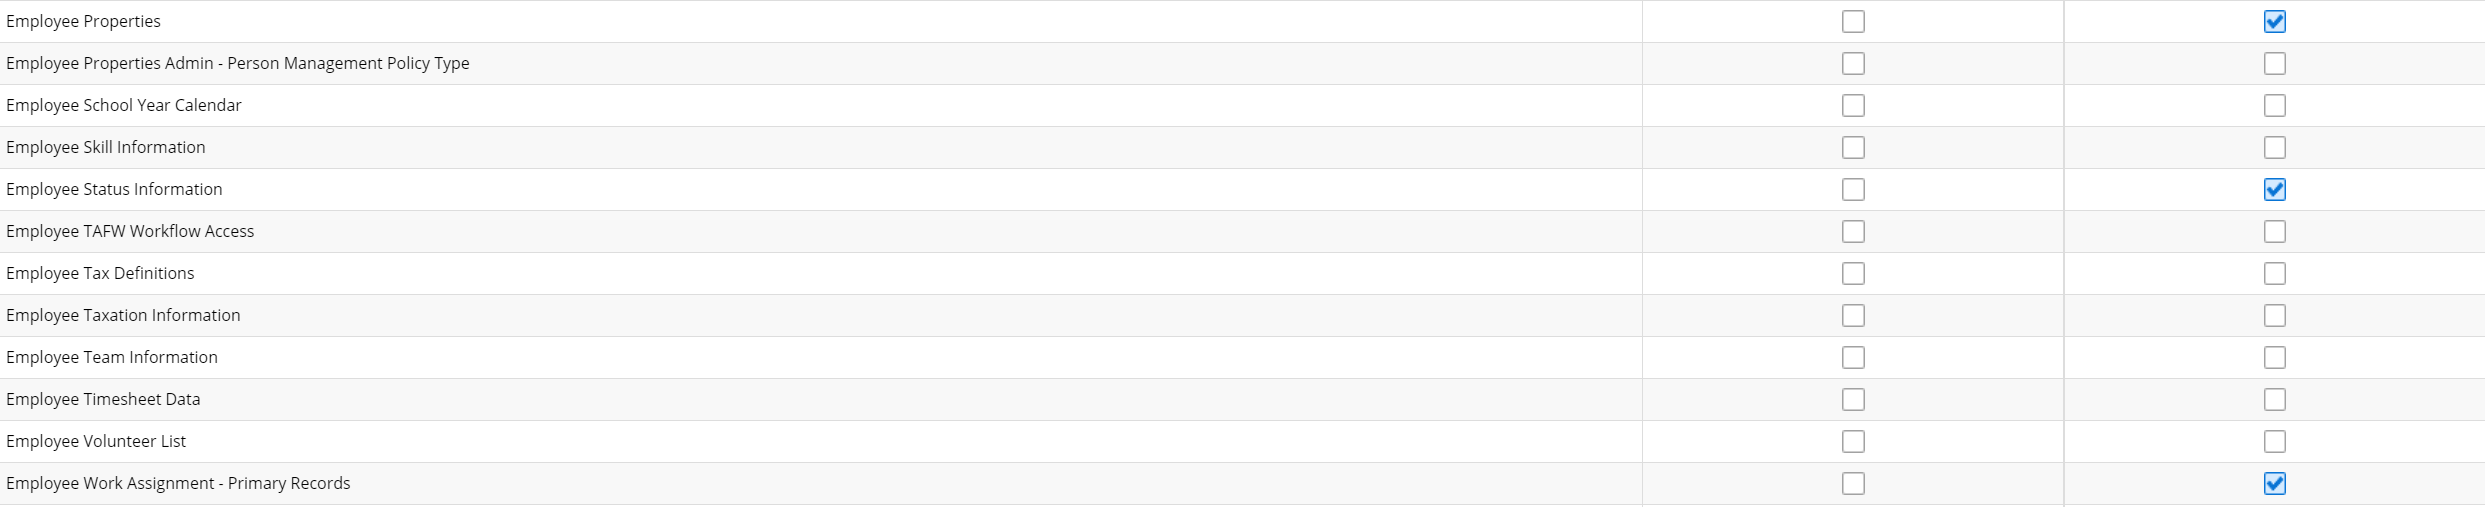
Note
Note: The options above do not appear next to each other in the Authorizations list.
Select Data Query
Admin users can select the data fields that OrgChart is permitted to query.
Note
Note: Some fields are required for proper configuration. Reference the Required Fields section below for more information.
Click on the Web Services Field-Level Access tab, and then check the following checkboxes (shown in the screenshot below).
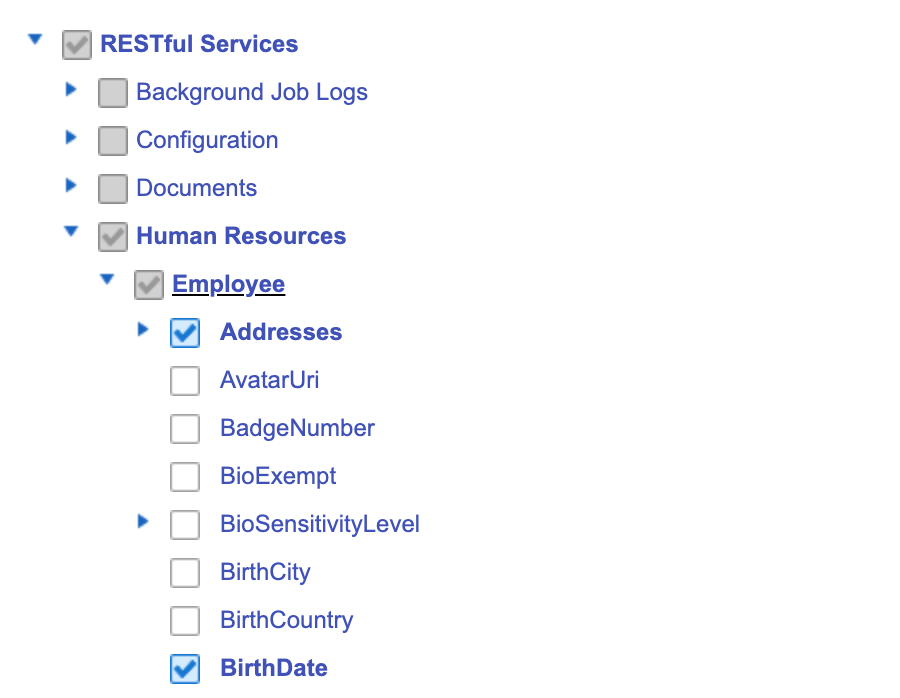
Caution
WARNING: OrgChart can only pull checkboxes under the Employee dropdown menu associated with the gray checkbox (shown above). Do not check boxes under any other menu associated with a gray checkbox.
The following table displays how each Dayforce element maps to OrgChart. Check the following Dayforce checkboxes (under the appropriate Dayforce menu) to pull into OrgChart. The bolded elements are required, while the rest are additional.
Note
Note: Some fields require multiple Dayforce Elements are checked in order to pull correctly in OrgChart.
Dayforce Menu | Dayforce Element | OrgChart Equivalent |
|---|---|---|
Employee > WorkAssignments > WorkLocationOverride | WorkLocationOverride.ShortName | Work Location Override |
Employee > WorkAssignments | WorkAssignment.EffectiveStart | Start Date |
Employee > PerforamanceRatings > Reviewer | Reviewer.XRefCode | Reviewer Code |
Employee > PerformanceRatings | ReviewDate | Review Date |
Employee > PerforamanceRatings | RatingScore | Rating Score |
Employee > PayGradeRates > RateMidPoint | RateMidPoint | Rate Mid Point |
Employee >WorkAssignments | Position.LongName | Title |
Employee > WorkAssignments > Position | Position.Job.UDFString3 | Job Field 3 |
Employee > WorkAssignments > Position | Position.Job.UDFString2 | Job Field 2 |
Employee > WorkAssignments > Position | Position.Job.UDFString1 | Job Field 1 |
Employee > WorkAssignments > Position | Position.Job.ShortName | Job Title |
Employee >WorkAssignments > Position | Position.Job.LongName | Job Description |
Employee > PerformanceRatings > PeformanceRating | PerformanceRating.XRefCode | Performance Rating Code |
PerformanceRatingScale.ShortName | PerformanceRating.ShortName | Performance Rating |
Employee > PerformanceRatings > PerformanceRatingScale | PerformanceRatingScale.ShortName | Performance Rating Scale Code |
Employee > PerformanceRatings > PerformanceRatingScale | PerformanceRatingScale.LongName | Performance Rating Scale |
Employee > EmploymentStatuses > PayGroup > PayFrequency | PayGroup.PayFrequency.LongName | Pay Frequency |
Employee > PayGradeRates > PayGrade | PayGrade.LongName | Pay Grade |
Employee > OriginalHireDate | OriginalHireDate | Original Hire Date |
Employee > OrgUnitInfos > OrgUnitDetail > OrgLevel | OrgLevel.ShortName | Organization Name |
Employee > OrgUnitInfos > OrgUnitDetail > OrgLevel | OrgLevel.LongName | Organization Level |
Employee > PayGradeRates > MinimumSalary | MinimumSalary | Minimum Salary |
Employee > PayGradeRates > MinimumRate | MinimumRate | Minimum Rate |
Employee > PayGradeRates > MaximumSalary | MaximumSalary | Maximum Salary |
Employee > PayGradeRates > MaximumRate | MaximumRate | Maximum Rate |
Employee >EmployeeManagers | ManagerXRefCode | Supervisor ID |
Employee > WorkAssignments > Location | Location.ShortName | LocationShortName |
Employee >WorkAssignments > Location | Location.LongName | LocationLongName |
Employee > WorkAssignments > Location > LegalEntity | Location.LegalEntity.ShortName | Division |
Employee >WorkAssignments > Location > LegalEntity | Location.LegalEntity.LongName | Company |
Employee > WorkAssignments > Location > LegalEntity > LegalEntityAddress > State | LegalEntityAddress.State.XRefCode | State Code |
Employee > WorkAssignments > Location > LegalEntity > LegalEntityAddress > State | LegalEntityAddress.State.Name | State |
Employee > WorkAssignments > Location > LegalEntity > LegalEntityAddress | LegalEntityAddress.PostalCode | Postal Code |
Employee> WorkAssignments > Location > LegalEntity> LegalEntityAddress> Country | LegalEntityAddress.Country.XRefCode | Country Code |
Employee> WorkAssignments > Location > LegalEntity > LegalEntityAddress > Country | LegalEntityAddress.Country.Name | Country |
Employee> WorkAssignments > Location > LegalEntity | LegalEntityAddress.City | City |
Employee > WorkAssignments > Location > LegalEntity > LegalEntityAddress | LegalEntityAddress.Address1 | Street |
Employee | LastName | Last Name |
Employee > WorkAssignments > Position > Job | JobFamily.LongName JobFamily.ShortName JobFamily.xRefCode | Job Family |
Employee > Gender | Gender | Gender |
Employee | FirstName | First Name |
Employee > Ethnicities | Ethnicity.ShortName | Ethnicity Code |
Employee > Ethnicities | Ethnicity.LongName | Ethnicity |
Employee > EmployementStatuses > EmploymentStatus | EmployementStatus.LongName | Status |
Employee > EmployementStatuses > PayType | EmployementStatuses.PayType.LongName | Pay Type |
Employee > EmployementStatuses > PayGroup | EmployementStatuses.PayGroup.LongName | Pay Group |
Employee > EmployementStatuses > PayClass | EmployementStatuses.PayClass.LongName | Pay Class |
Employee | EmployeeXRefCode | Person ID |
Employee > Employee Properties | EmployeeProperty.ShortName EmployeeProperty.XRefCode Employee.Property.StringValue | Employee Property 2 |
Employee > Employee Properties | EmployeeProperty.LongName EmployeeProperty.XRefCode EmployeeProperty.StringValue | Employee Property 1 |
Employee | EmployeeNumber | Employee Number |
Employee > Contacts > ElectronicAddress | ElectronicAddress | Business Email |
Employee | DisplayName | Name |
Employee > Culture | Culture.LongName | Locale |
Employee > PayGradeRates > ControlSalary | ControlSalary | Control Salary |
Employee > PayGradeRates > ControlRate | ControlRate | Control Rate |
Employee > Contacts > ContactNumber | ContactNumber | Business Mobile |
Employee > Contacts | CommonName | Common Name |
Employee > EmployementStatuses > Base Salary | BaseSalary | Base Salary |
Note
Note: If you are interested in pulling an additional field that is not listed above, please contact OrgChart Support. The Development team will determine if the desired field(s) can be queried.
OrgChart Required Fields
OrgChart requires the following fields for basic setup. Reference the table above for a list of additional compatible fields.
Menu Name | Field |
|---|---|
WorkAssignments |
|
EmployeeManagers |
|
Danger
XRefCode maps to PersonID, and ManagerXRefCode maps to SupervisorID in OrgChartNow. these fields are critical to determine your reporting relationships and to update the right records via the API. Ensure these boxes are checked for the integration to work.


Important
It is important to check the child boxes within parent boxes, otherwise data might not be selected that you had meant to select. For instance, check the values within the workAssignments table for the Job, Department, and Location tables. Ensure access is given to ShortName, LongName, if possible.
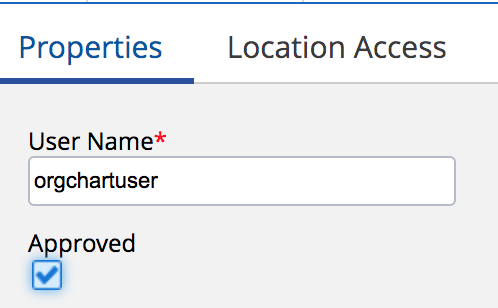
Add a Service User
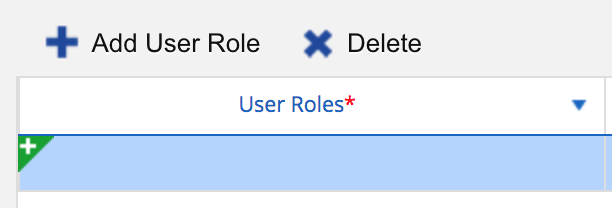
Add the service user by selecting System Admin, and then selecting User. Select the
 button to add a new user.
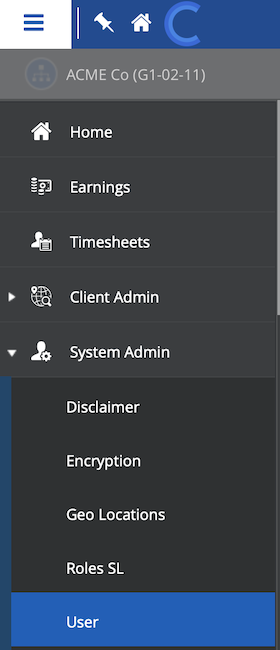
Enter in a unique username, culture, and password, as shown in the screenshot below.

Danger
You will need to enter this username and password into OrgChart.
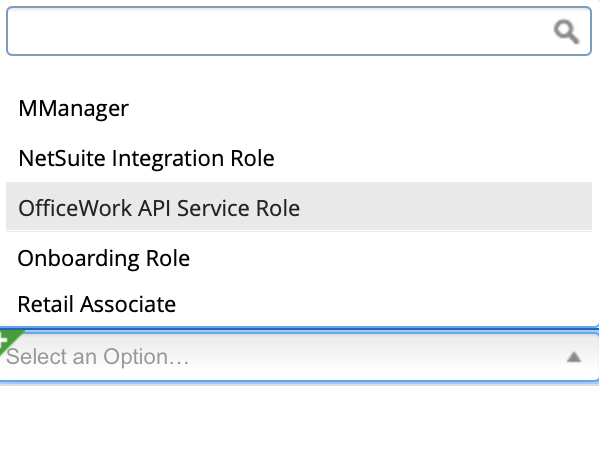
Click on the Add User Role button, and then double-click the box under the User Roles heading.
Select the Service Role (created in steps 1-4 of the Add a Service Role section) from the dropdown menu.
Check the Approved checkbox.
Click on the Location Access tab, then click on the Add Location button.
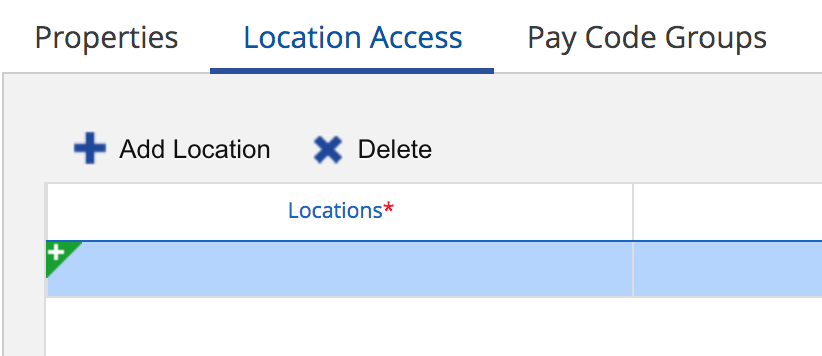
Double click on the box under the Locations heading, and then select your entire company (or the part of your company used in OrgChart) from the dropdown menu.
Check the Primary check box (under the Primary heading).
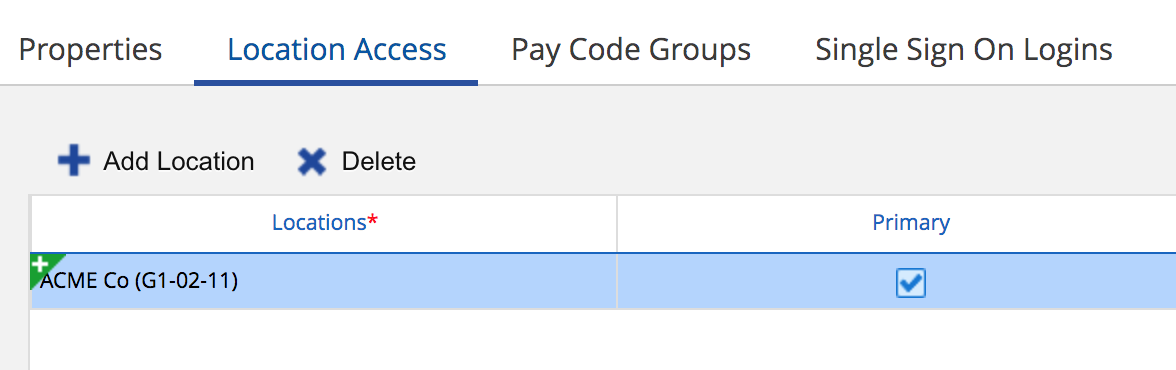
Click the Save button at the top of the screen.
You are now ready to connect Dayforce to OrgChart. See Dayforce Connector Setup for more information.