SuccessFactors Configuration
Audience
Audience: Administrators
Overview
OrgChart can import data directly from SAP SuccessFactors via the ODATA REST API.
In order to connect to SuccessFactors in OrgChart, you must have the following information provided by your SuccessFactors System Administrator.
Server
User ID
Password
Org Code
Connecting to SuccessFactors
Log in to OrgChart.
Click on the Mode Switcher icon in the Top Toolbar, and then select the Setup option. The Setup panel is displayed.
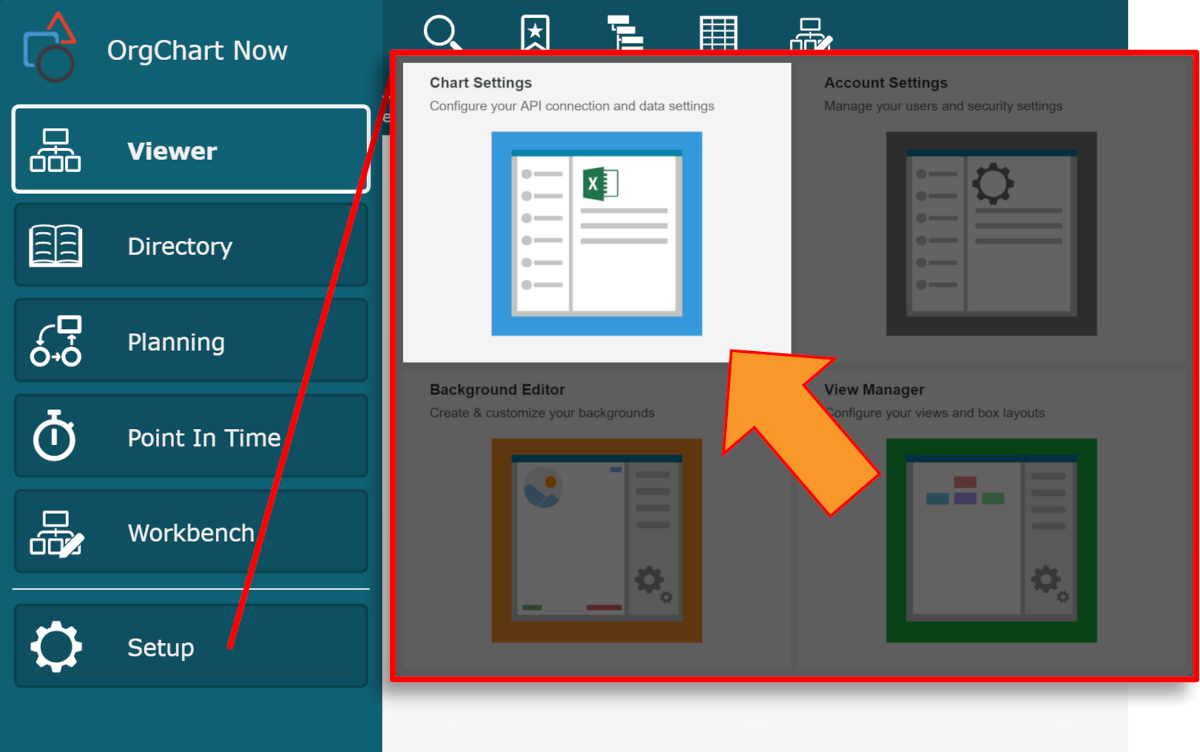
Click on the Chart Settings tile. The Source panel is displayed.
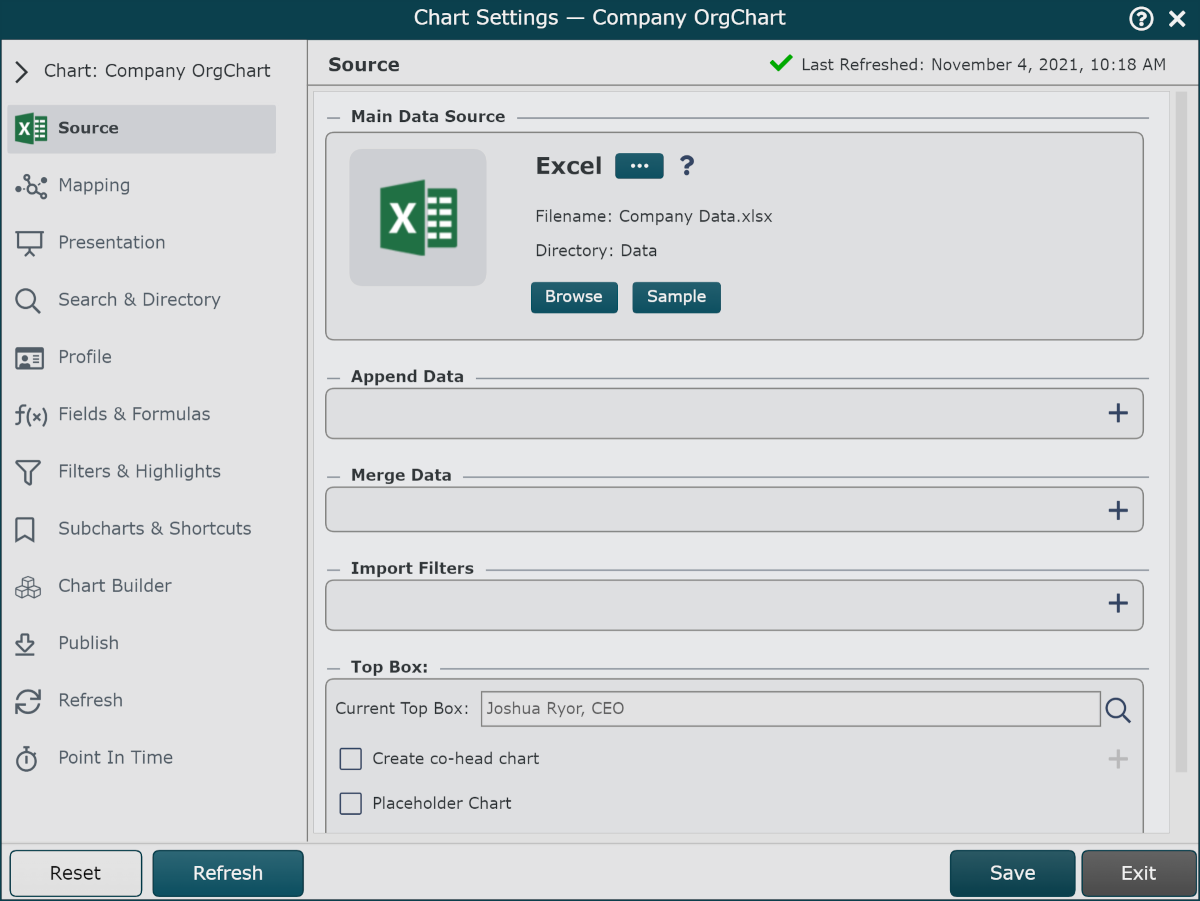
Click on the
 under the Main Data Source heading. The list of Main Data Source connectors is displayed.
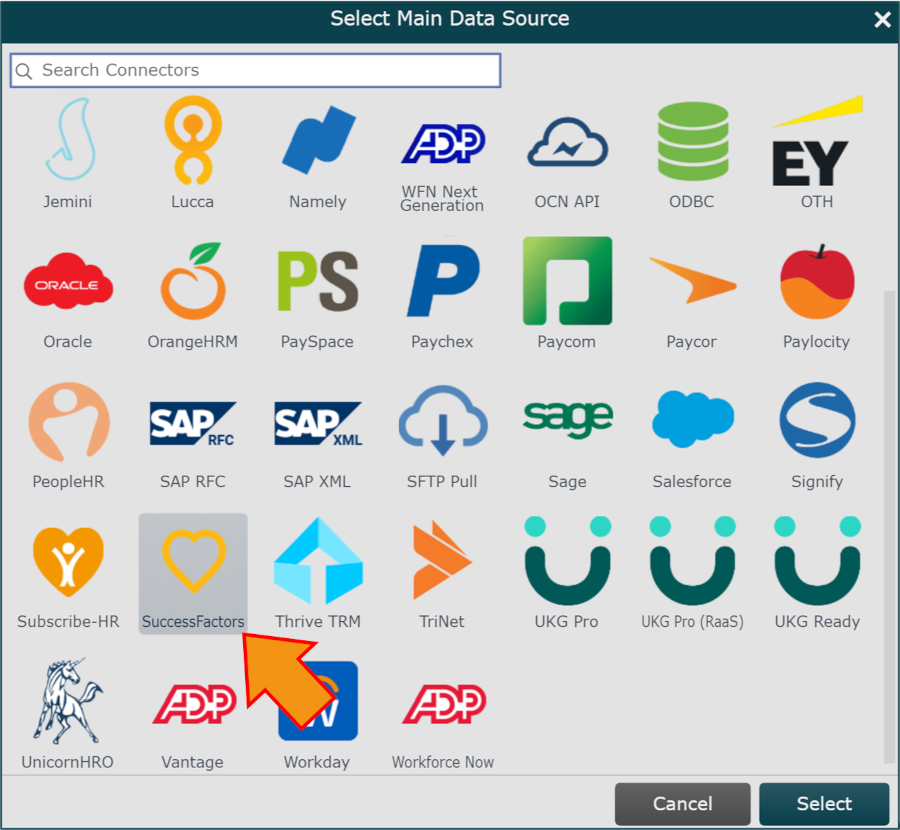
Click on SuccessFactors, and then click on Select.
Enter the Server, User ID, Password, and Org Code provided by your SuccessFactors System Administrator.
Enter "User" in the Resource Table textbox (under the Configure SuccessFactors Connection header).
Note
Note: The User Resource Table integrates best with OrgChart. While it is possible to use a different Resource Table, it may lead to integration problems and is not recommended.
Enter the SupervisorID (as it is labeled in your SuccessFactors data configuration) in the SupervisorID textbox. This information is derived from whichever table contains the hierarchy information (typically the Managers table).
Note
Note: Reference the Chart Settings: Mapping panel to to determine what OrgChart will set as the label for the hierarchy field in an alternative setup.
Enter Query Parameters. If you do not know your SuccessFactor's data configuration (i.e., the tables and picklists from your SuccessFactor's instance), please contact your SuccessFactors support rep.
Note
Note: Your SuccessFactors data configuration might require the $orderby=userId Query Param. The $orderby=userId Query Param ensures that OrgChart does not interpret the SuccessFactors data incorrectly.
Click on the
 icon (under the Main Data Source heading) to test that the credentials provided are valid.
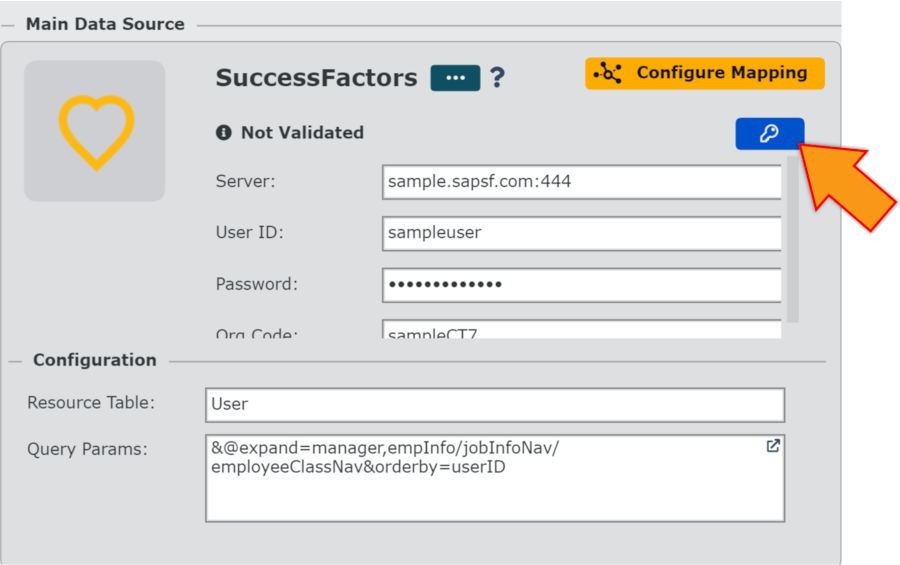
Click on the yellow Configure Mapping button, and then click on Save Changes. The Chart Settings: Mapping panel is displayed.
Click on the yellow Load Mapping button.
Ensure that OrgChart has mapped the fields correctly, and then click on Save, and then Refresh.
Picklist Mapping
Picklist Mapping is a Merge Connector that updates your data.
If the data query (configured in steps 1-7) returns unexpected values for certain fields, you must create a Picklist Mapping that tells OrgChart how to convert picklist values into labels. For example, if your query for Employee Status returns "500," instead of "Active," you must provide the proper Picklist Mapping to return the desired value.
To create a Picklist Mapping:
Click on the
 icon under the Merge Data heading, and then double-click on the SuccessFactors icon.
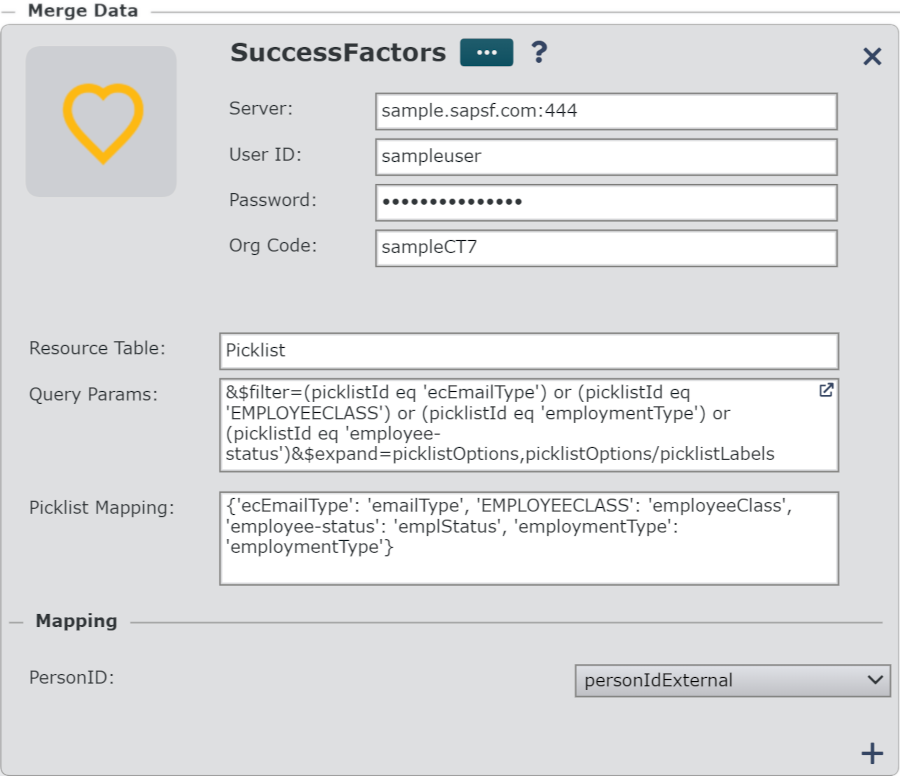
Enter the Server, UserID, Password, and Org Code provided by your SuccessFactors System Administrator.
Type "Picklist" in the Resource Table textbox, and then click on Save. The Picklist Mapping box appears.
Enter the Query Params. Query Params vary depending upon your SuccessFactors data configuration. Consult your SuccessFactors System Administrator for the Picklist ID's.
Enter the Picklist Mapping for the SuccessFactors fields which returned unexpected values in the initial query. For example, {'ecEmailType':'emailType'}. The mapping block structure will have key/value pairs.
Each Key is a Picklist ID from the prior step.
Each Value is the corresponding OrgChart Field Name.
Note
Note: Your Picklist Mapping depends upon your SuccessFactors data configuration. Consult your SuccessFactors System Administrator for the relevant Picklist Mapping.
Click Save, and then click Refresh.