Restricted Link Setup
Audience:
Audience: Administrators
Overview
Restricted Links allow you to embed your OrgChart into your intranet or SharePoint Site. Restricted Links are secured and only accessible from site(s) that you specify.
The following article provides step-by-step instructions for configuring and generating a Restricted Link in OrgChart.
Configuring a Restricted Link
There are two main components to configuring a Restricted Link:
Restricted Link User - The user associated with the link that you are generating. The permissions assigned to that user will drive the level of access for the generated link.
Whitelisted Referrer Domain - URL of the website (in which the link will be embedded) entered in the Link User Configuration section of the Access Settings: Authorization panel.
Follow the steps presented in the two following sections before generating your Restricted Link.
Configuring a Link User
The Link User is a service user used to access OrgChart via a Restricted Link. This service user is not a real employee, but rather acts as a means to authenticate end-users who click on the Restricted Link.
The End-User will be "signed into" OrgChart under the Link User's UserID, and will experience the application with the Link User's permissions.
The following section provides step-by-step instructions for configuring a Link User.
Log in to OrgChart.
Click on the Mode Switcher icon in the Top Toolbar, and then select the Setup option. The Setup panel is displayed.
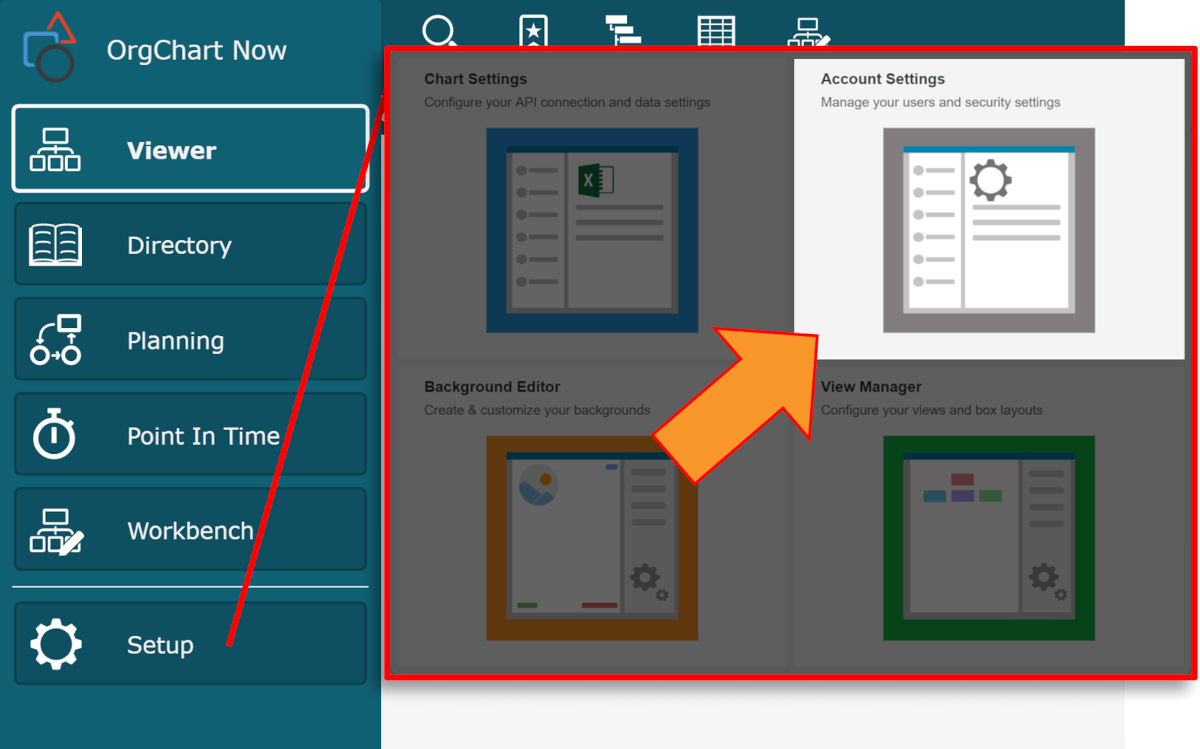
Click on the Account Settings tile, and then click on the Manage Users tab in the left side menu.
Click on the Create User button (in the bottom left corner). The New User panel is displayed.
Enter a User ID (i.e., Web Access) and Email Address (i.e., webaccess@yourcompanyname.com) into the corresponding textboxes. See example below.
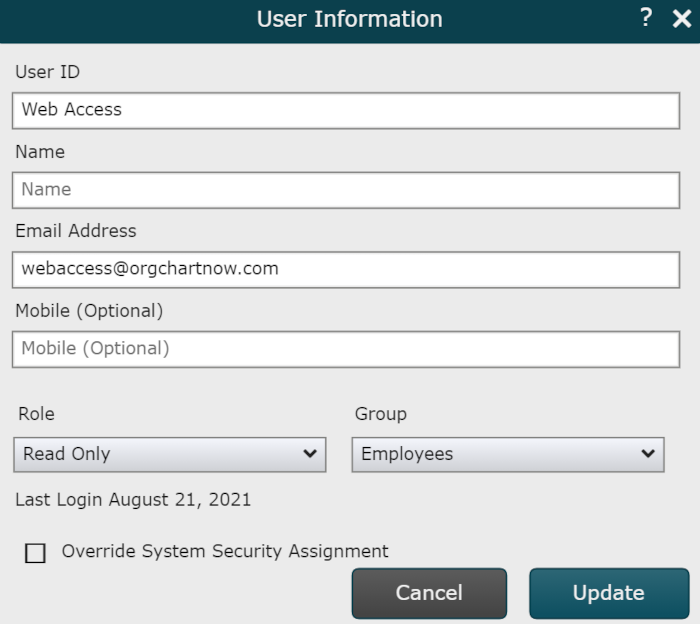
Click on the Role dropdown menu, and then select the role (Admin, Read/Write, or Read Only) to assign to the Link User. Typically, administrators select the Read Only role for Link Users.
Click on the Group dropdown menu, and then select the Access Group to assign to the Link User.
Click on the Create button.
Whitelisting a Referrer Domain
An End-User can only access the content of a Restricted Link, if they click on the Restricted Link from a specified website domain.
The address of the website that hosts the Restricted Link is known as a referrer domain.
Specifying the website domain is a process known as whitelisting.
Administrators must add the URLs for each website on which they plan to embed the Restricted Link.
The following section provides step-by-step instructions for whitelisting a referrer domain in OrgChart.
Sign in to OrgChart.
Click on the Mode Switcher icon in the Top Toolbar, and then select the Setup option. The Setup panel is displayed.

Click on the Account Settings tile, and then select the Authorization option from the settings dropdown menu.
In the Link User Configuration section, mouse over the user that you would like to configure as the Link User.
Click on the
 icon. The Configure Link Access dialog is displayed.
Click on the
 icon (to the right of the Allowed Referrer Domains header).
Enter the URL of the website on which you will embed the Restricted Link.
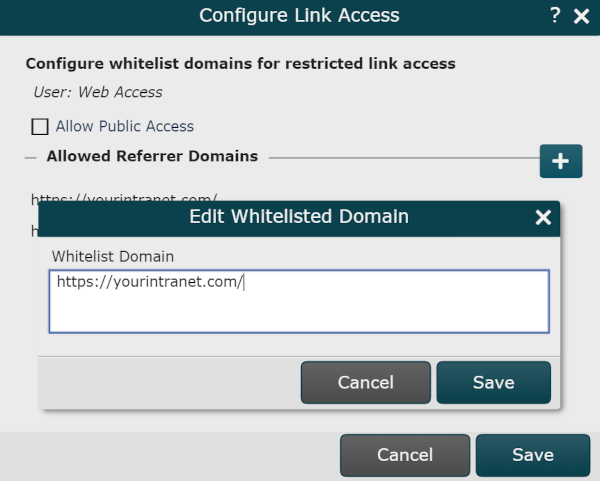
Click on OK. The domain is displayed in the Allowed Referrer Domains list.
Note
It is possible to edit or delete a URL in the Allowed Referrer Domain list.
Mouse over the URL you wish to modify, and then click on the
 icon to edit it, or click on the
  icon to delete it.
Click on Save.
Generating a Restricted Link
The following section provides step-by-step instruction for generating a Restricted Link in OrgChart.
Before reading this section, please following the steps in both the Configuring a Link User and Whitelisting a Referrer Domain sections above.
Sign in to OrgChart.
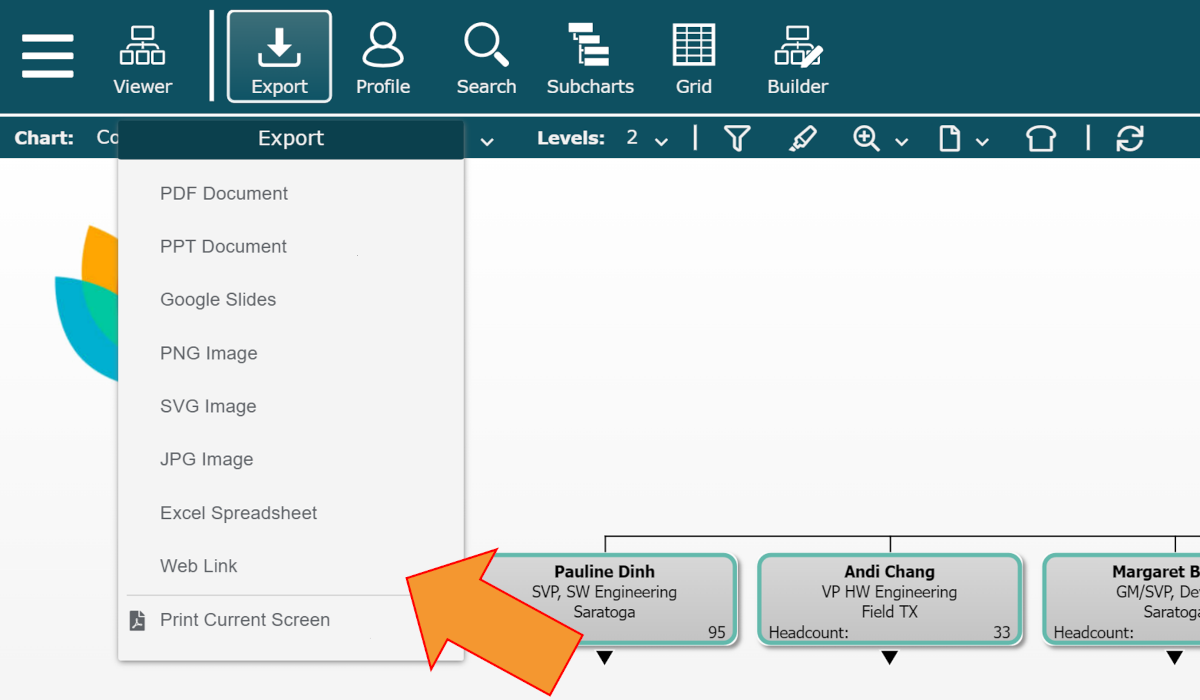
Click on the Export icon, and then select the Web Link option from the dropdown menu. The Web Publishing panel is displayed.
Select the Restricted Link radio button (under the Link Type heading).
Click on the UserID dropdown menu, and then select the Link User from the list.
Note
A Link User will not appear in this list, until at least one referrer domain has been whitelisted.
Select the mode (i.e., Viewer - Chart) in which to launch a Master Chart or Chart Document when using the Restricted Link. Reference the Web Publishing article for more information on launch modes.
Click on the Launch To dropdown menu, and then select the type of chart (i.e., Master Chart) to which the Restricted Link will launch.
Note
If you select Chart Document, please click on the Browse button to select the Chart Document to which the Restricted Link will launch.
Optionally, select a UI Profile from the UI Profile dropdown menu (under the Presentation heading). Reference the Account Settings: UI Profiles for more information on UI Profiles.
Note
If you have assigned the Restricted Link user a UI Profile via their Access Group, you do not need to select a UI profile for this step.
Optionally, you can click on the Configure UI profiles option to create a new profile, or a modify an existing one.
Optionally, click on the
 icon (under the Starting Point heading), and search the name of the employee who you would like to set as the Top Box of the chart when the link is accessed.
Optionally, click on the Levels dropdown to set how many levels of the chart are displayed when the link is accessed.
Note
Select the Chart Default option to display the number of levels selected in the Chart Settings: Presentation panel of the associated Master Chart.
Optionally, click on the View dropdown menu to select the View that is displayed when the link is accessed.
Optionally, check the iFrame checkbox to generate a Restricted Link in the iFrame format.
Click on the Generate Link (under the textbox in the Result section). The link is generated.
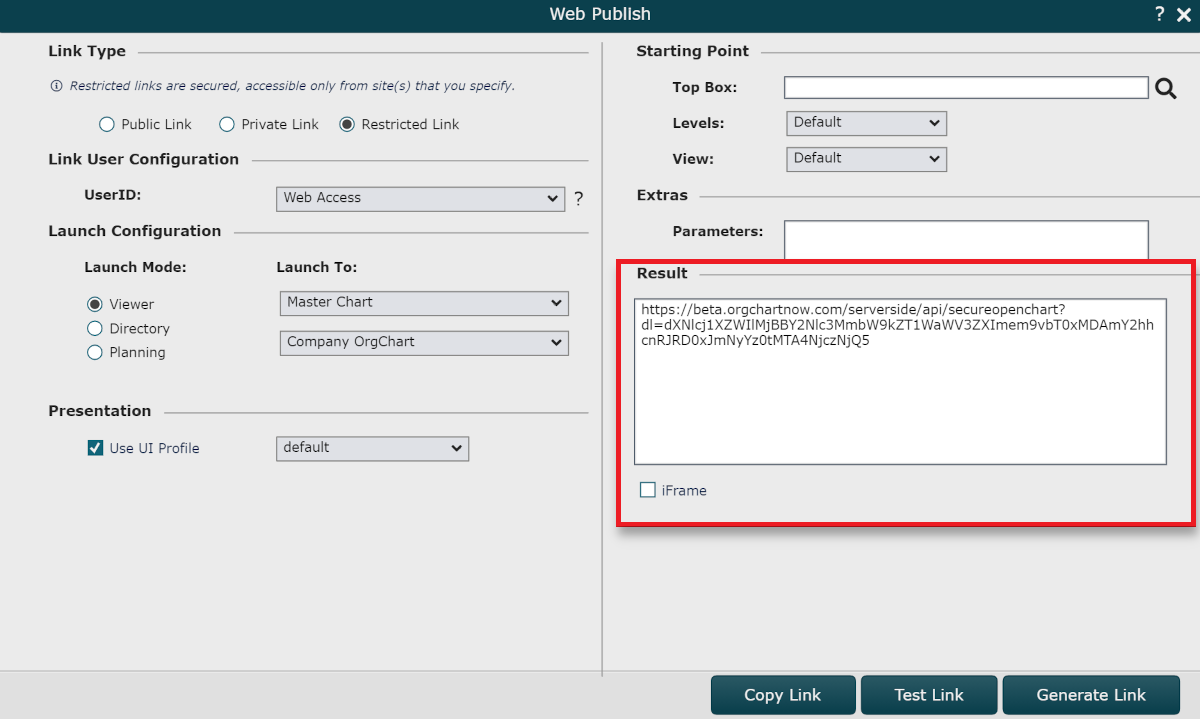
Optionally, click on Test Link option to view the contents of the link as it will appear for the end-user.
Note
Remember to whitelist the URL of the OrgChart server from which you are creating the link, in order to test the Restricted Link. Otherwise, you will receive a failure.
Troubleshooting a Restricted Link Failure
If you are receiving a "Failure" message when clicking on a Restricted Link, try the following troubleshooting techniques.
Remove Metadata from Link
Links that are sent via email, may contain metadata from your email service provider. To remove meta data, follow these steps:
Copy the link from the email.
Paste the link into a Notepad document.
Copy the link from the Notepad document.
Paste the link on your intranet or SharePoint site.
Verify the Domain Referrer
It is possible that the whitelisted domain referrer is different from the actual domain referrer sent to OrgChart to authenticate the web user. To Verify the domain referrer, follow these steps:
Click on the restricted link that you have embedded into your intranet or SharePoint site. The tab containing the "Failure" error is displayed.
Open the Developer Tools by clicking on CTRL + SHIFT + J (Windows/Linux) or Option + ⌘ + J (MacOS).
Click on the Console tab.
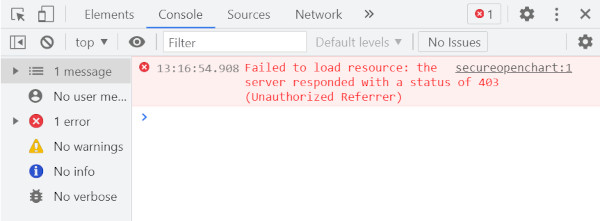
Type document.referrer, and then press ENTER on your keyboard. The Referrer Domain URL is displayed beneath the doccument.referrer command (as shown below).

Copy the domain referrer from the console.
Whitelist the newly copied domain referrer in the Account Settings: Authorization panel. See the Whitelisting a Referrer Domain section above for more information.