Append Table
Audience:
Audience: Administrators
Overview
OrgChart allows Administrator Users to override and/or supplement the data flowing in from their HRIS Connector using the Append Table feature.
Append Tables provide an easy and user-friendly solution for maintaining your org charts. Admin can add, suppress, and modify employee records, add additional fields, and upload excel files to manage any non-HRIS data directly in-app.
Setting Up an Append Table
The Append Table is available in the Append Data section of the Chart Settings: Source panel. The following section provides step-by-step instructions for setting up an Append Table.
Log in to OrgChart.
Click on the Mode Switcher icon in the Top Toolbar, and then select the Setup option. The Setup panel is displayed.
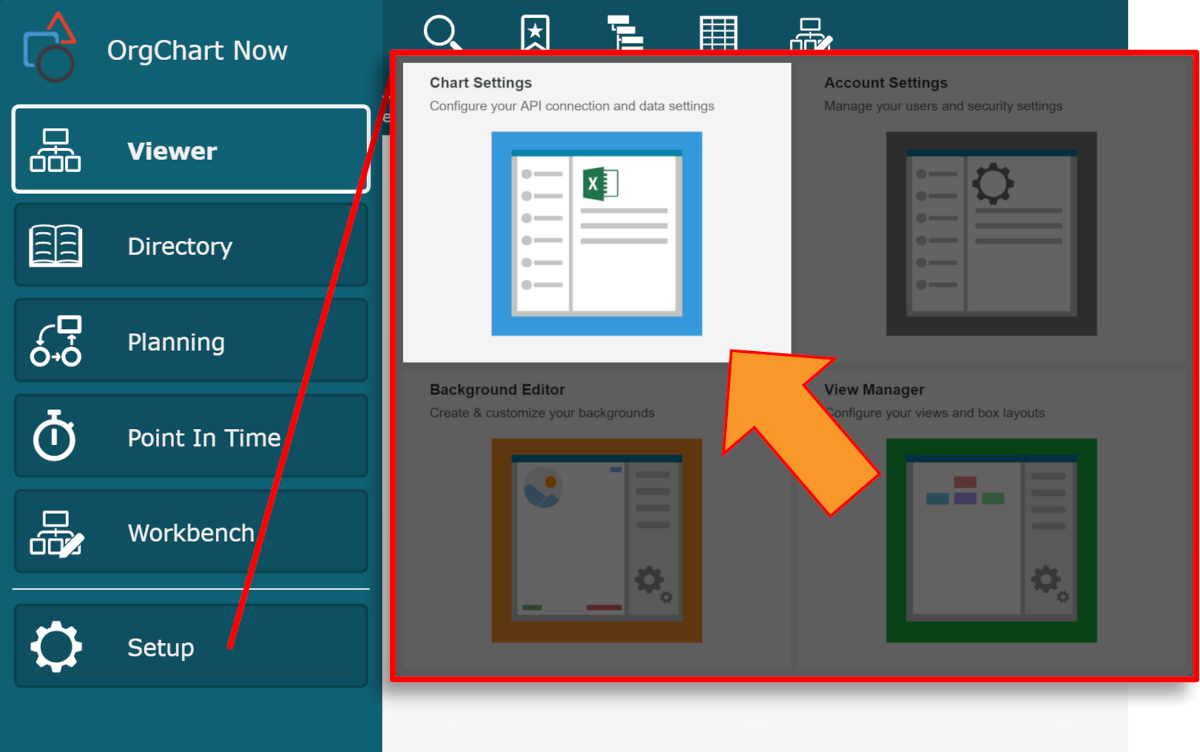
Click on the Chart Settings tile. The Source panel is displayed.
Click on the
 icon (under the Append Data heading). The list of Append Data Sources is displayed.
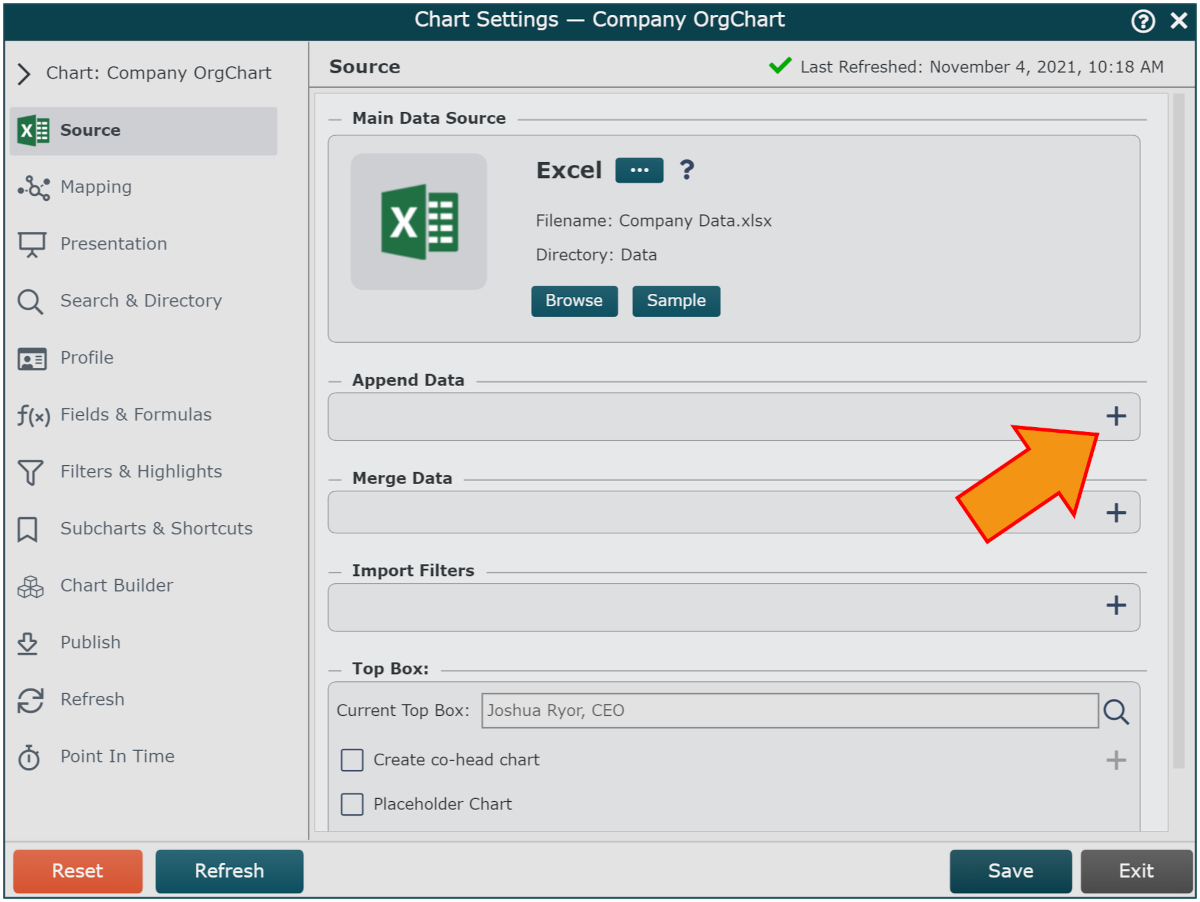
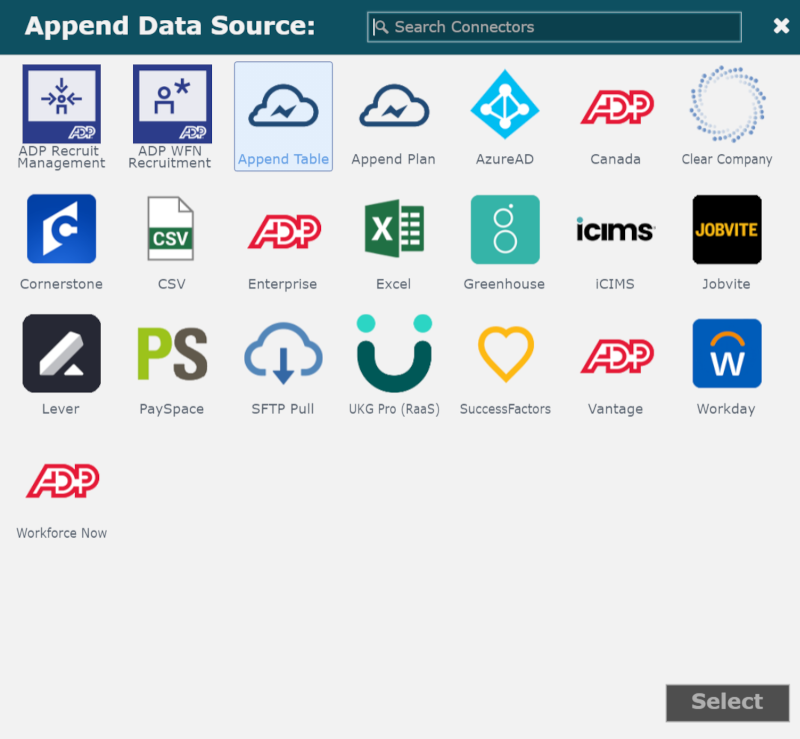
Click on the Append Table icon, and then click Select.
Click on the Click here to create a table hyperlink. The Table Manager panel is displayed.
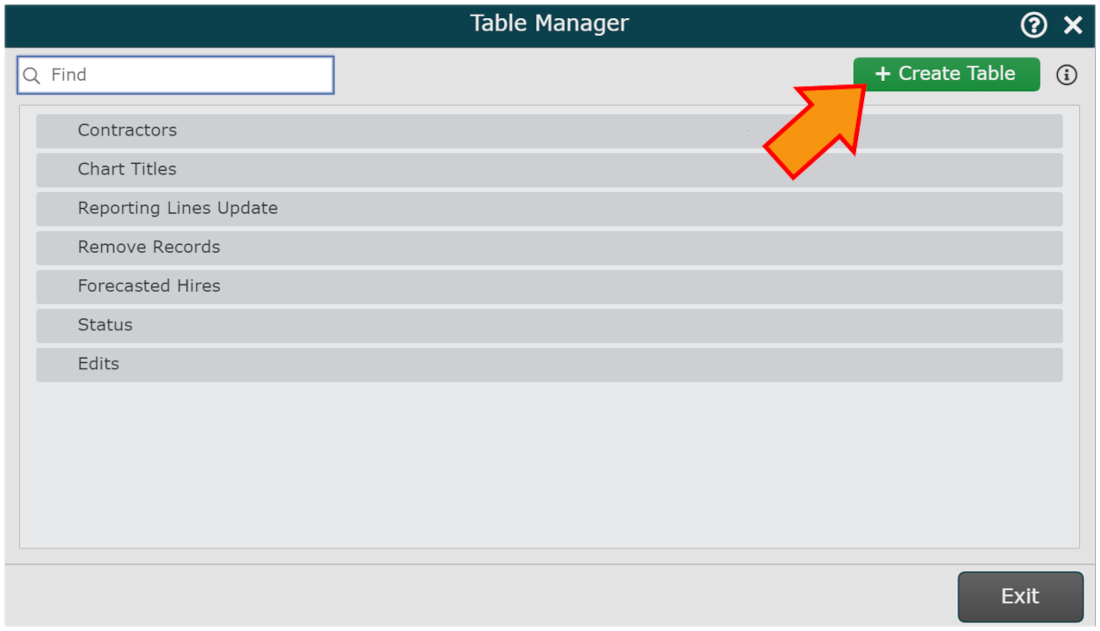
Click on the green + Create Table icon (in the top right corner) to create an Append Table. You will be prompted to name the new table.
Enter a name for the Append Table in the Append Table Name text box, and then click Save.
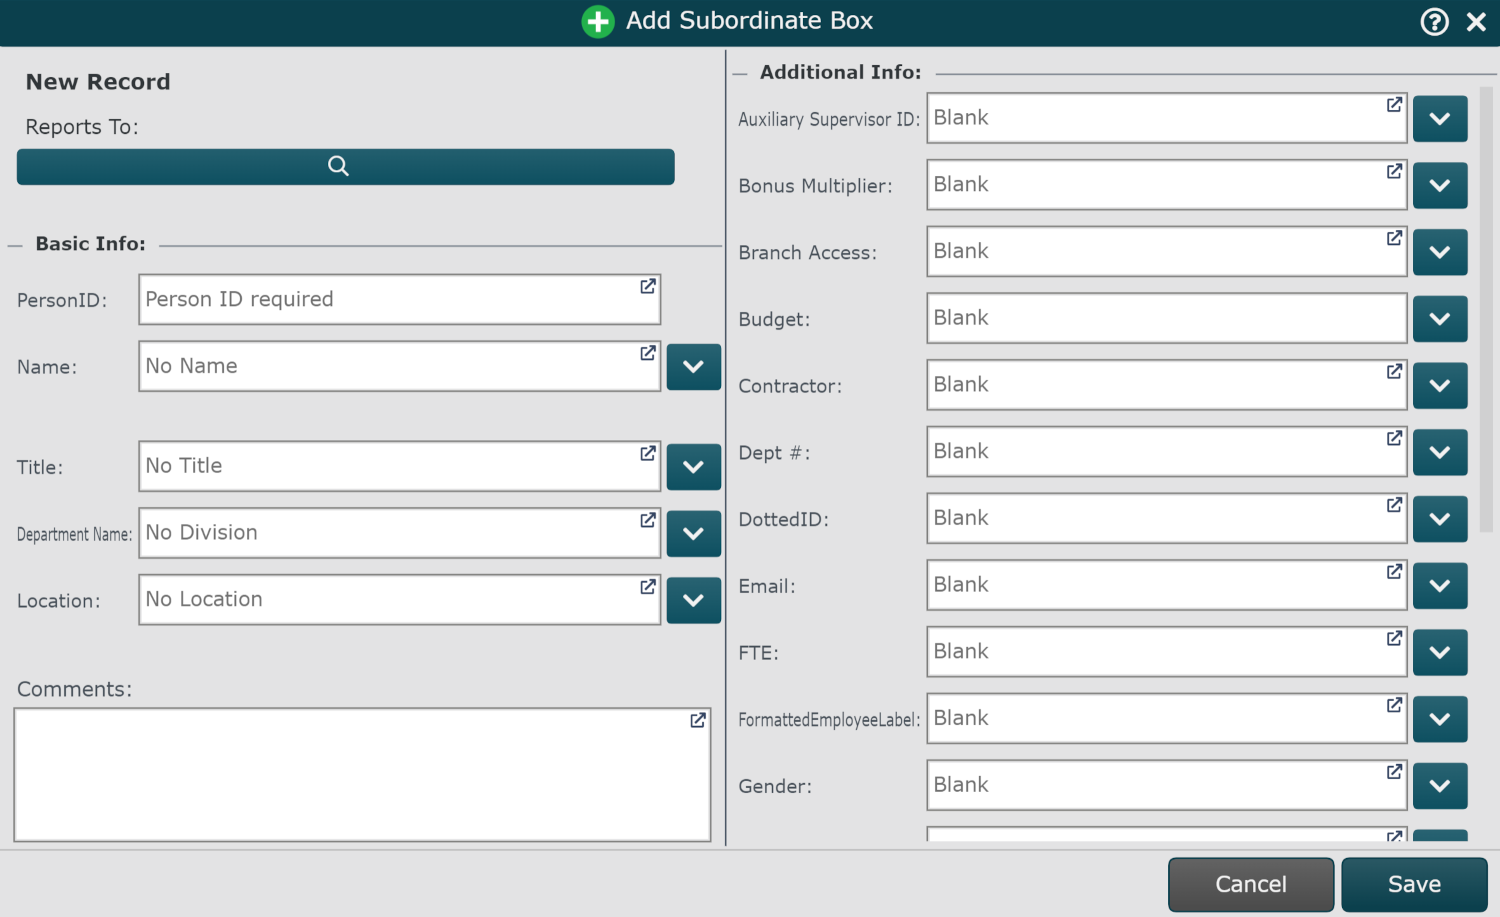
The Append Table Editor is displayed. The following options are available on the left side of the panel:
Click on an icon to begin. A panel associated with the chosen action is displayed.
Note
Note: If you click on Edit, Move, or Suppress, you will be prompted to search for the employee record you'd like to modify. Once selected, a panel associated with the chosen action is displayed.
Enter the desired values in each field. Optionally, use the
 (to the right of each field) to select field values from your source data.
Note
Note: Ensure that the following required fields are properly populated, so that the record appears on the chart:
Reports To
PersonID
Name
When you are finished click Add, Change, Move, or Suppress to register your modifications.
Note
Optionally, mouse over an Append Table entry, and then click on the
 icon to edit it, or the
  icon to delete it.
Click Exit when you are finished.
Select your Append Table from the Append Table dropdown (under the Append Table heading).
Click Save and Refresh.


Adding a New Field
Administrators can use the Append Table to add new fields to their data set directly in OrgChart. The following section provides instructions for adding a new field to your data.
Open the Append table to which you would like to add the new field, and then click on the
 icon in the top right corner.
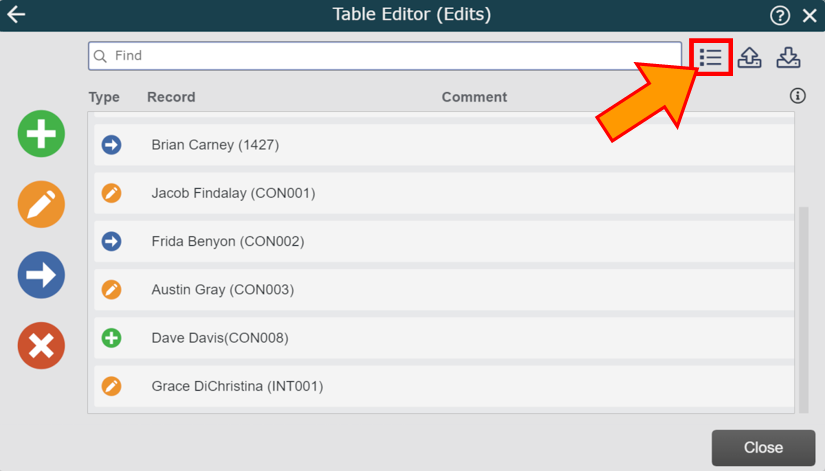
Click on the green + Add Field button.
Enter a name for the field in the highlighted textbox.
Optionally, repeat steps 2 and 3 to add multiple fields.
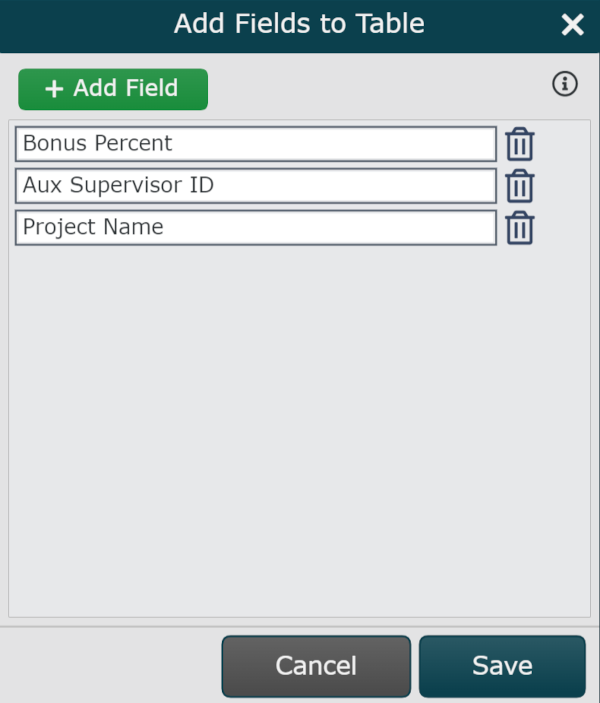
Click on Save. The new fields are available to edit in each existing append entry, and in any future append entries for this table.
Note
Change the field type, or modify other field properties in the Chart Settings: Fields & Formulas panel.
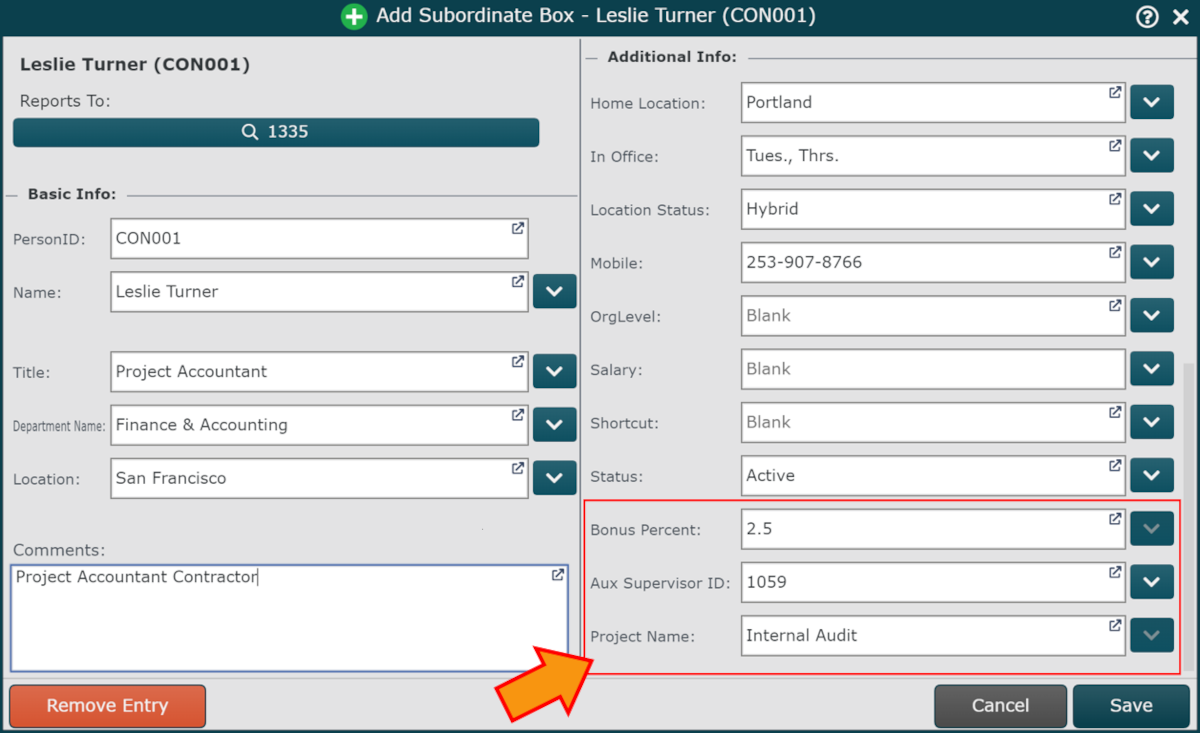
Important
If you are adding an Auxiliary Supervisor ID field (as seen above), you still must configure the mapping in the Chart Settings: Mapping panel. Reference the Auxiliary Reporting article for more information.
Additional Append Table Options
The following options are available when accessing an Append Table from the Chart Settings: Source panel.
Append Table dropdown | Select an Append Table from the list of saved tables. |
 | Edit the Append Table selected from the Append Table dropdown. |
 | Click to open the Table Manager, and view a list of the saved Append Tables in your account. |
The following options are available when using the Table Manager.
+Create Table | Add a new, untitled Append Table |
| Modify the selected Append Table |
 | Rename the selected Append Table |
| Delete the selected Append Table |
The following options are available when editing an Append Table with the Table Editor:
| Add new fields that don't exist in your current data. |
 | Upload an Append Table. NoteAdmins can upload Append Tables from other accounts (i.e. upload an Append Table used in your production account to your Sandbox account), or upload Excel files and convert them into Append Table records, so that any non-HRIS data can be managed in-app. Reference the Managing Append Tables article for more information. |
 | Download an Append Table. |