Box Layout Editor
Audience:
Audience: Administrators & Read/Write Users
Overview
Administrators and Read/Write users can edit Box Styles using the Box Layout Editor .The following article provides a schema for navigating the Box Layout Editor.
Accessing the Box Layout Editor
Click on the Mode Switcher icon in the Top Toolbar, and then select the Setup option. The Setup panel is displayed.
Click on the View Manager tile. The View Manager user interface is displayed.
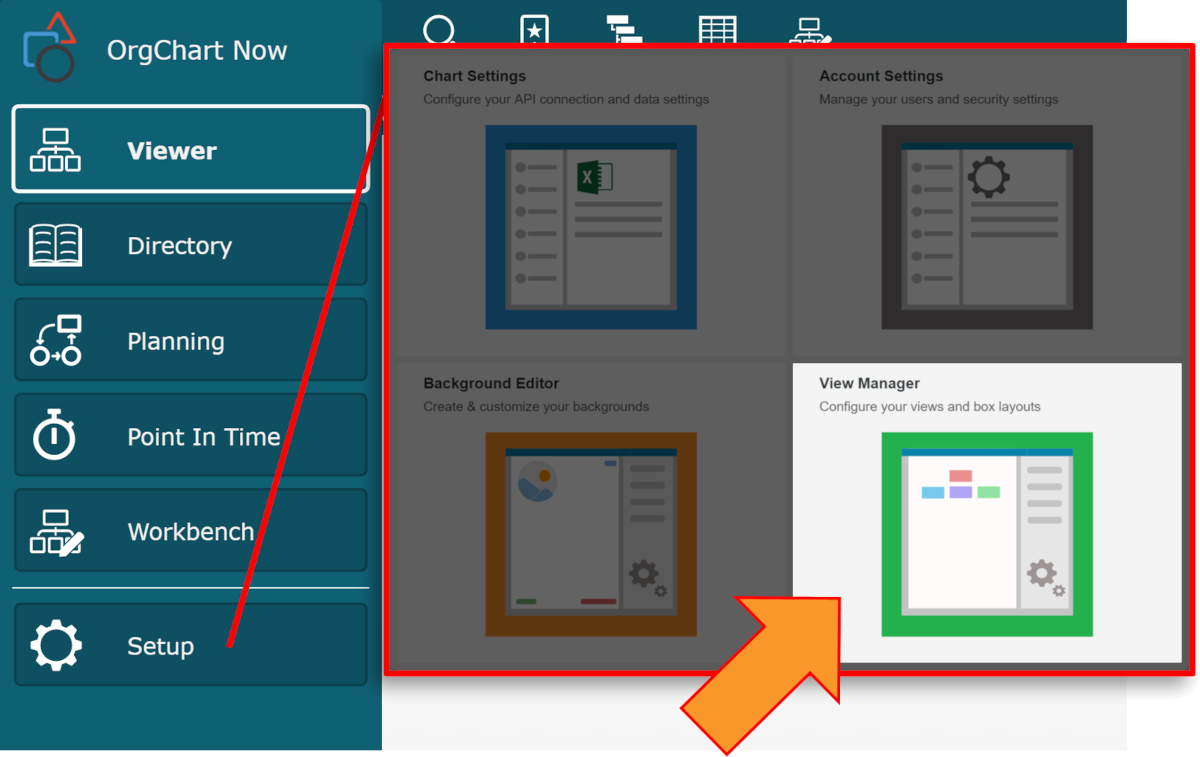
Click on the Box Styles button. The Box Styles panel is displayed to the right of the screen.
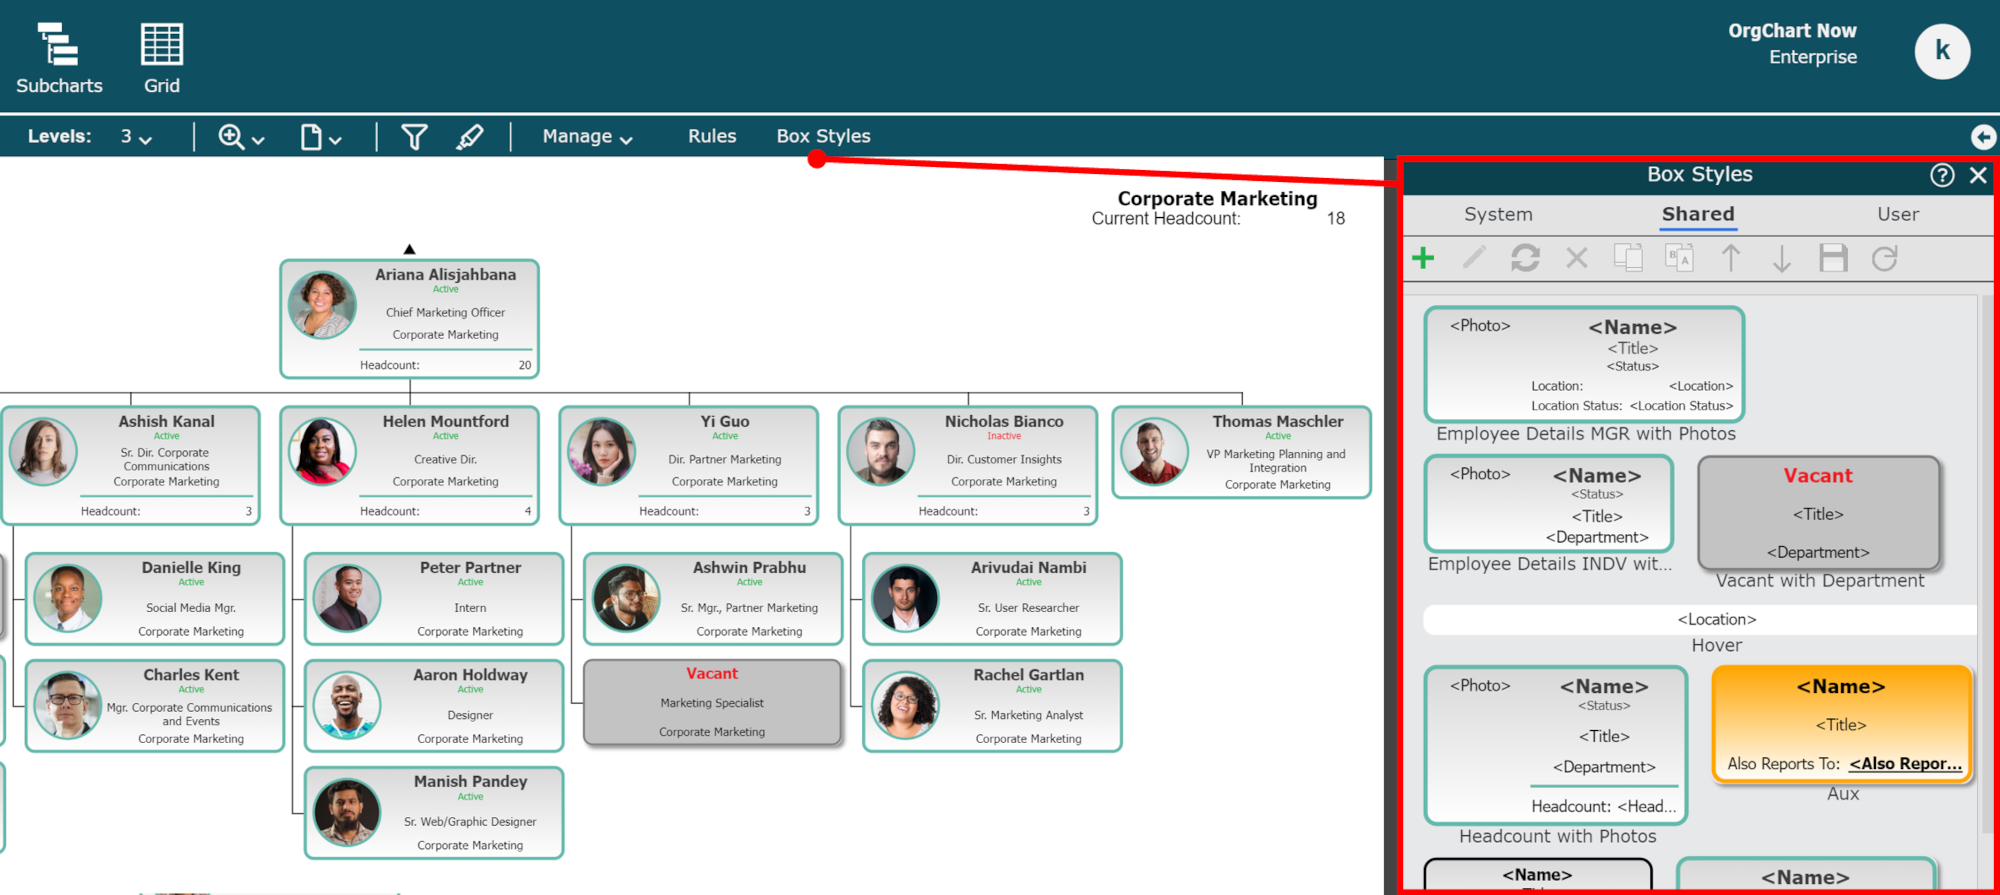
Right-click on an existing box style, and then select the  Edit icon from the dropdown menu.
Adding Fields to a Box Style
There are many tools available for Administrators and Read/Write users to edit and customize a Box Style.
Before you stylize a box, you may want to add additional or alternative fields to display.
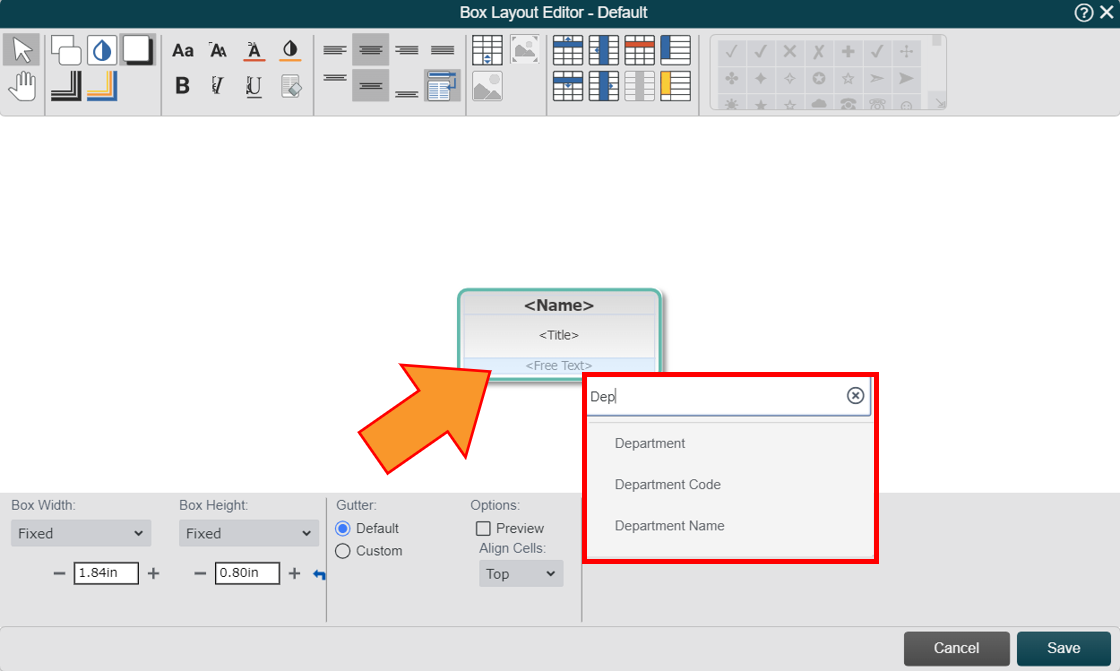
To display additional fields, use the Row and Column tools to add more cells. Then, right click on a cell, and select the field or formula you'd like to display.
To display an alternative field, right click on the cell containing the field or formula you'd like to replace, and then select a different one from the dropdown menu.
Editing a Box Style
The following tools are available in the Box Layout Editor top toolbar:

Tools
 | Click to select a cell. Right-click within a cell to search for a field. |
 | Click and drag to pan to different areas of the screen. |
Box
 | Change the shape of the selected box. |
 | Change the fill color of the selected box. |
 | Turn box shadow effect on/off. |
 | Change the border thickness and style for selected box. |
 | Change the border color for the selected box. |
Text
The following options pertain to the text within the selected cell(s).
 | Change the font style. |
 | Change the font size. |
 | Change the text color. |
 | Change the cell color. |
 | Bold text. |
 | Italicize text. |
 | Underline text. |
 | Configure the field label display settings.
|
Alignment
The following options pertain to the text within the selected cell(s).
 | Align text to the top. |
 | Align text to the middle. |
 | Align text to the bottom. |
 | Make all cell content visible by displaying it on multiple lines. |
 | Align text to the left. |
 | Align text to the middle. |
 | Align text to the right. |
 | Align text to both the right and left margins. Use this option when displaying a field label and a field value within the same cell. |
Cell
The following options pertain to the
 | Increase row height to fill remaining vertical space in the box. |
 | Set the width and height of the image. |
 | Apply a mask to the selected image.
|
Rows & Columns
The following options pertain the selected cell(s).
 | Insert cell above |
 | Insert column to the left |
 | Delete cell |
 | Merge cells |
 | Insert row below |
 | Insert column to the right |
 | Delete column |
 | Unmerge cells |
Symbols
Add Symbols to boxes to signify an employee's status. For example, use the airplane symbol to distinguish an employee as a flight risk.
To add Symbols to a box:
Add a new cell to the box. A Free Text field is added by default.
Double-click on the Free Text cell. The Symbol Picker (shown below) is illuminated.
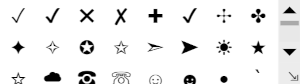
Click on a symbol to add it to the Free Text cell.

Close Editor
Save | Apply format changes to the selected Box Style. |
Cancel | Exit Box Layout Editor without preserving any changes. |
Box Layout Editor: Bottom Tool Bar

Apply Changes to: | Select the scope to which you will apply the changes made while editing in the selected box.
NoteNote: Apply Changes to: is only available after right clicking on an existing employee record within the chart, and then selecting the Box Properties from the dropdown menu. This option is NOT available when creating a new box style, or editing an existing one from the Shared Box Styles library. |
Box Width | Set the width of the box.
|
Box Height | Set the height of the box.
|
Gutter | Set the amount of space between the edge of the cells within a box and the box border.
|
Options | Check to preview the box style layout with source data. |
Align Cells | Set the positioning of the cells in the current Box Style.
|
Layout Type | Set the type of box.
|