Paycom Connector Setup
Audience
Audience: Administrators
Overview
OrgChart can pull employee data directly from Paycom. The following article provides step-by-step instructions for setting up a Paycom Connector in OrgChart.
Setting Up a Connector
Log in to OrgChart.
Click on the Mode Switcher icon in the Top Toolbar, and then select the Setup option. The Setup panel is displayed.
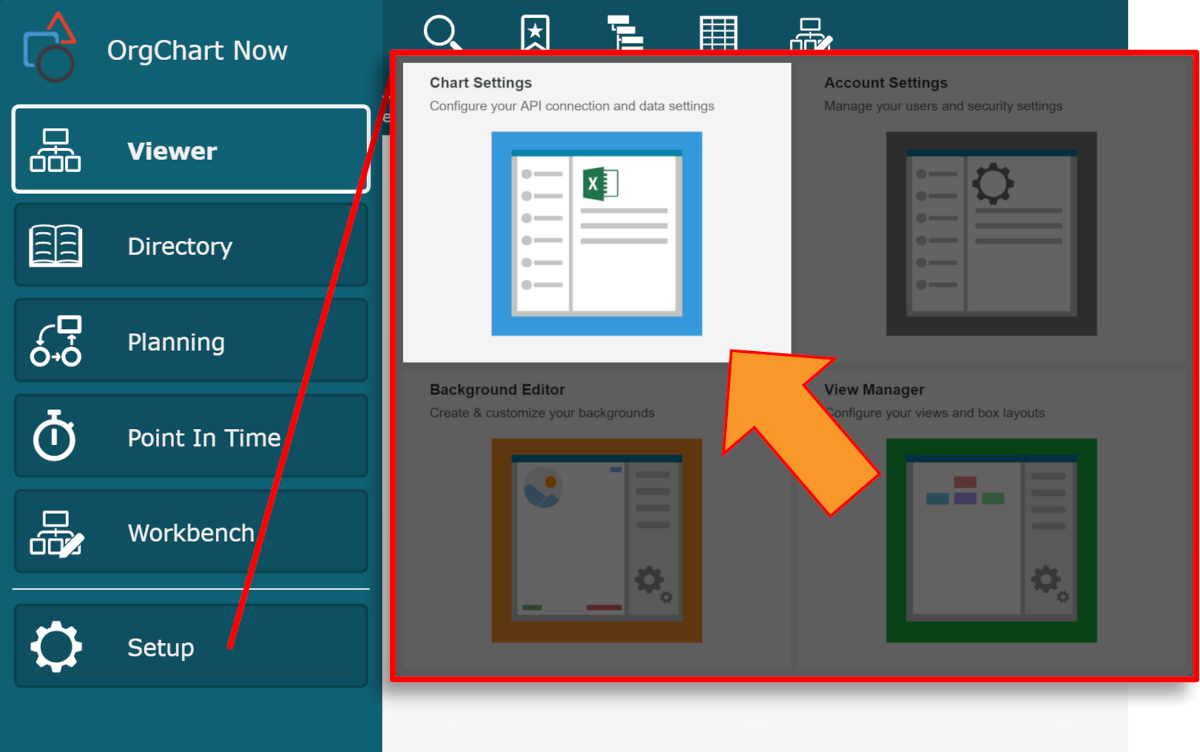
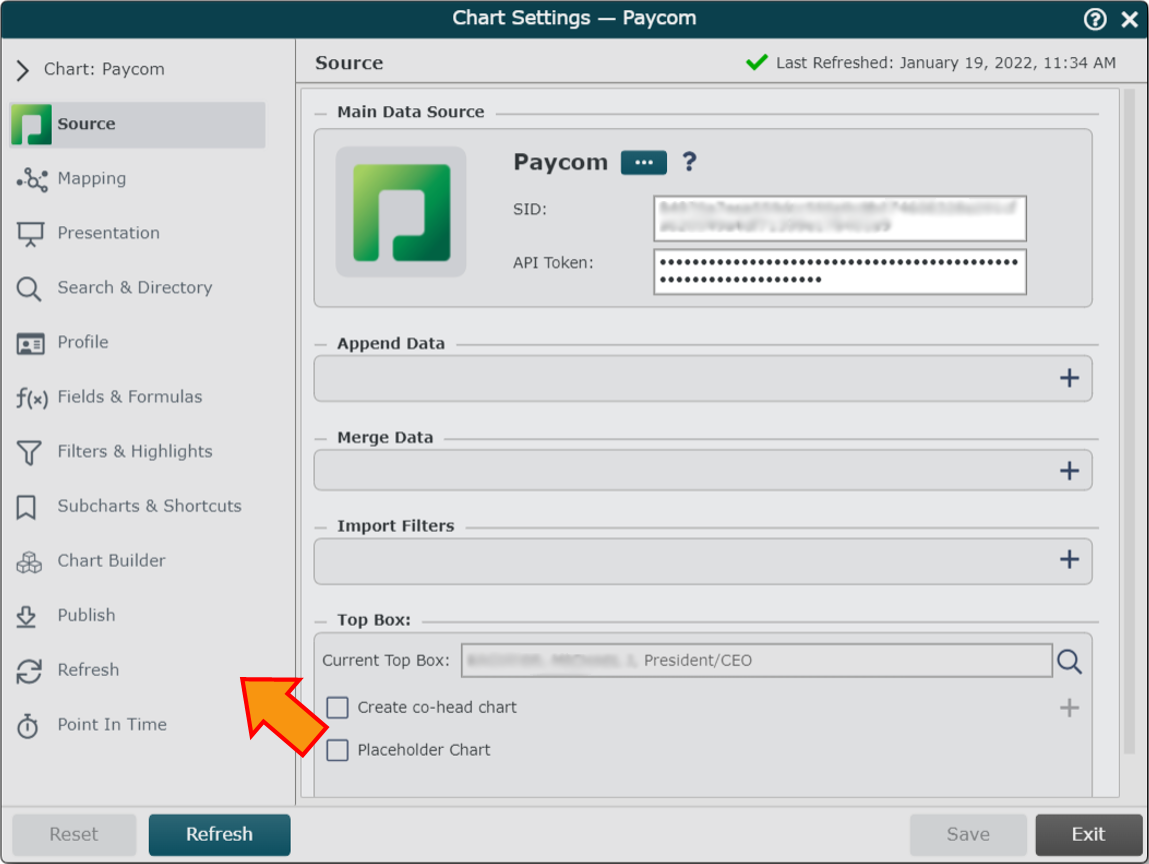
Click on the Chart Settings tile. The Source panel is displayed.
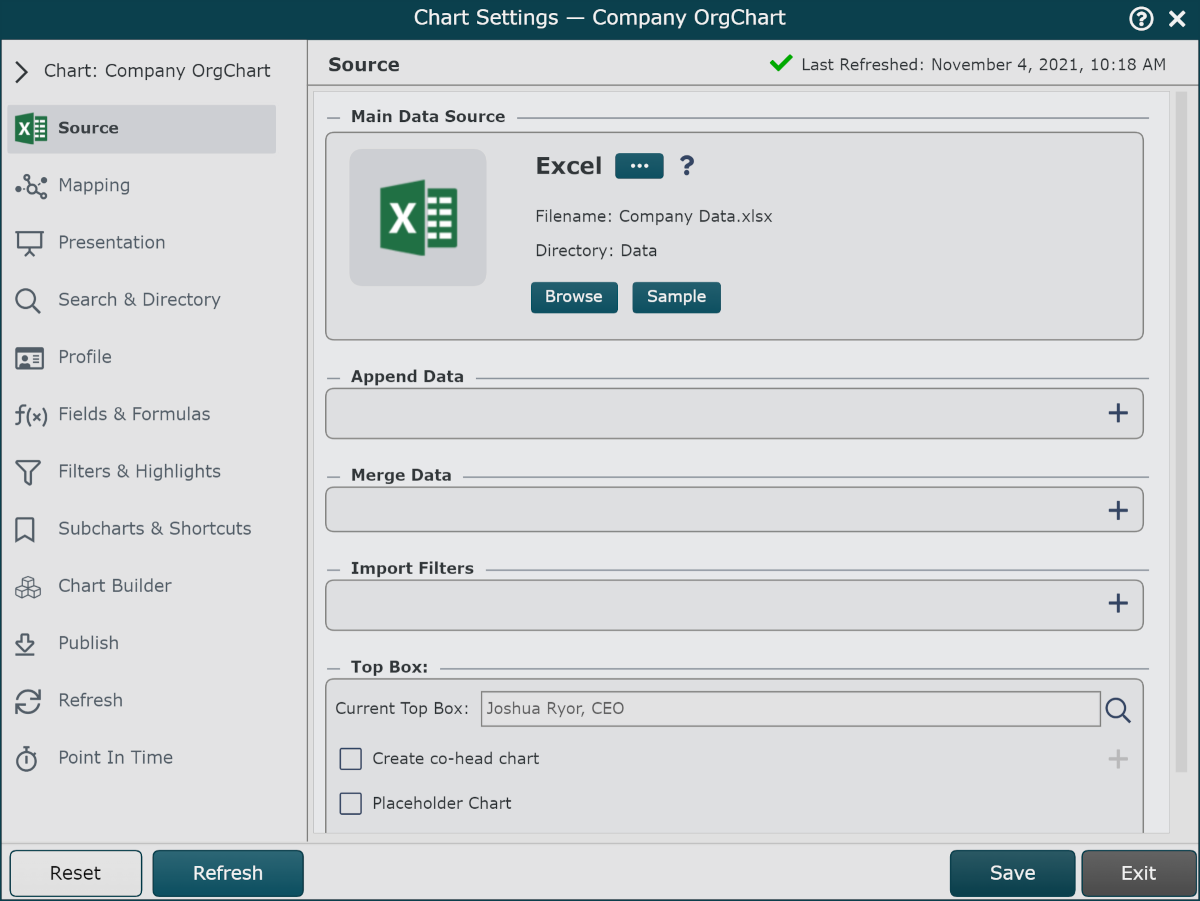
Click on the
 under the Main Data Source heading. The list of Main Data Source connectors is displayed.
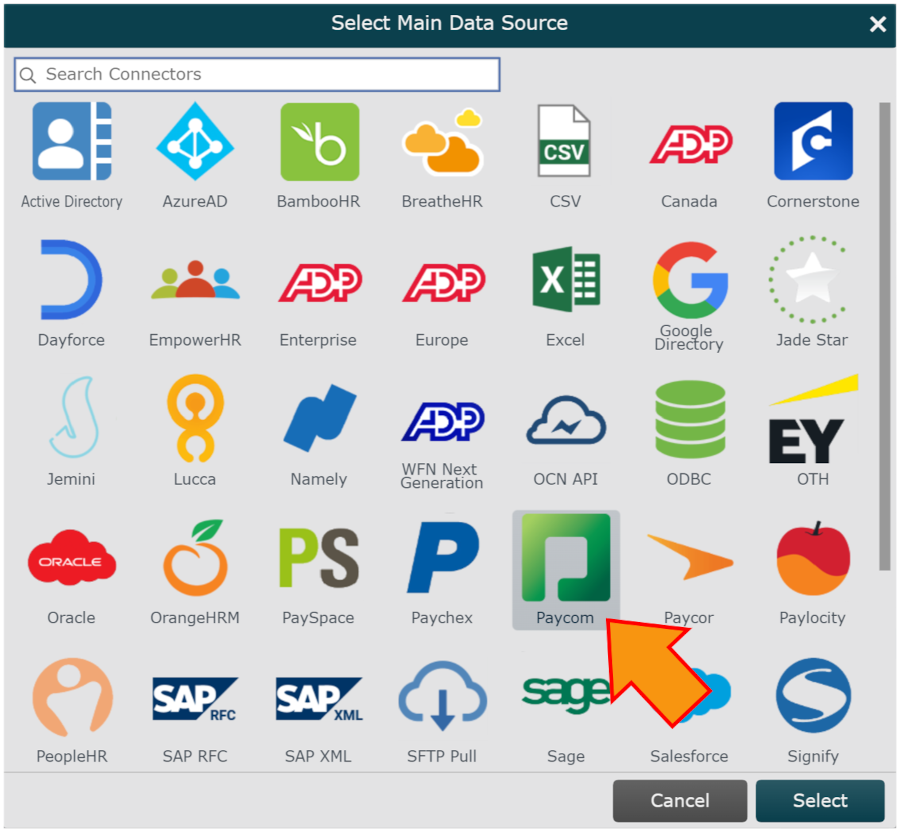
Click on Paycom icon, and then click on Select.
Enter the following information into the corresponding text boxes:
SID - Alpha-numeric string generated during the Paycom configuration process.
Token -Alpha-numeric string generated during the Paycom configuration process.
Optionally, click on the Additional Fields dropdown menu, and then select additional and custom fields you would like to pull into OrgChart.
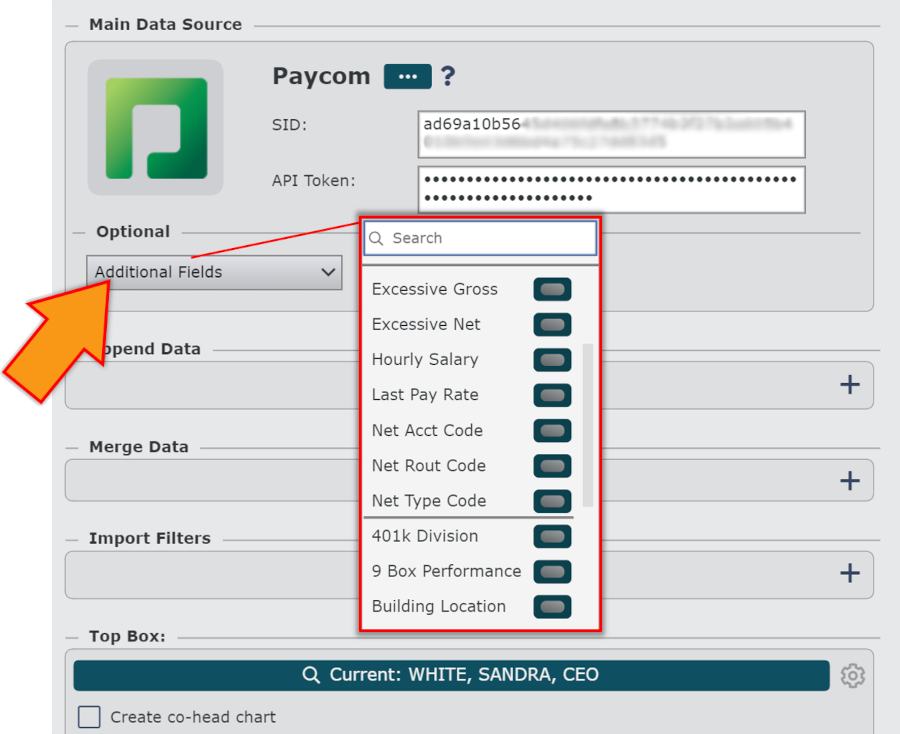
Note
Custom fields are listed below the separator in the Additional Fields dropdown menu.
To pull custom fields, ensure that you have enabled custom fields in your API settings. Contact your Paycom administrator for more information.
Click Save, and then configure a scheduled refresh.
Configuring a Scheduled Refresh
In order for OrgChart to pull your Paycom data, you must configure a scheduled refresh. The following section provides step-by-step instructions for configuring a scheduled refresh:
Click on the Refresh tab in the left side menu of the Chart Settings panel.
Click on the Frequency dropdown menu (under the Data Refresh Options heading), and then select the Daily option.
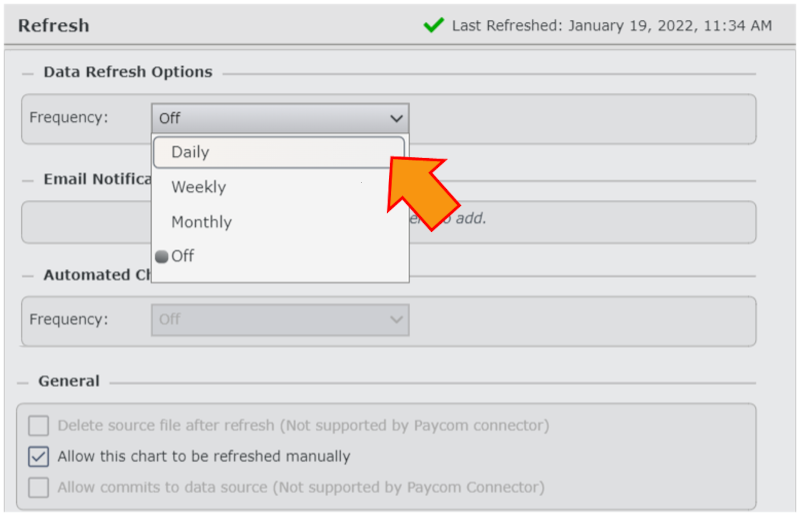
Optionally, click on the Time (GMT) dropdown menu, and then select the time for the refresh to occur.
Important
The scheduled refresh time is listed in GMT (Greenwich Mean Time).
Click on Save.