Creating Shortcuts
Audience:
Audience: Administrators
Overview
Shortcuts allow users to jump to specific locations within an OrgChart. This is useful to quickly navigate to a chart "hot spot," or a branch that is frequently viewed by end-users.
This article provides step-by-step instructions for configuring Shortcuts. For this example, we will merge a an Excel file containing a Shortcut field into your account. If you are importing a custom Shortcut field from the main data source, skip to step 14).
Important
Enable Shortcuts in the UI Profile affiliated with your Access Group, in order to access this feature.
Creating Shortcuts in Your Data
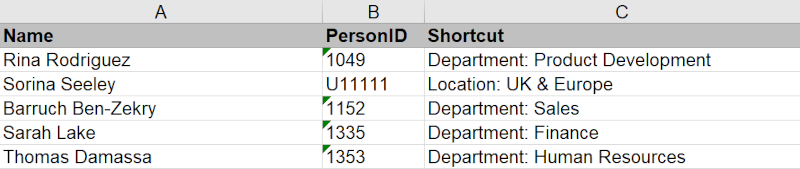
Create an Excel file, which includes at least the following columns:
PersonID
Name
Shortcut
Important
Ensure that your flat file is formatted correctly. Reference the Flat File Prep article for more information.
For instructions on how to merge Excel data into your account, reference the Merge Data Connectors article.
Note
SupervisorID is not a necessary column here, are you are not adding records to the chart, but rather updating existing records. Thus, the hierarchy already exists and does not need to be included in the Merge file.
Populate the Excel file, using the Name and PersonID columns to verify that you are creating a Shortcut using the correct employee record.
Optionally, if you want to create separate headings in your shortcuts menu, include the heading you want to use, followed by a :, and then the value you would like displayed.
Save the Excel file.
In OrgChart, Click on the Mode Switcher icon in the Top Toolbar, and then select the Setup option. The Setup panel is displayed.
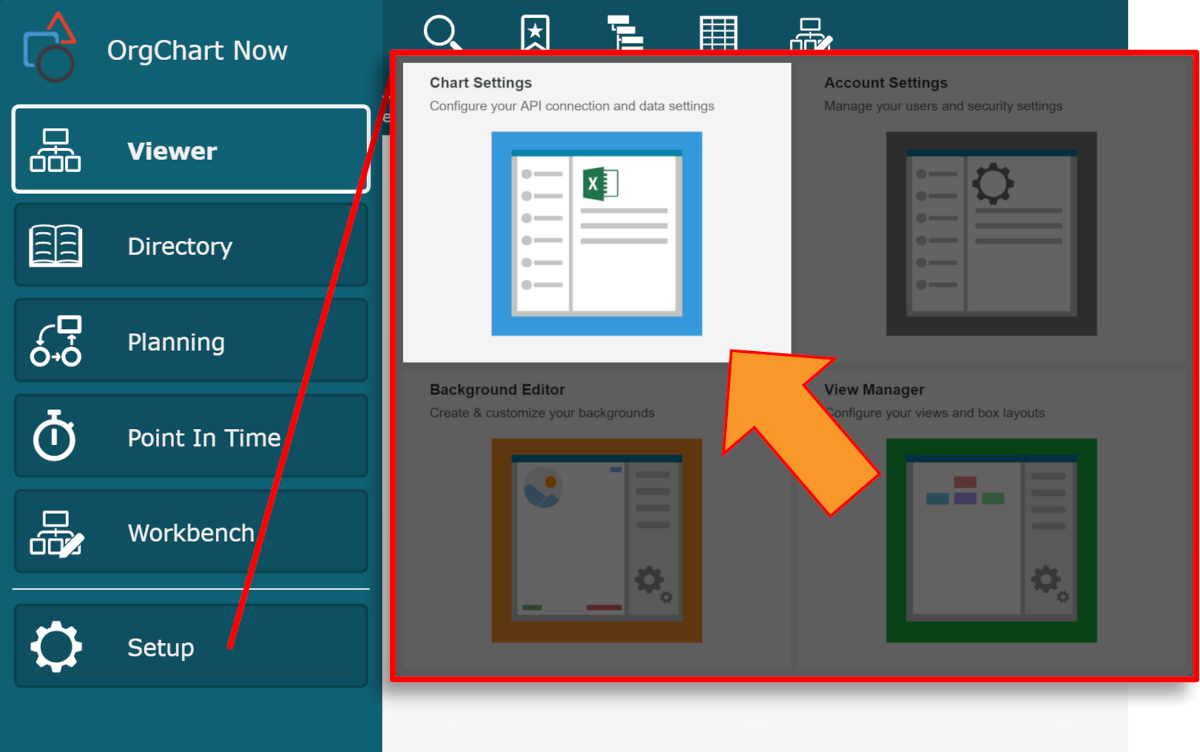
Click on the Chart Settings tile. The Source panel is displayed.
Click on the
 icon (under the Merge Data heading) to add a Merge Data source.
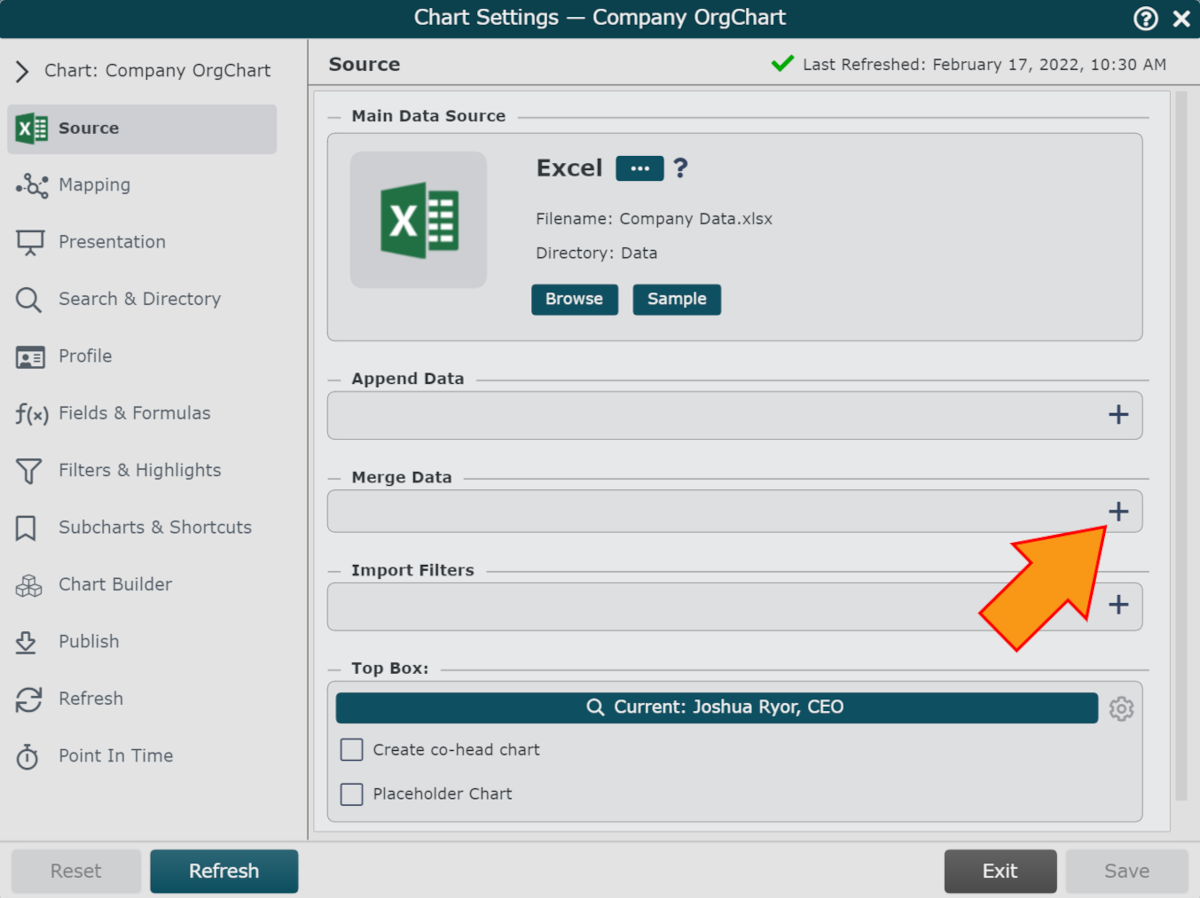
Click on the Excel icon, and then click on Select. The Merge Data source is added to the Source panel.
Click on the Browse button (under the newly added Merge Data source). The File Manager is displayed.

Click on the Data directory (on the left).
Click on the
 icon (in the top right corner of the File Manager).
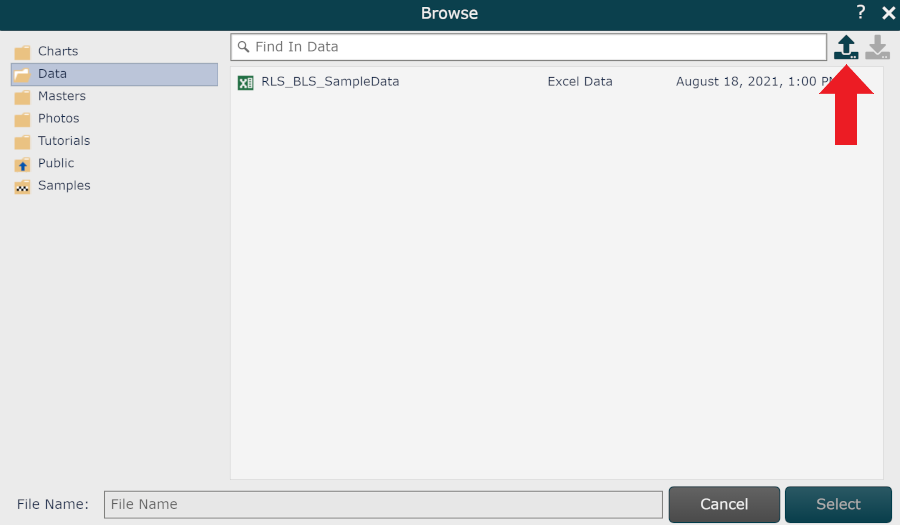
Search for and select the Excel file on your local computer, and then click on Open. The file is loaded into the Data directory in the File Manager.
Click on the newly added file, and then click on Select.
Click on Refresh.
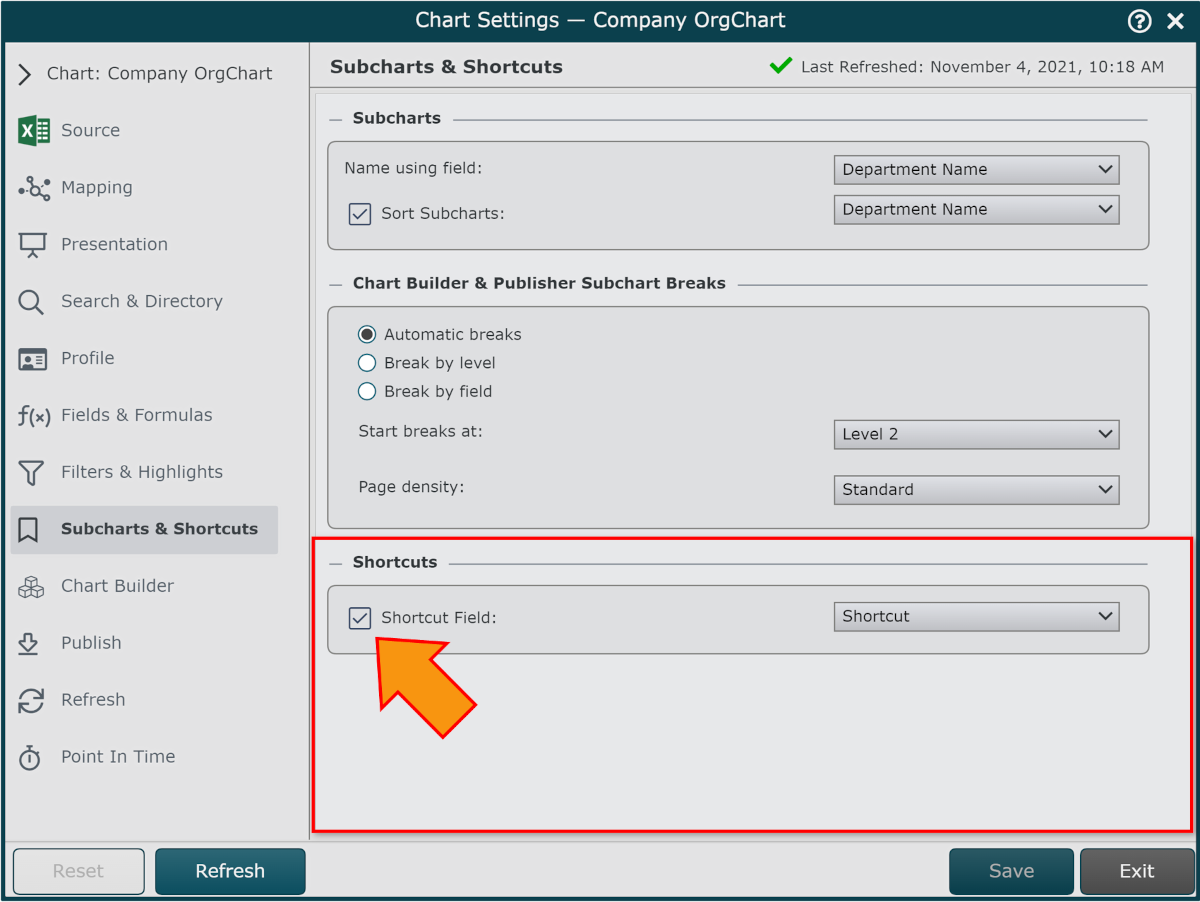
Click on the Subcharts & Shortcuts tab in the left side menu.
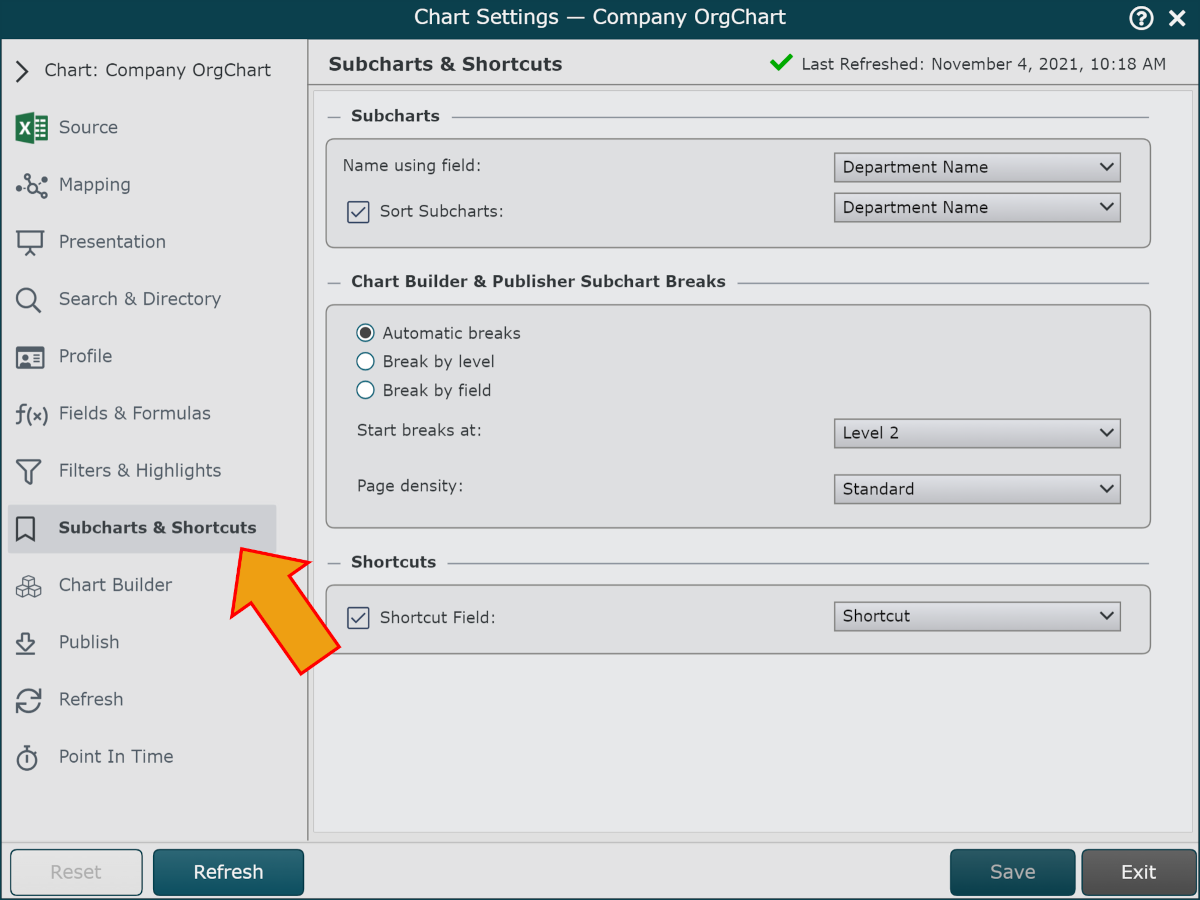
Check Shortcut Field box, and then select Shortcut from the dropdown menu.
Click on Save, Refresh, and then Exit.
In Viewer mode (with Shortcuts enabled in your UI Profile), click on the Shortcuts icon.
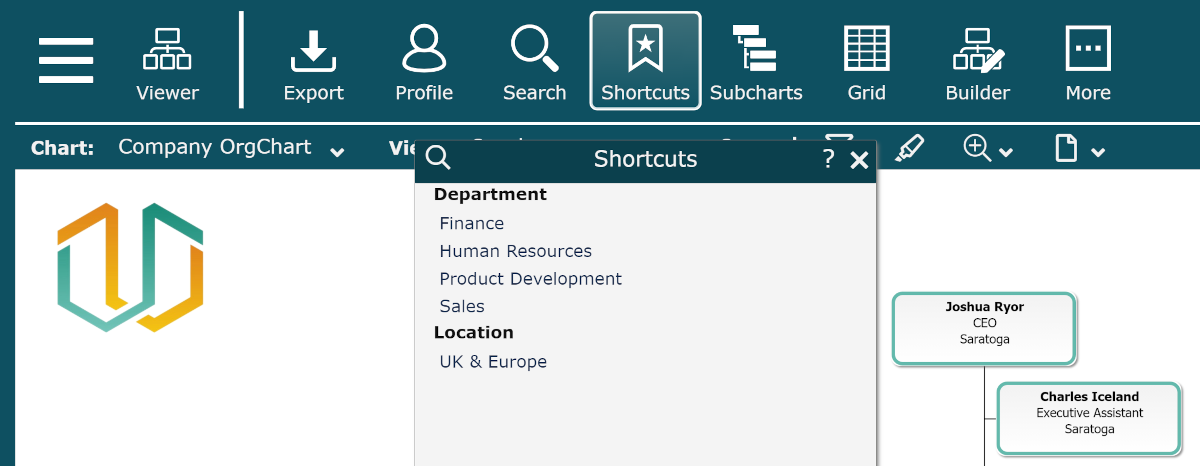
Click on a Shortcut to jump to employee record associated with this Shortcut.