Not In Example
Audience:
Audience: Administrators Edition: Enterprise
Overview
Conditional Row Level Security allows Administrators to restrict users access row-by-row based on a defined set of criteria.
For example, you can restrict employee records from displaying location status when the location of a record is not in a defined list of values.
The following article provides step-by-step instructions for configuring a Conditional RLS profile using the Not In rule type.
Configuring a 'Not In' RLS Profile
Log in to OrgChart.
Click on the Mode Switcher icon in the Top Toolbar, and then select the Setup option. The Setup panel is displayed.
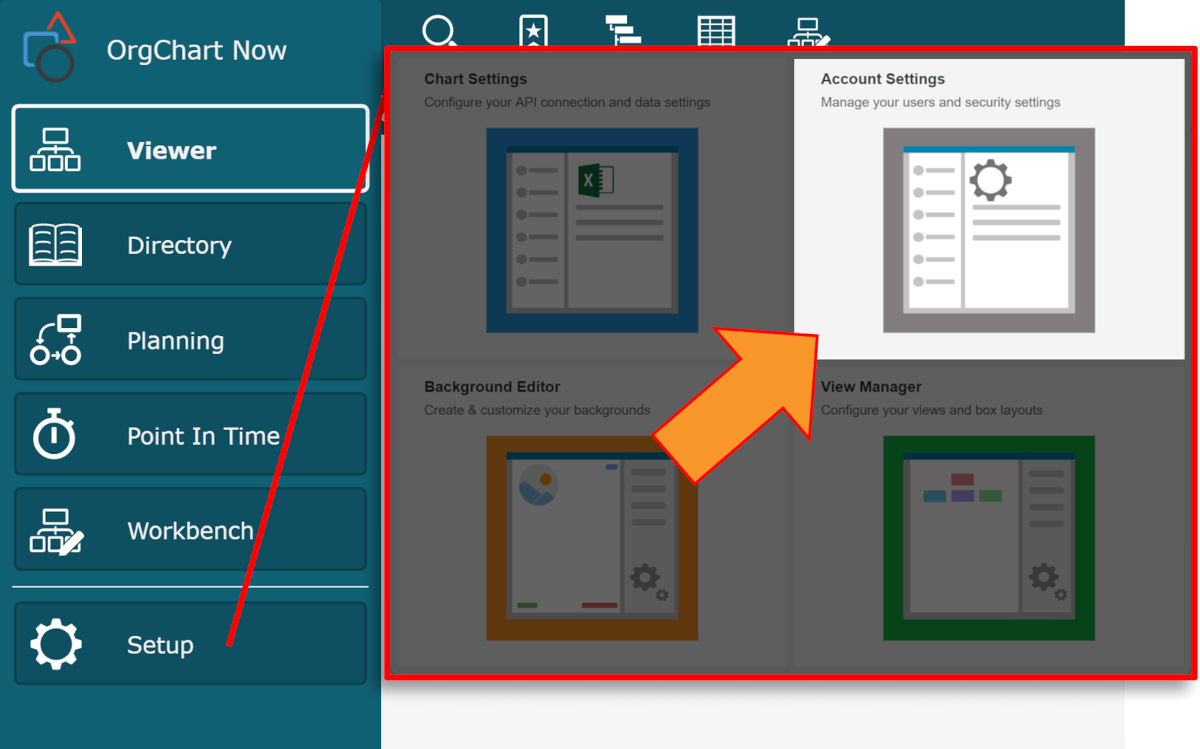
Click on the Account Settings tile, and then click on the Security tab in the left side menu.
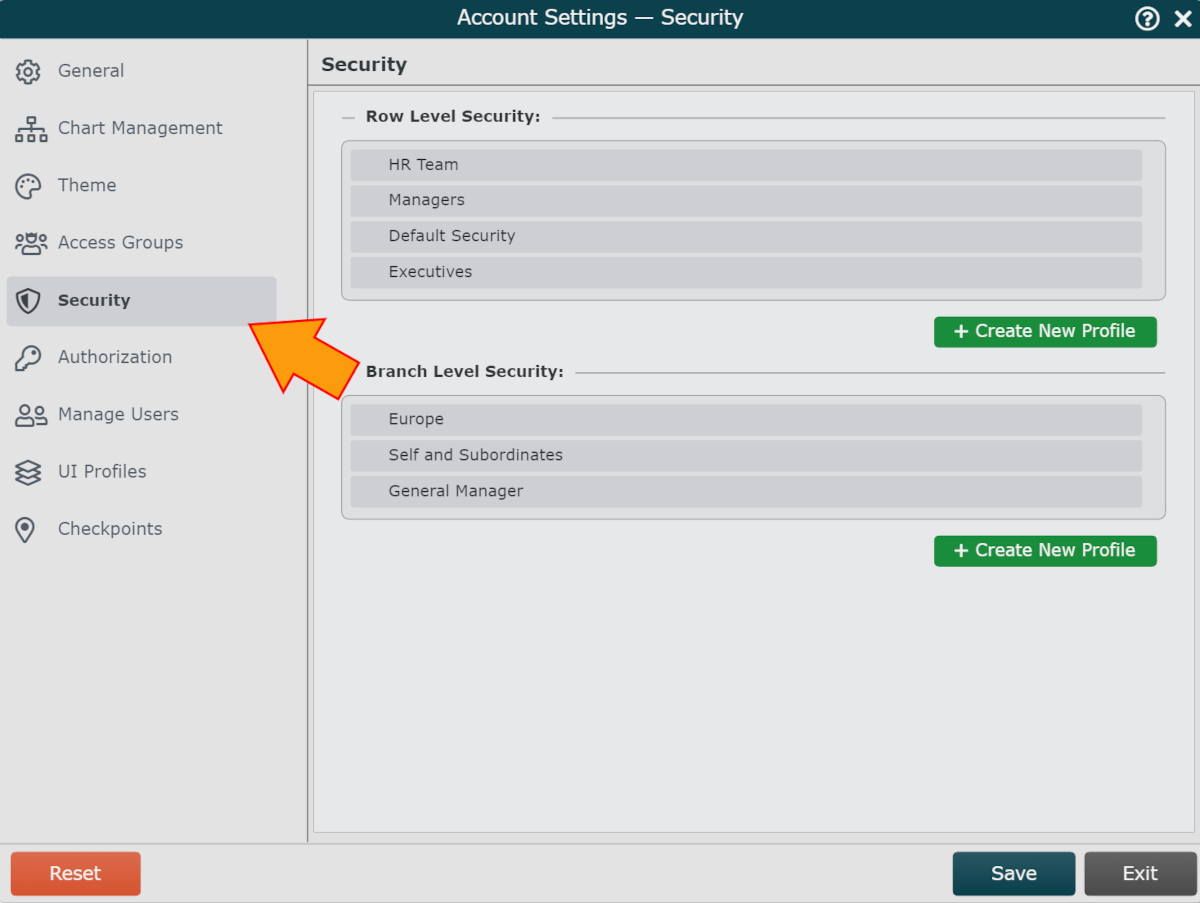
Click on the Create New Profile button (under the Row Level Security heading). The Security Configuration panel is displayed.
Enter a name for the profile in the Name text box.
Optionally, enter a description of the RLS profile into the Description text box.
Click on the
 icon (to the right of the Security Rules heading). Conditional Rule 1 is added to the Security Rule column.
Click on the
icon (to the right of the Definitions heading). The Conditional Definition Editor panel is displayed.Click on the Rule Type dropdown menu, and then select the Not In option.
Click on the
icon (to the right of the Field Value Criteria heading).Select a Field from the Field dropdown menu.
Select a Value from the Value dropdown menu.
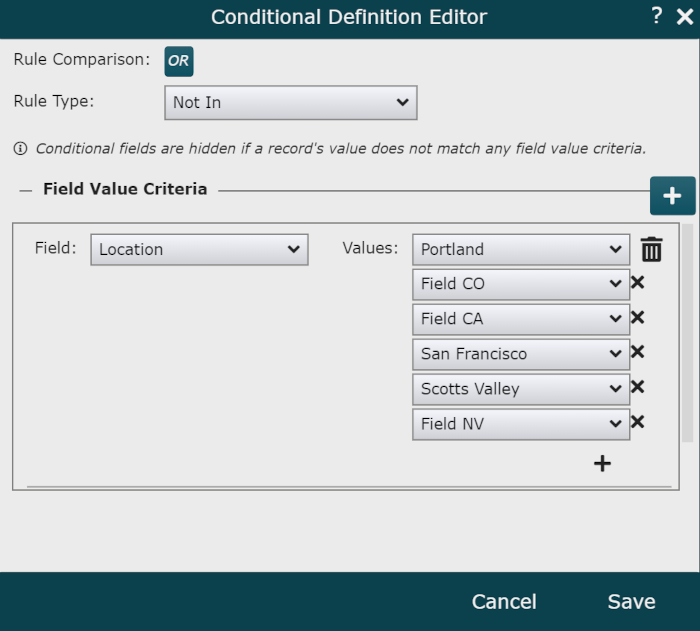
Optionally, click on the
 to select any additional Values from the Value dropdown menu.
Click Save. The conditional definition is displayed in the Definition column.
Click on the
icon to the right of the Fields heading, and then select a Field from the dropdown menu.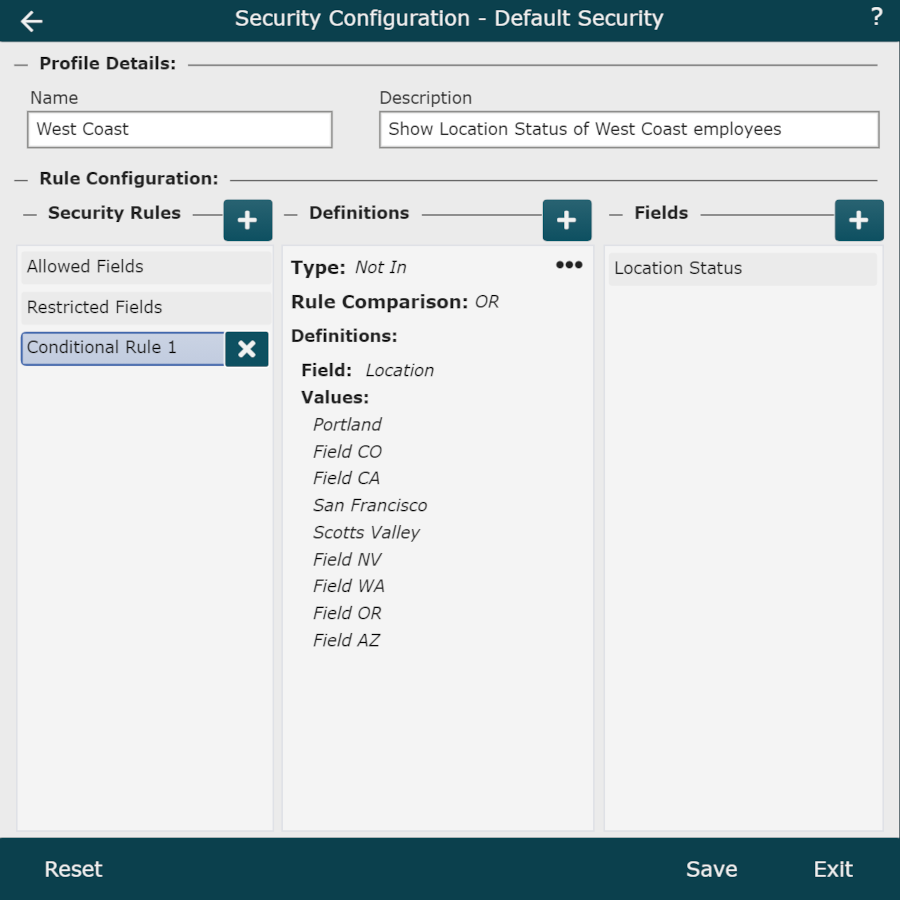
Click Save.
Assign this BLS profile to an Access Group. Reference the Branch Level Security article for instructions on how to assign a BLS profile to an Access Group.
Testing Permissions
Administrators can login as users with different levels of access to test permissions. Reference the Admin User Impersonation article for more information.
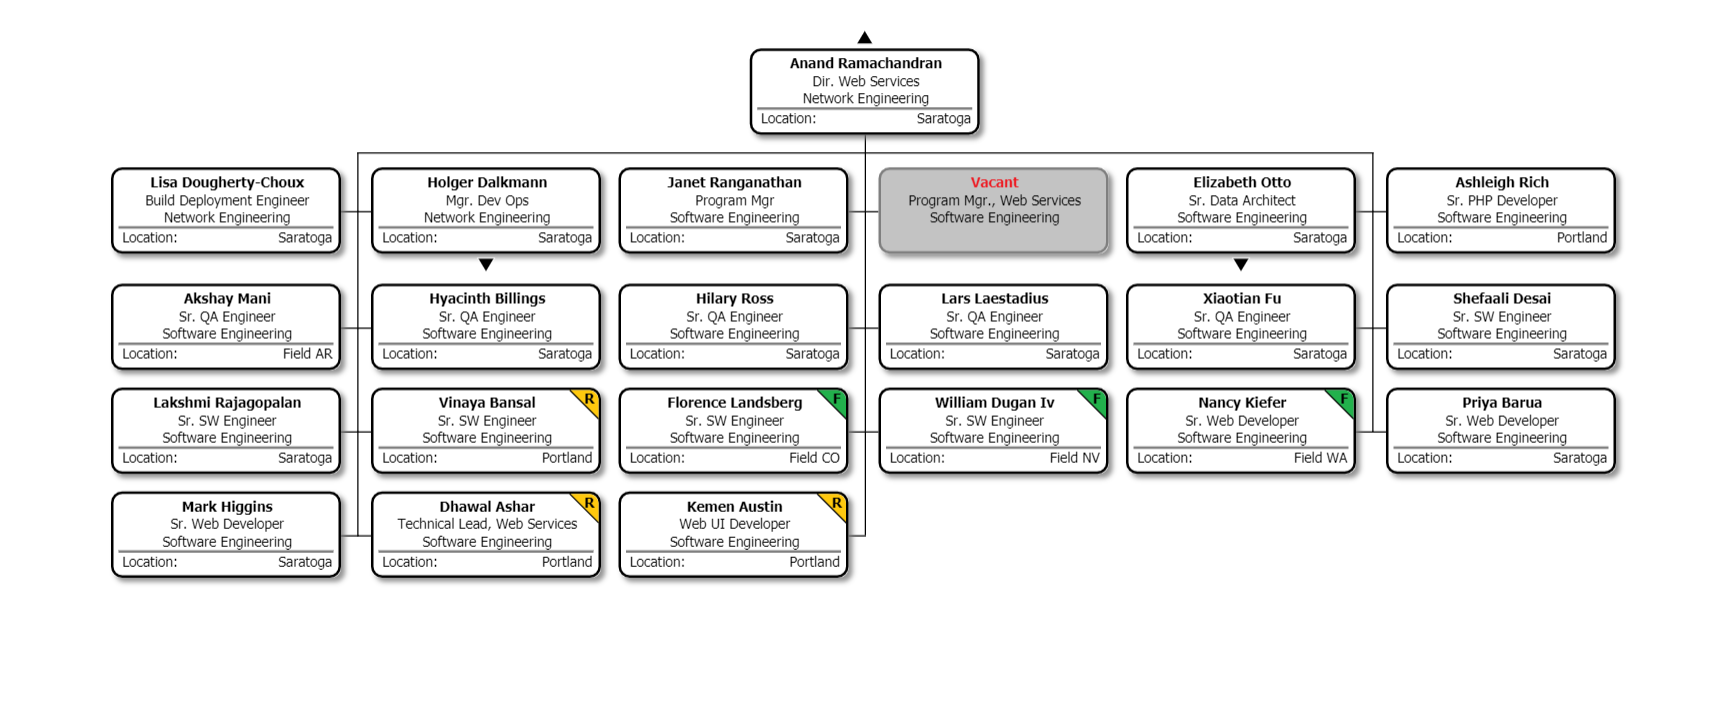
The following section tests the RLS profile configured above, which states employee records with a Location which is NOT IN the defined list do not display Location Status.
No Security Profile
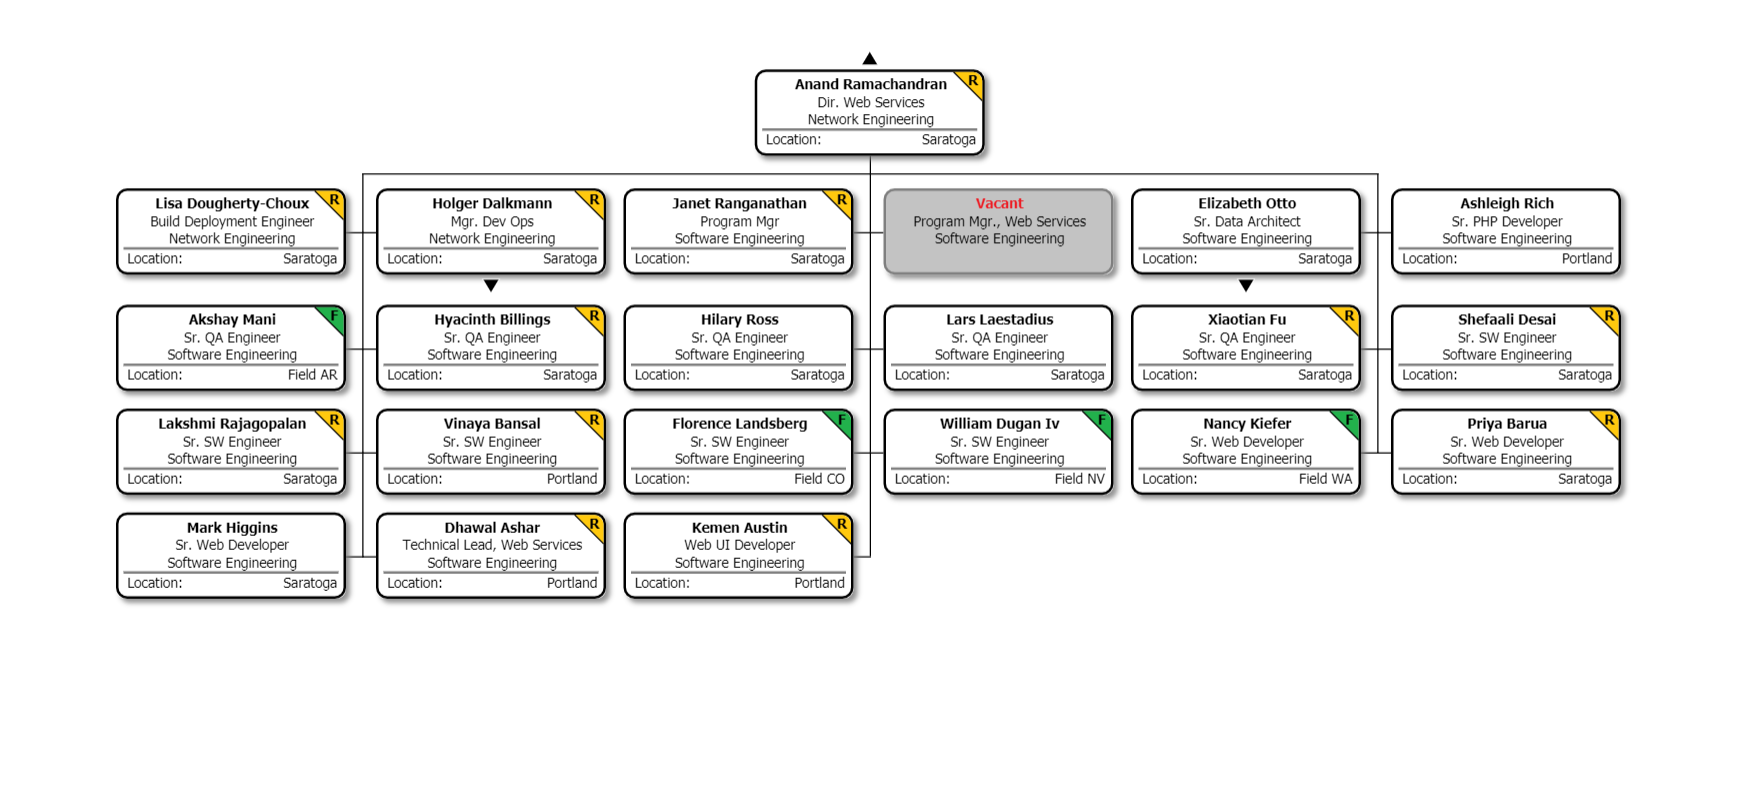
Security Profile Applied