- OrgChart Overview
- Quick Start Guides
- Top Toolbar
- Viewer
- Directory
- Planning
- Point in Time
- Workbench
- View Manager
- Chart Settings
- Account Settings
- Connectors
- Append Data Connectors
- Merge Data Connectors
- Active Directory
- ADP
- ADP Recruitment
- Append Table
- Azure AD
- BambooHR
- Breathe HR
- ClearCompany
- Cornerstone
- CSV
- Dayforce
- Excel
- Greenhouse
- iCIMS
- Jobvite
- Lever
- Namely
- Oracle
- OrangeHRM
- Paychex
- Paycom
- Paycor
- Paylocity
- PaySpace
- PeopleHR
- Sage
- Salesforce
- SFTP Pull
- Signify
- Subscribe HR
- SuccessFactors
- TriNet
- UKG
- UKG Pro
- Unicorn HRO
- Workday
- Append Data Connectors
- Topics
- Admin User Impersonations
- Automatically Export to SharePoint
- Auto-Assignment Example
- Auxiliary Reporting
- Co-Head Example
- Creating a Master Chart
- Creating a Master Page
- Creating Shortcuts
- Flat File Prep
- Formulas
- Functional Charts
- Import Filters
- Index Page
- Inverted Charts
- Level Charts
- Multi-Chart Documents
- Pie Chart Example
- Point-in-Time Charts
- Restricted Link Setup
- Security Profiles
- SSO Configuration
- Working with Photos
- Release Notes
- Troubleshooting
- Legal
- Contact Us
Azure AD Photo Configuration
Audience
Audience: Administrators
Overview
OrgChart Now allows customers to import photos directly from their Azure AD instance. The following article provides step-by-step instructions for configuring your Azure AD photo import in OrgChart Now.
Note
Note: If you would like to import photos from Azure AD, but you are not using Azure AD as your Main Data Source, please contact OrgChart Now Supportfor assistance.
Importing Azure AD Photos
Log in to OrgChart.
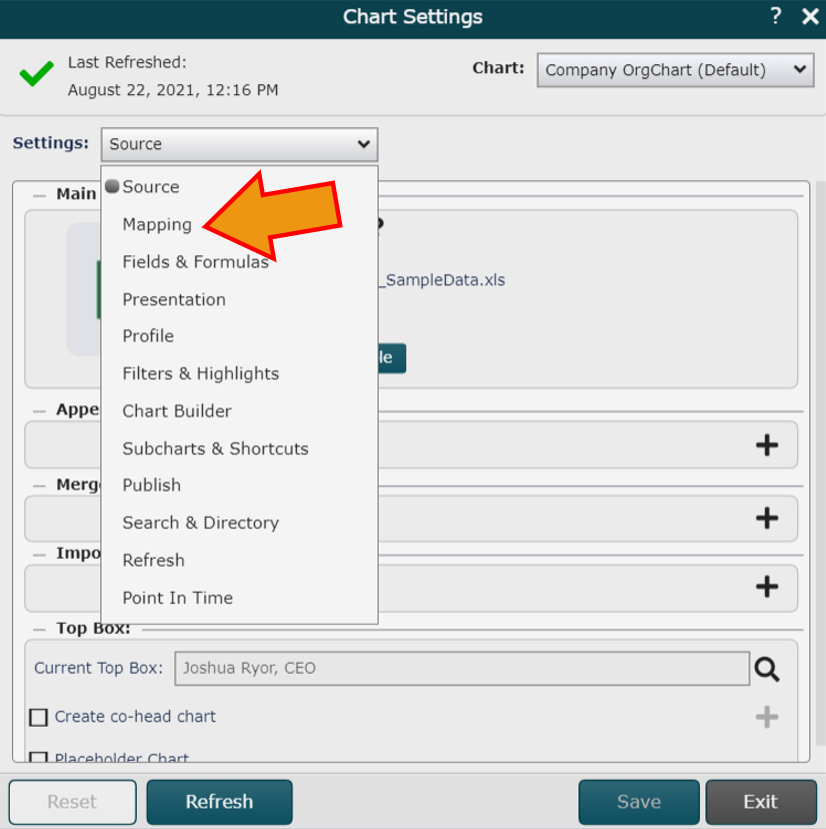
Click More > Chart Settings.
Click on the Settings drop down menu, and then select the Mapping option.
Scroll down to the Azure AD Photo Configuration section, and then check the Configure AzureAD Photos check box.
Enter your Azure AD Subdomain, Client ID, and Client Secret in the corresponding text boxes.
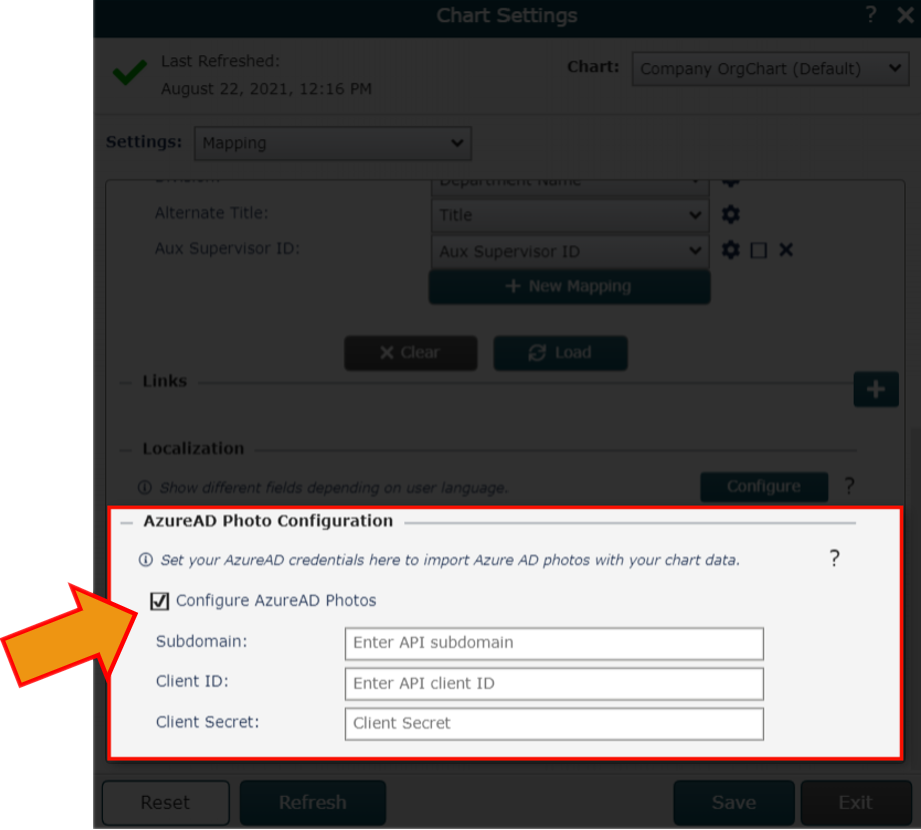
Click Save.
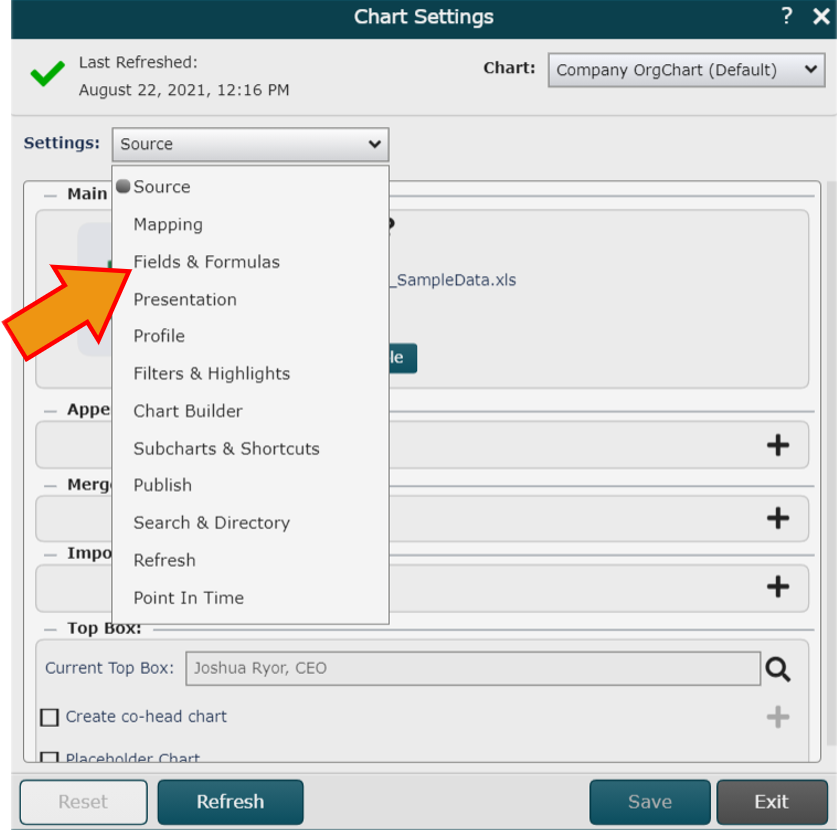
Click the Settings drop down menu, and then select the Fields & Formulas option.
Click on the New Formula button. The Formula Editor is displayed.
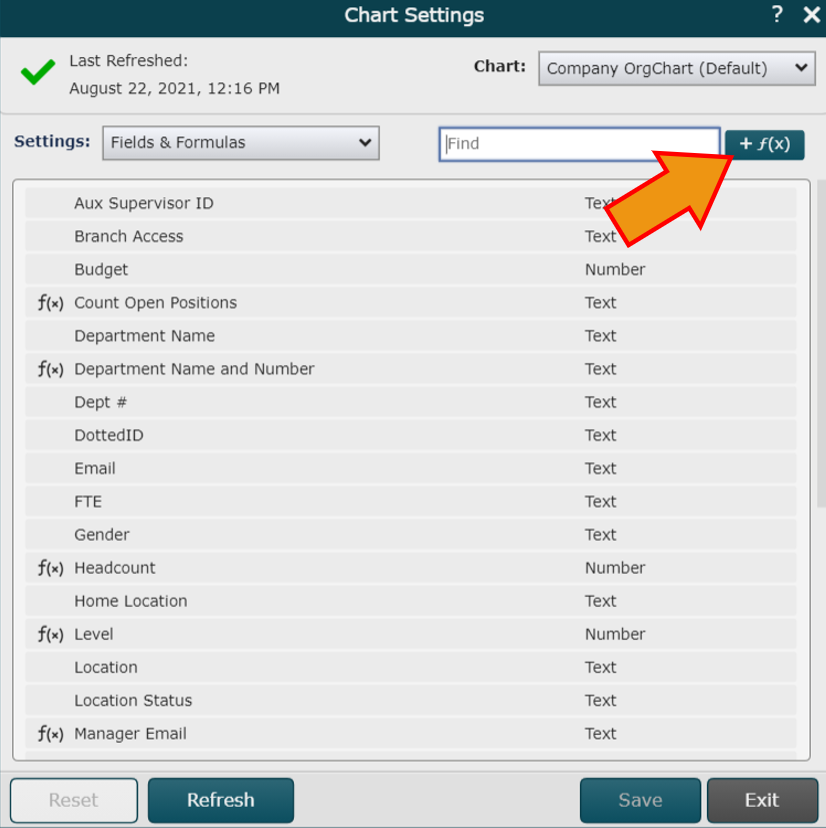
Enter a name for the formula (i.e. Azure Photo) for the new formula.
Click on the No values. Click here to add hyperlink, and then select the Concatenate option from the dropdown.

Enter /o365/ in the Value text box.
Click on the Add Value button.
Click on the Type dropdown menu, and then select the Field Lookup option.
Click on the Value dropdown menu, and then select the field used to name the Azure Photos (i.e. Email).
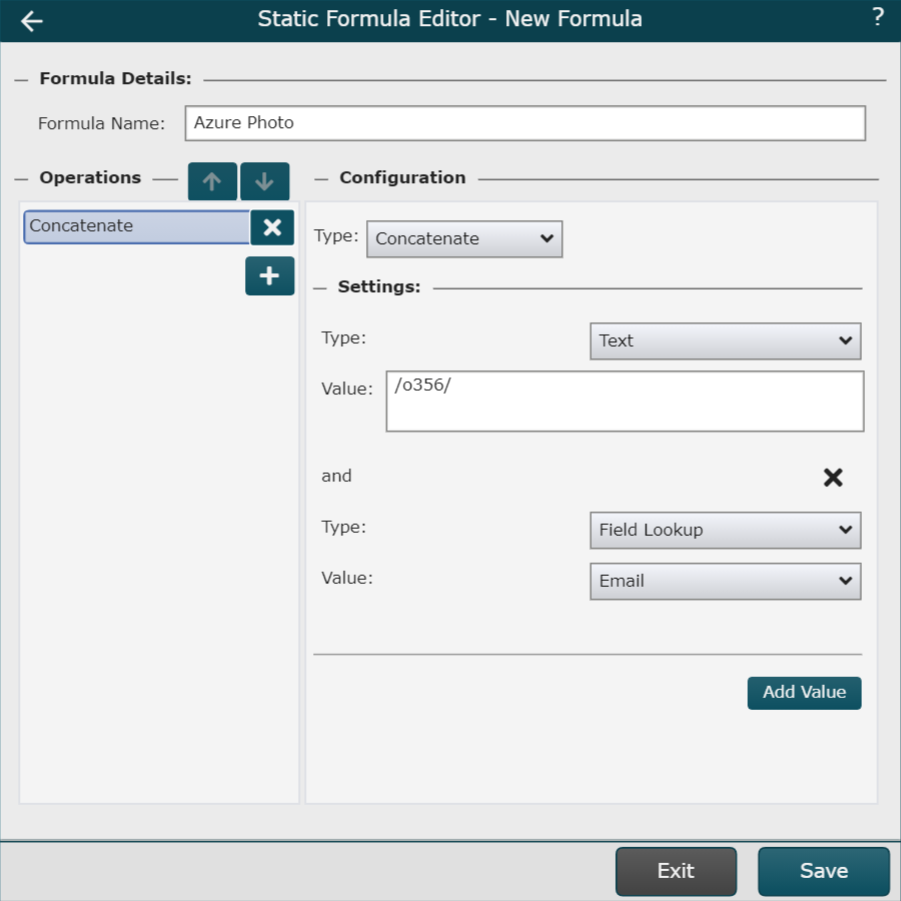
Click on Save. The formula is added to the Fields & Formulas panel.
Click on Save, and then Refresh.